Getting started with Arrowat Workforce
First of all you will need to create The Adminitrator account: When Arrowat Workforce start for first time use, Arrowat Workforce ask for an adminitrator account and you need to create it to have access and add data and other user account you want to add.
The following steps are required before using Arrowat Workforce, if you miss any step the app won't work correctly
-
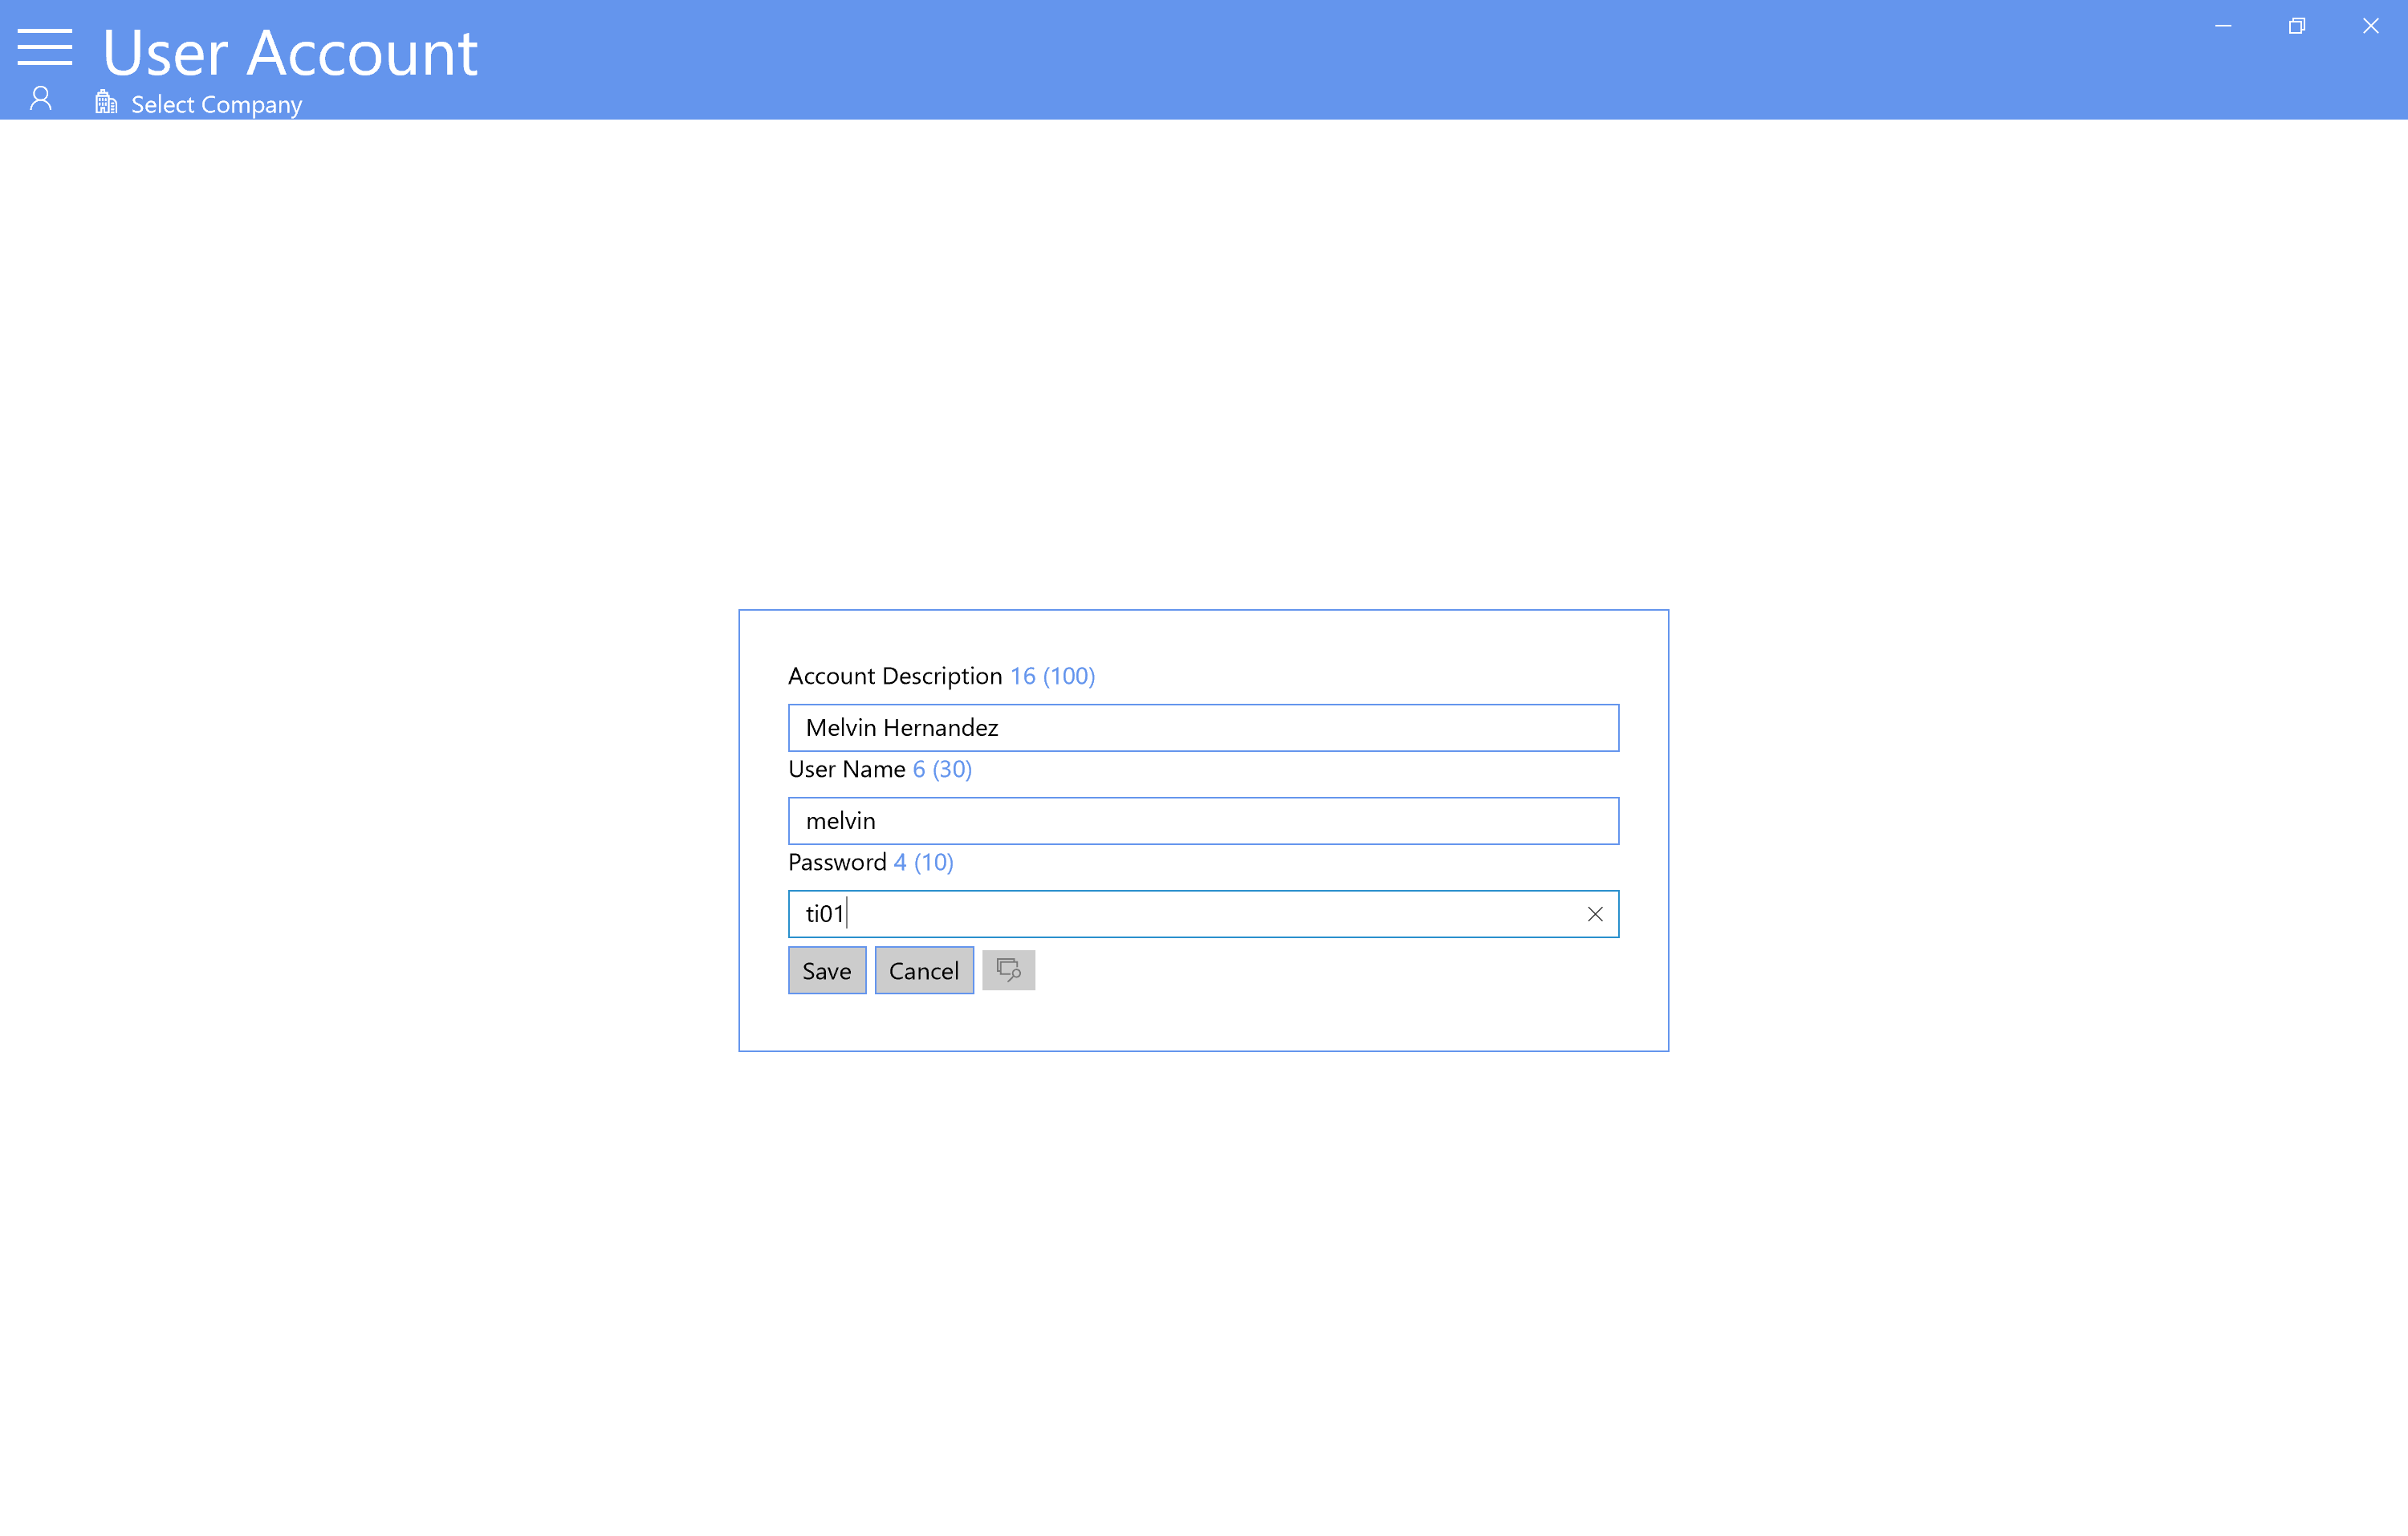
Create User Account
Tap Log in button

Add all required information.
Note:The first account that Arrowat Workforce ask to create is created as adminitrator account. You can't delete the account once it is created.-
Account Description
This can be the name of the user who will manage the app using this account.
-
User Name
The user name for the account, It does not accept sapces if you add a space it will be removed.
-
Password
The password for the account, you can change the password later if you want.
-
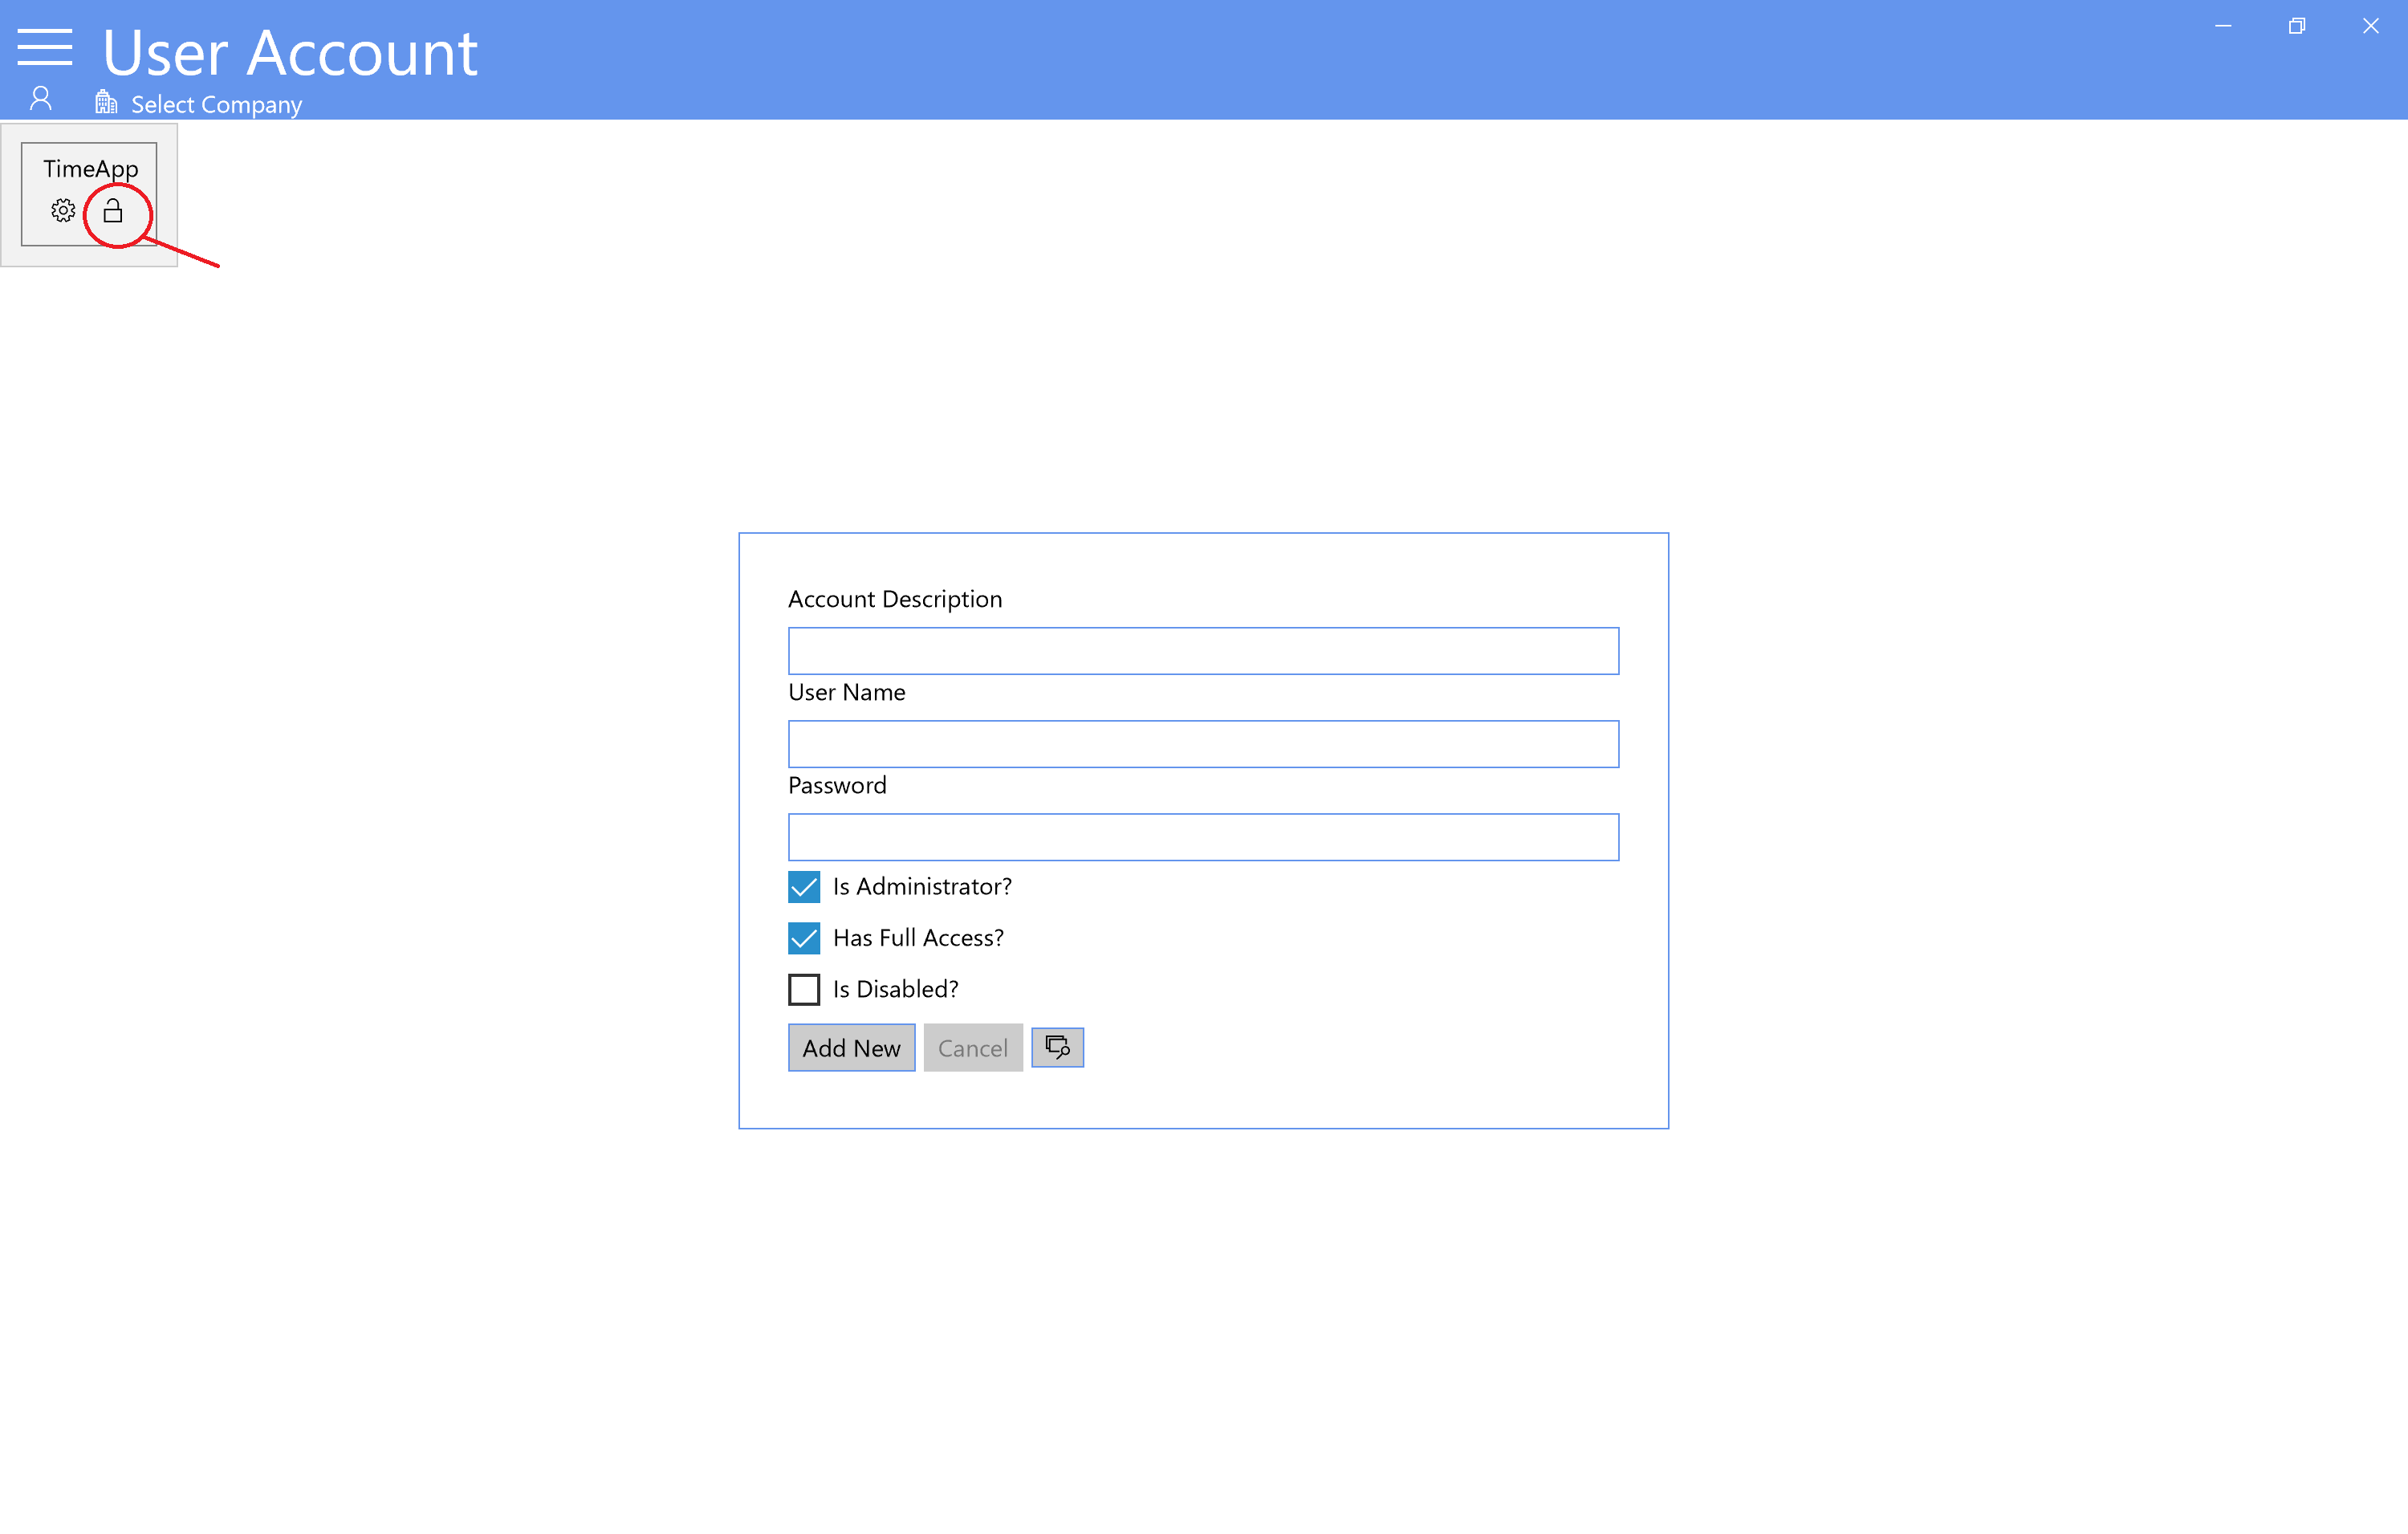
Is Administrator?
Check it if the account will be administrator. this account can restrict, disable others user accounts.
-
Has Full Access?
Check it if the account has full access, if you decide to give full access to this account, it can do what administrators do but cannot perform restricted areas like Add user account, Backup database, this areas are acessed using administrator accounts only.
-
Is Disabled?
Check it to restrict access to the account, the user who uses this account won't be able to log in.
-
-
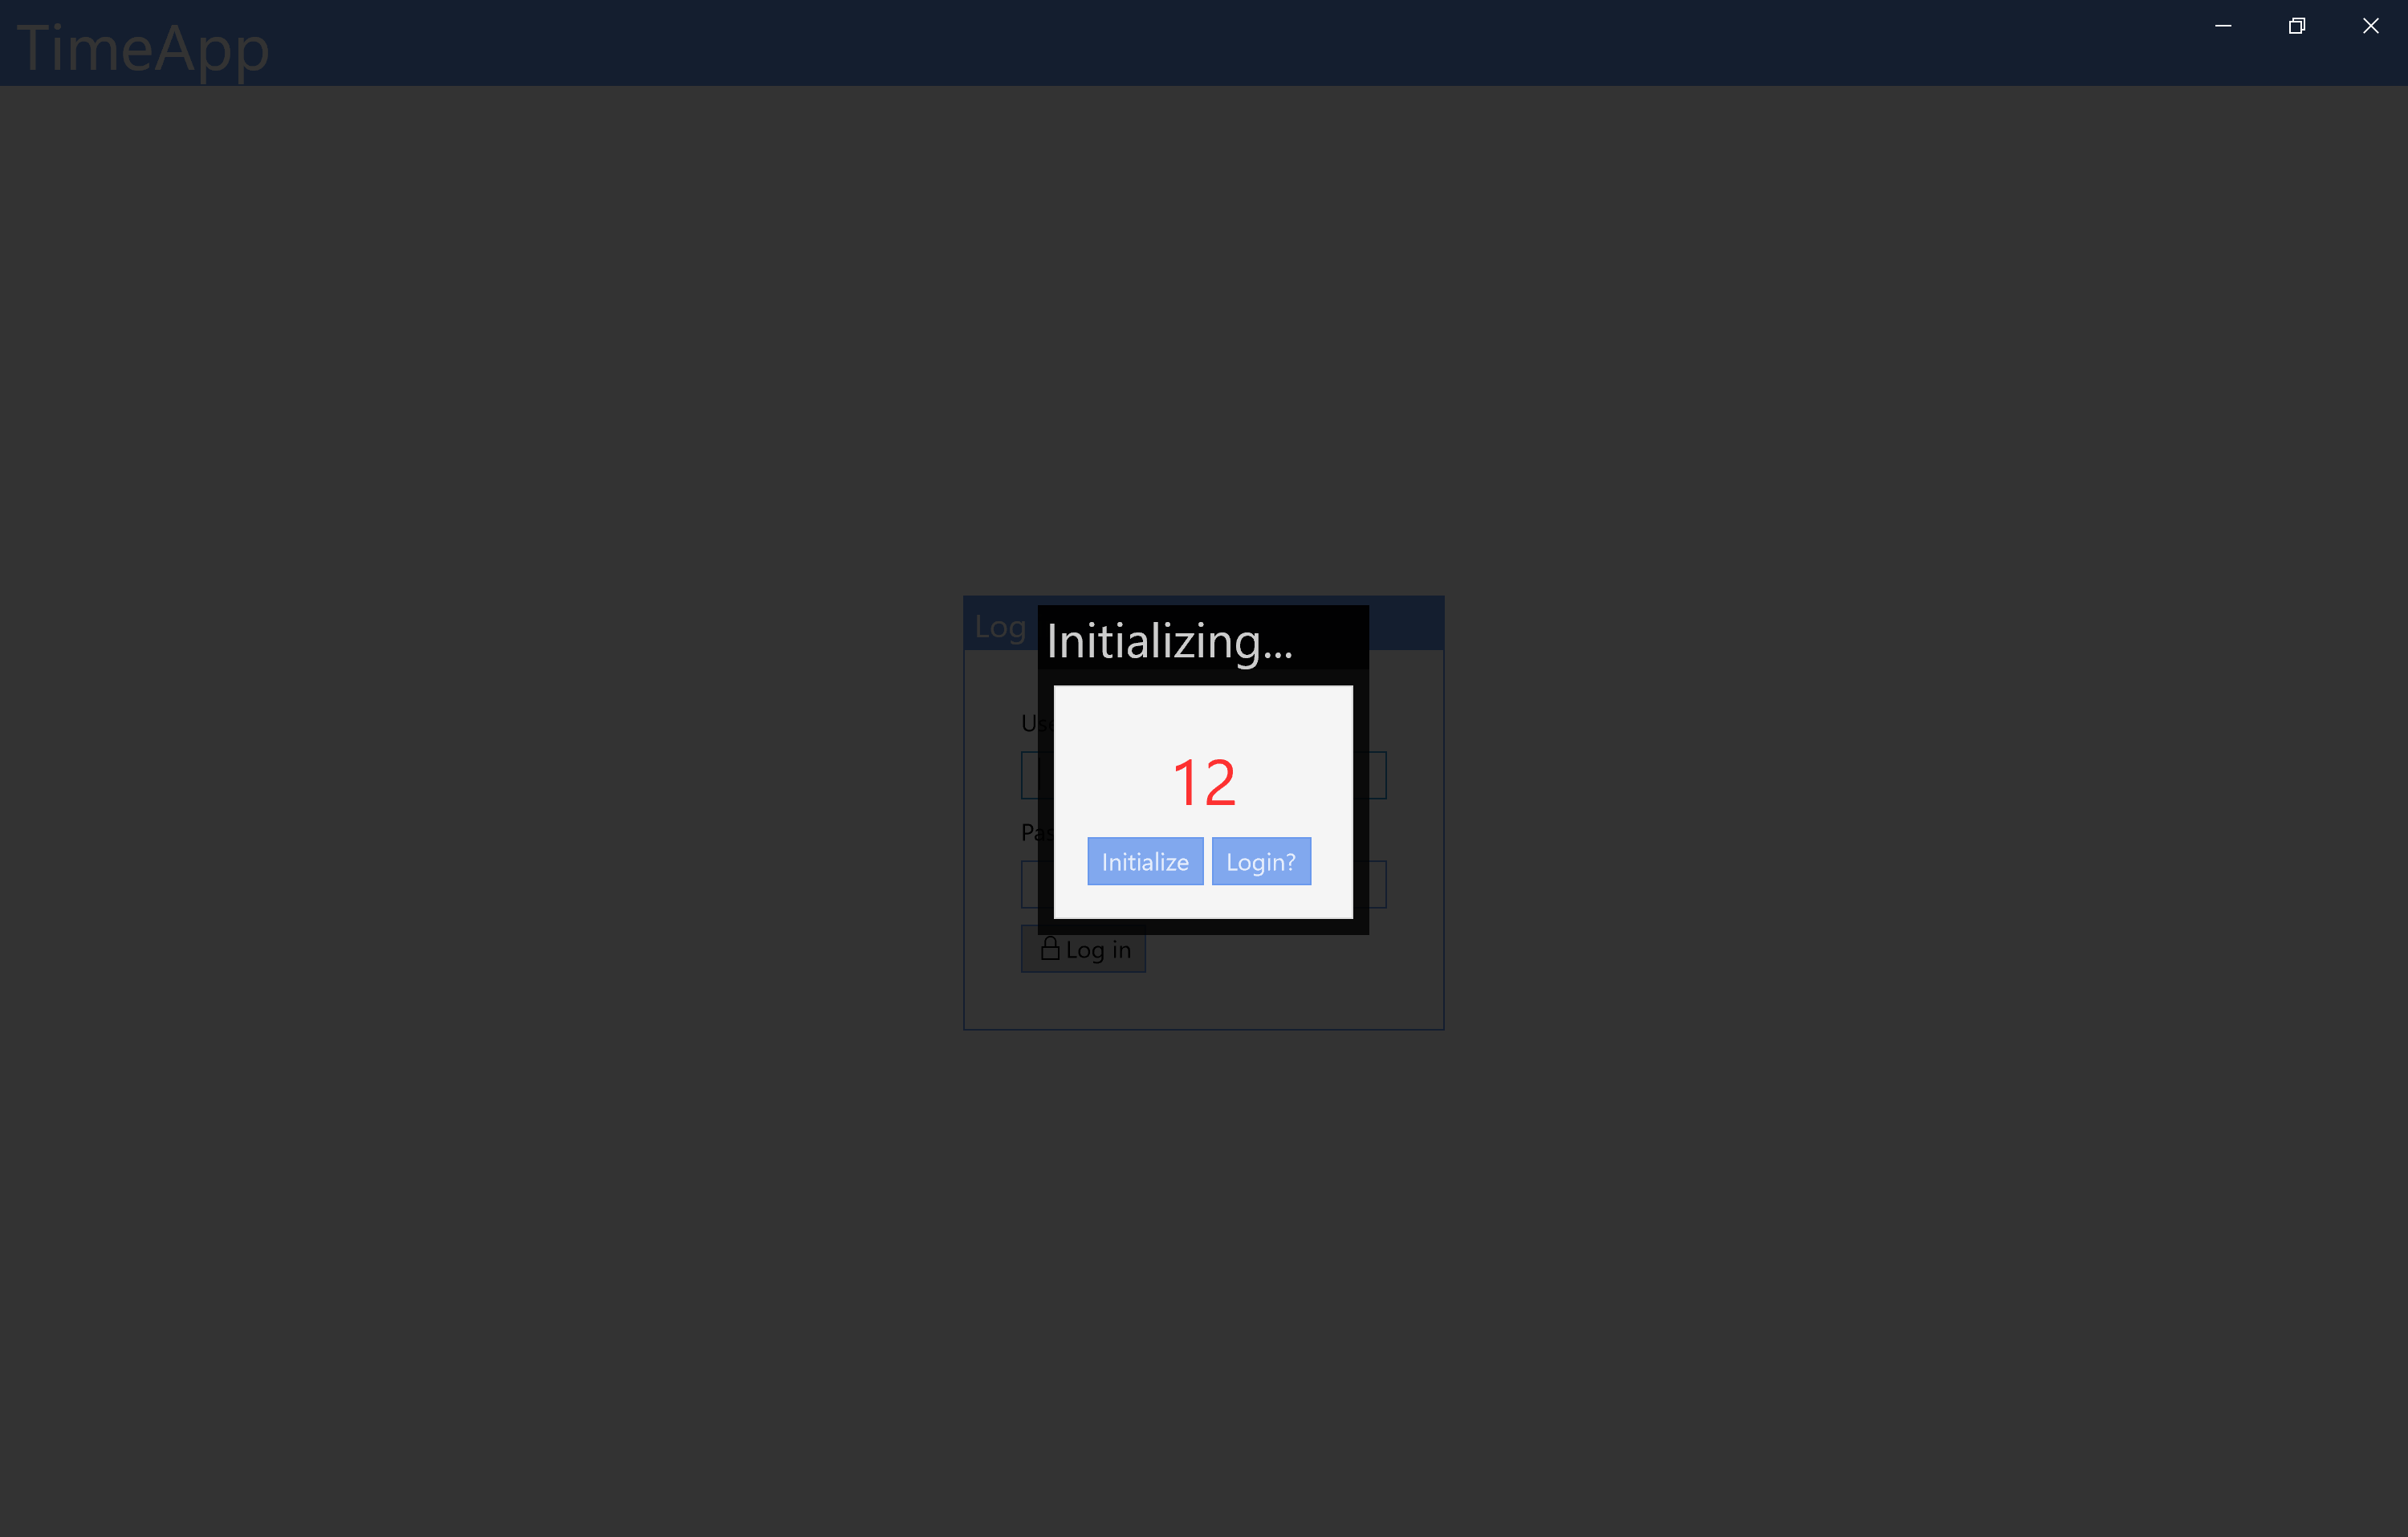
From Action Center tap Logout
-
Tap login button before the app initialize
-
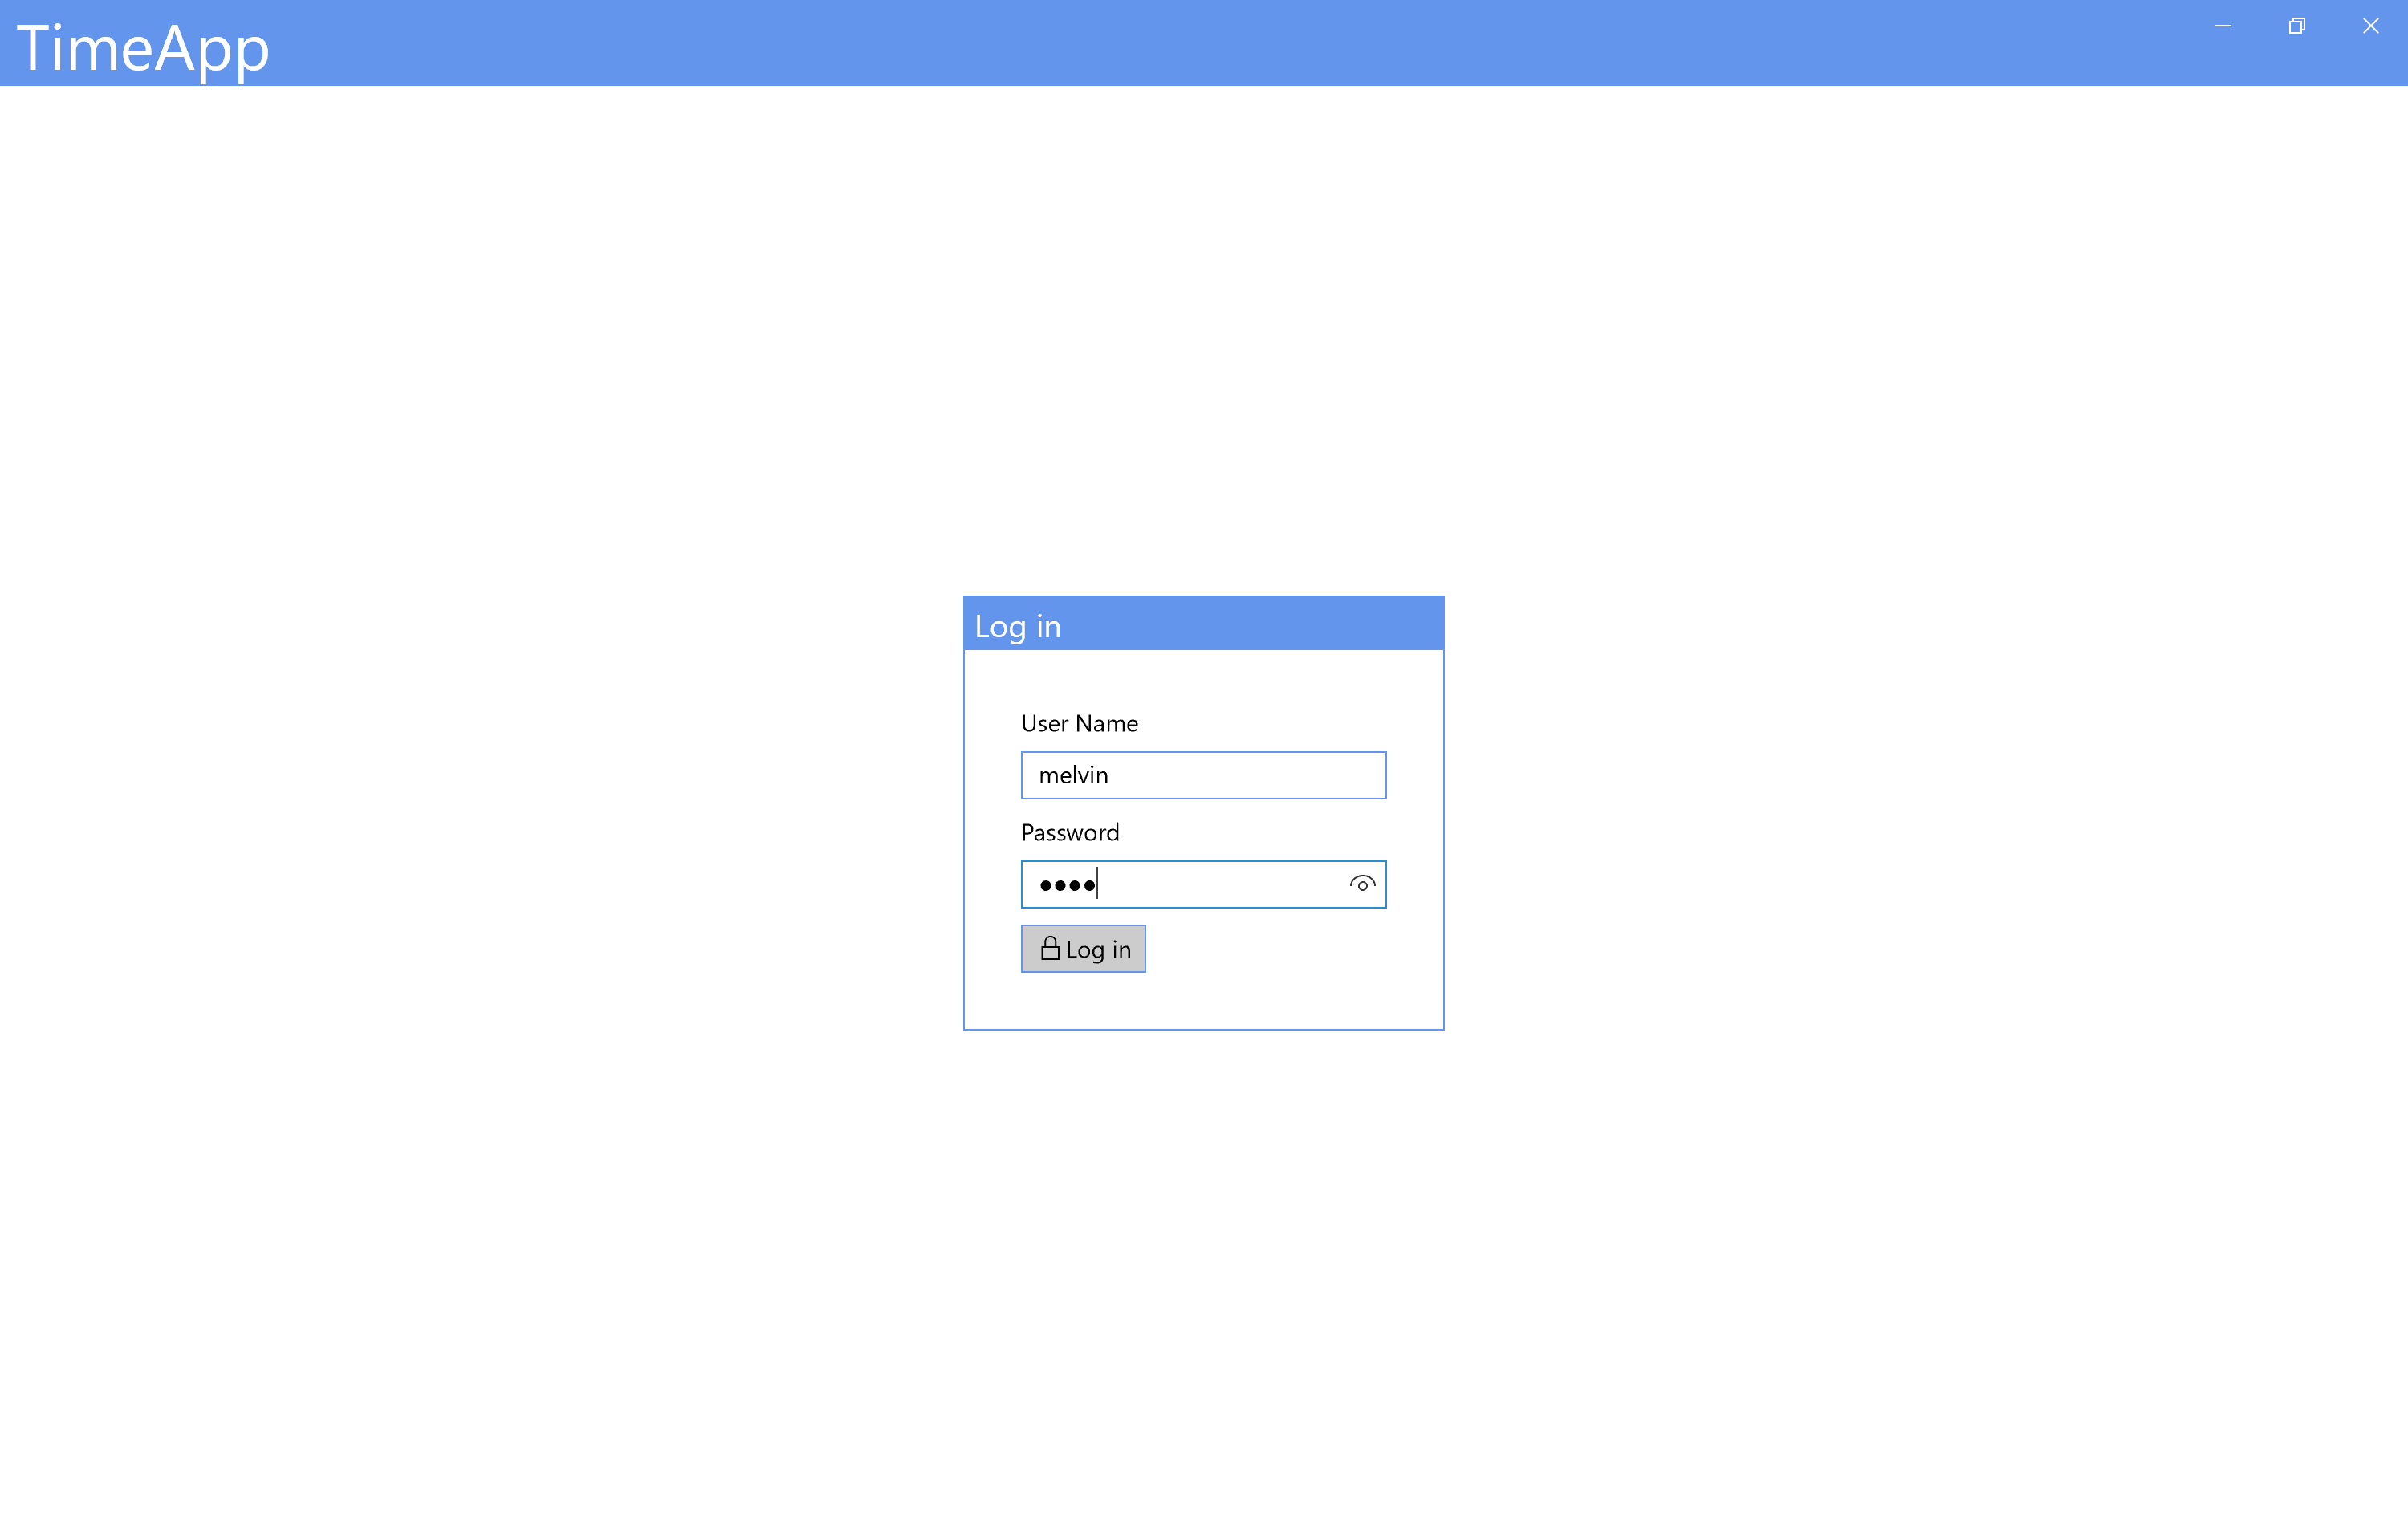
Login with the account created
-
From the Action Center Select Company
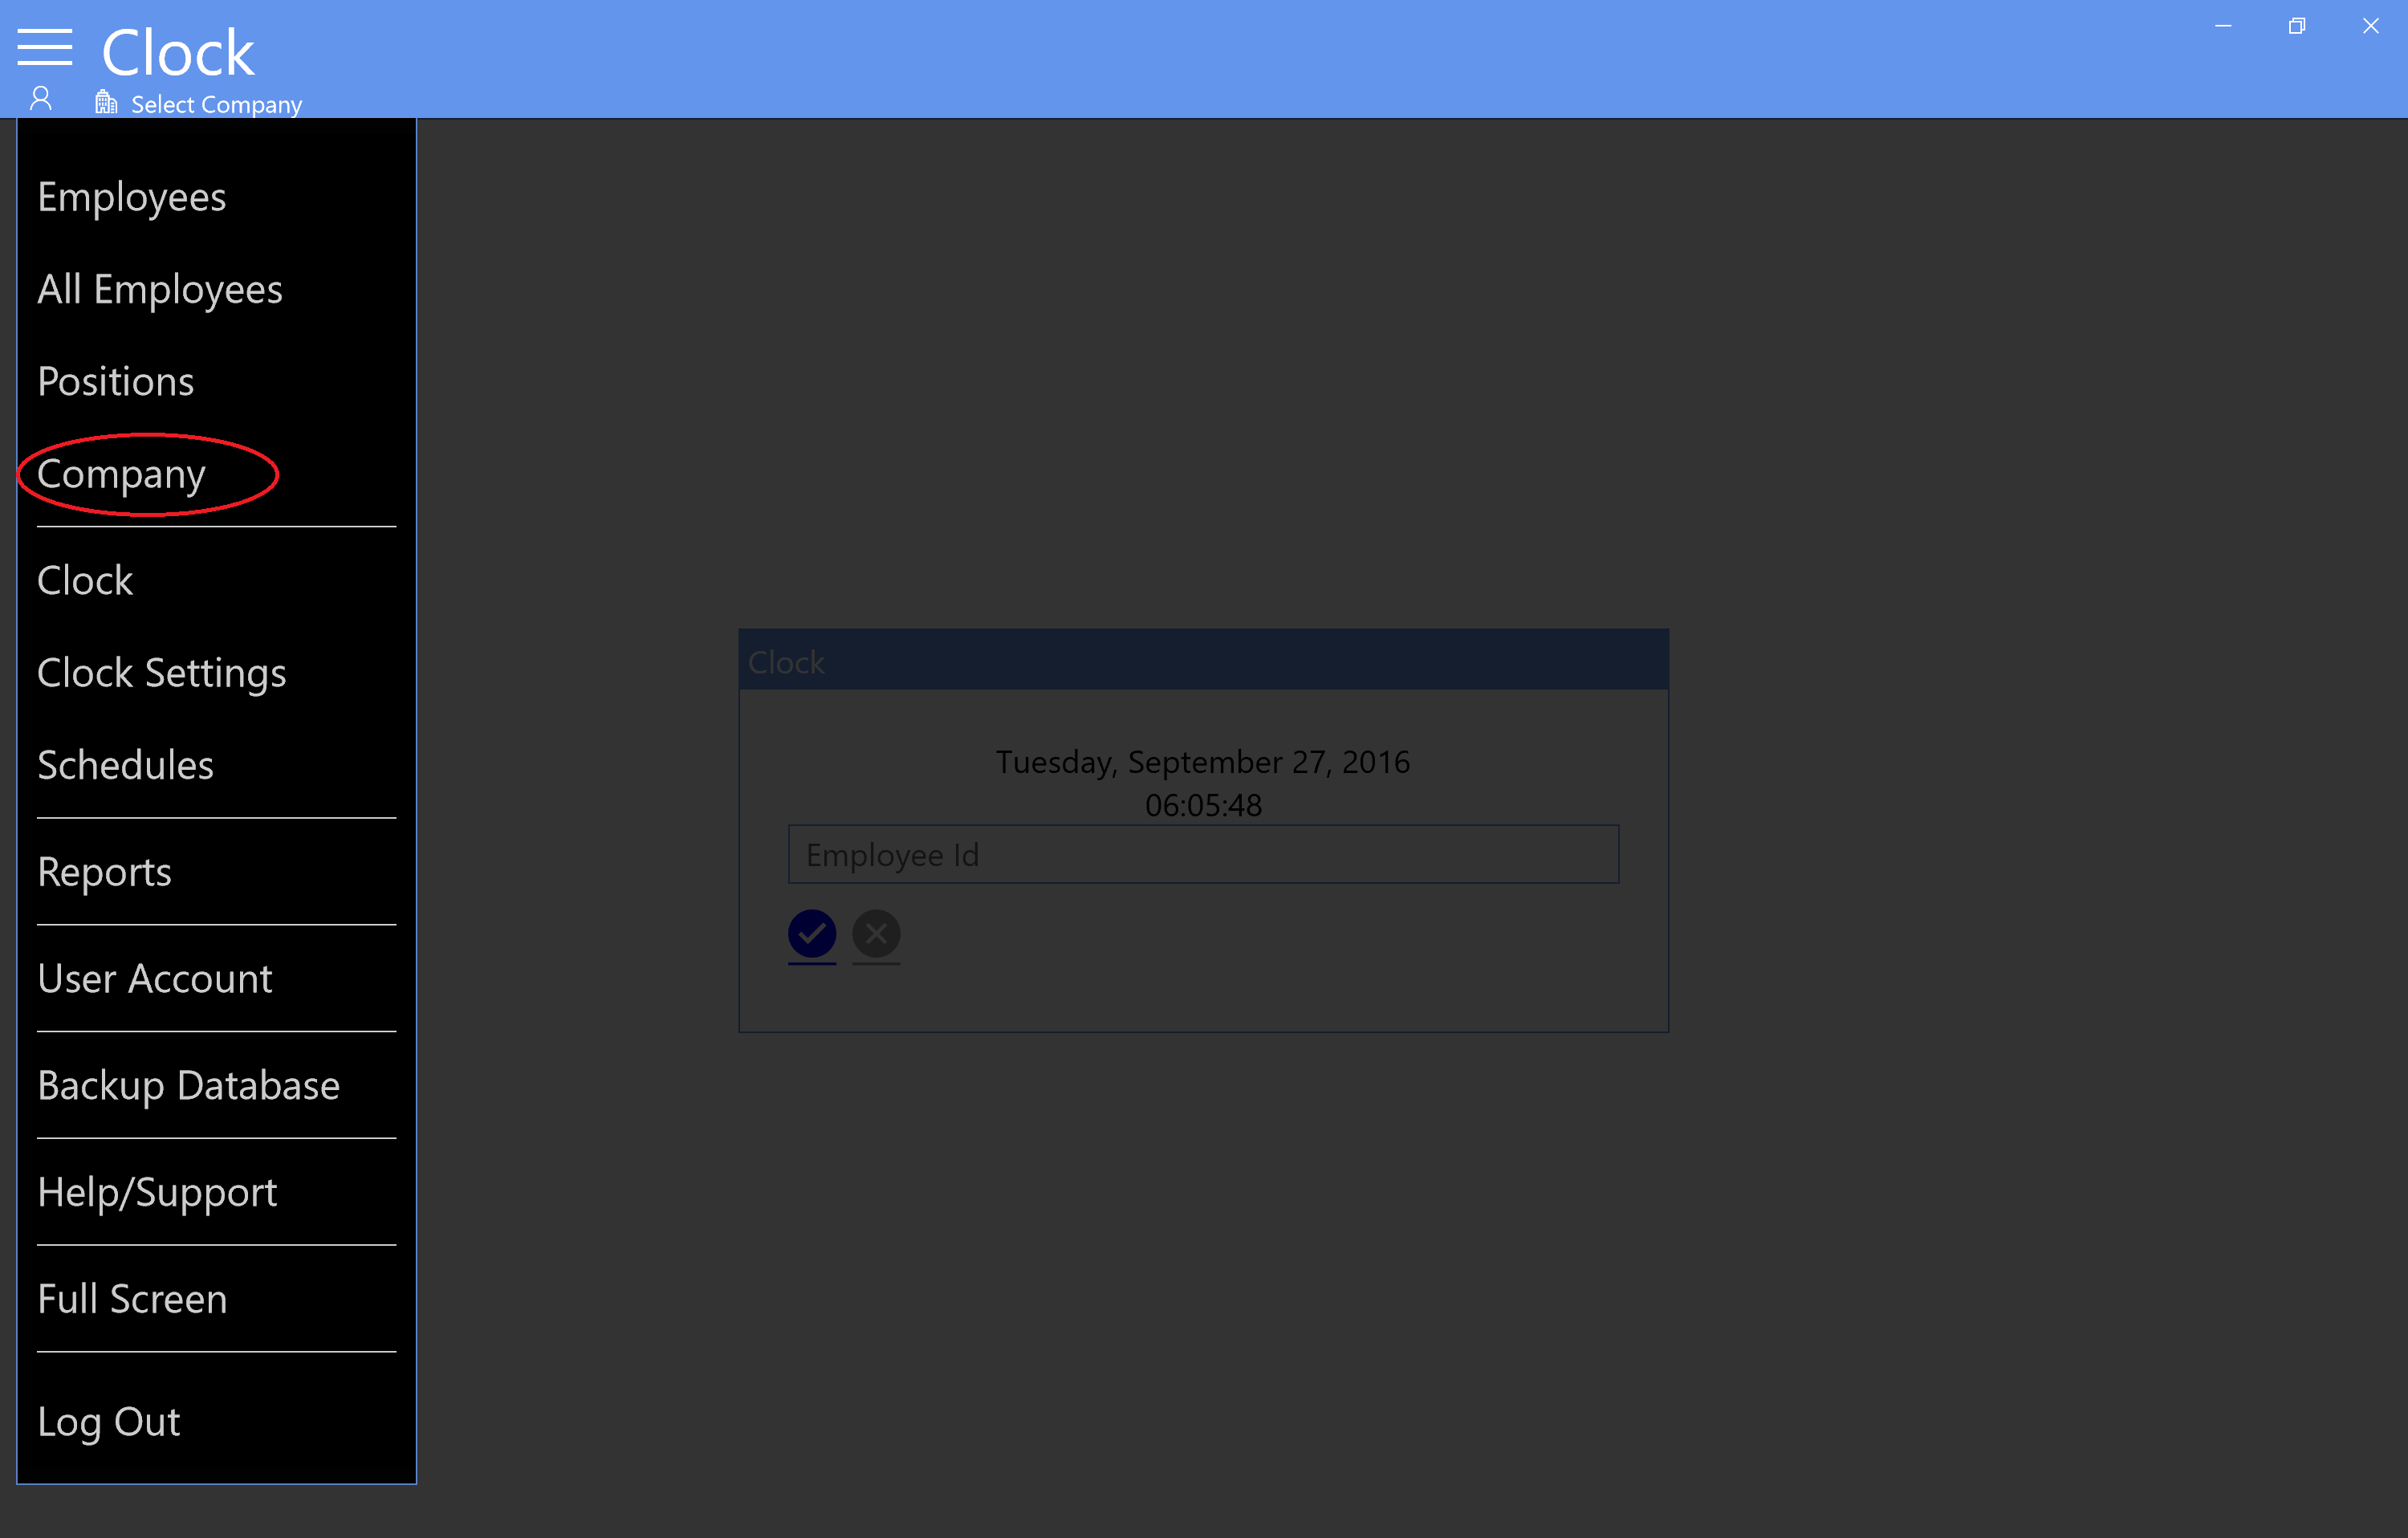
-
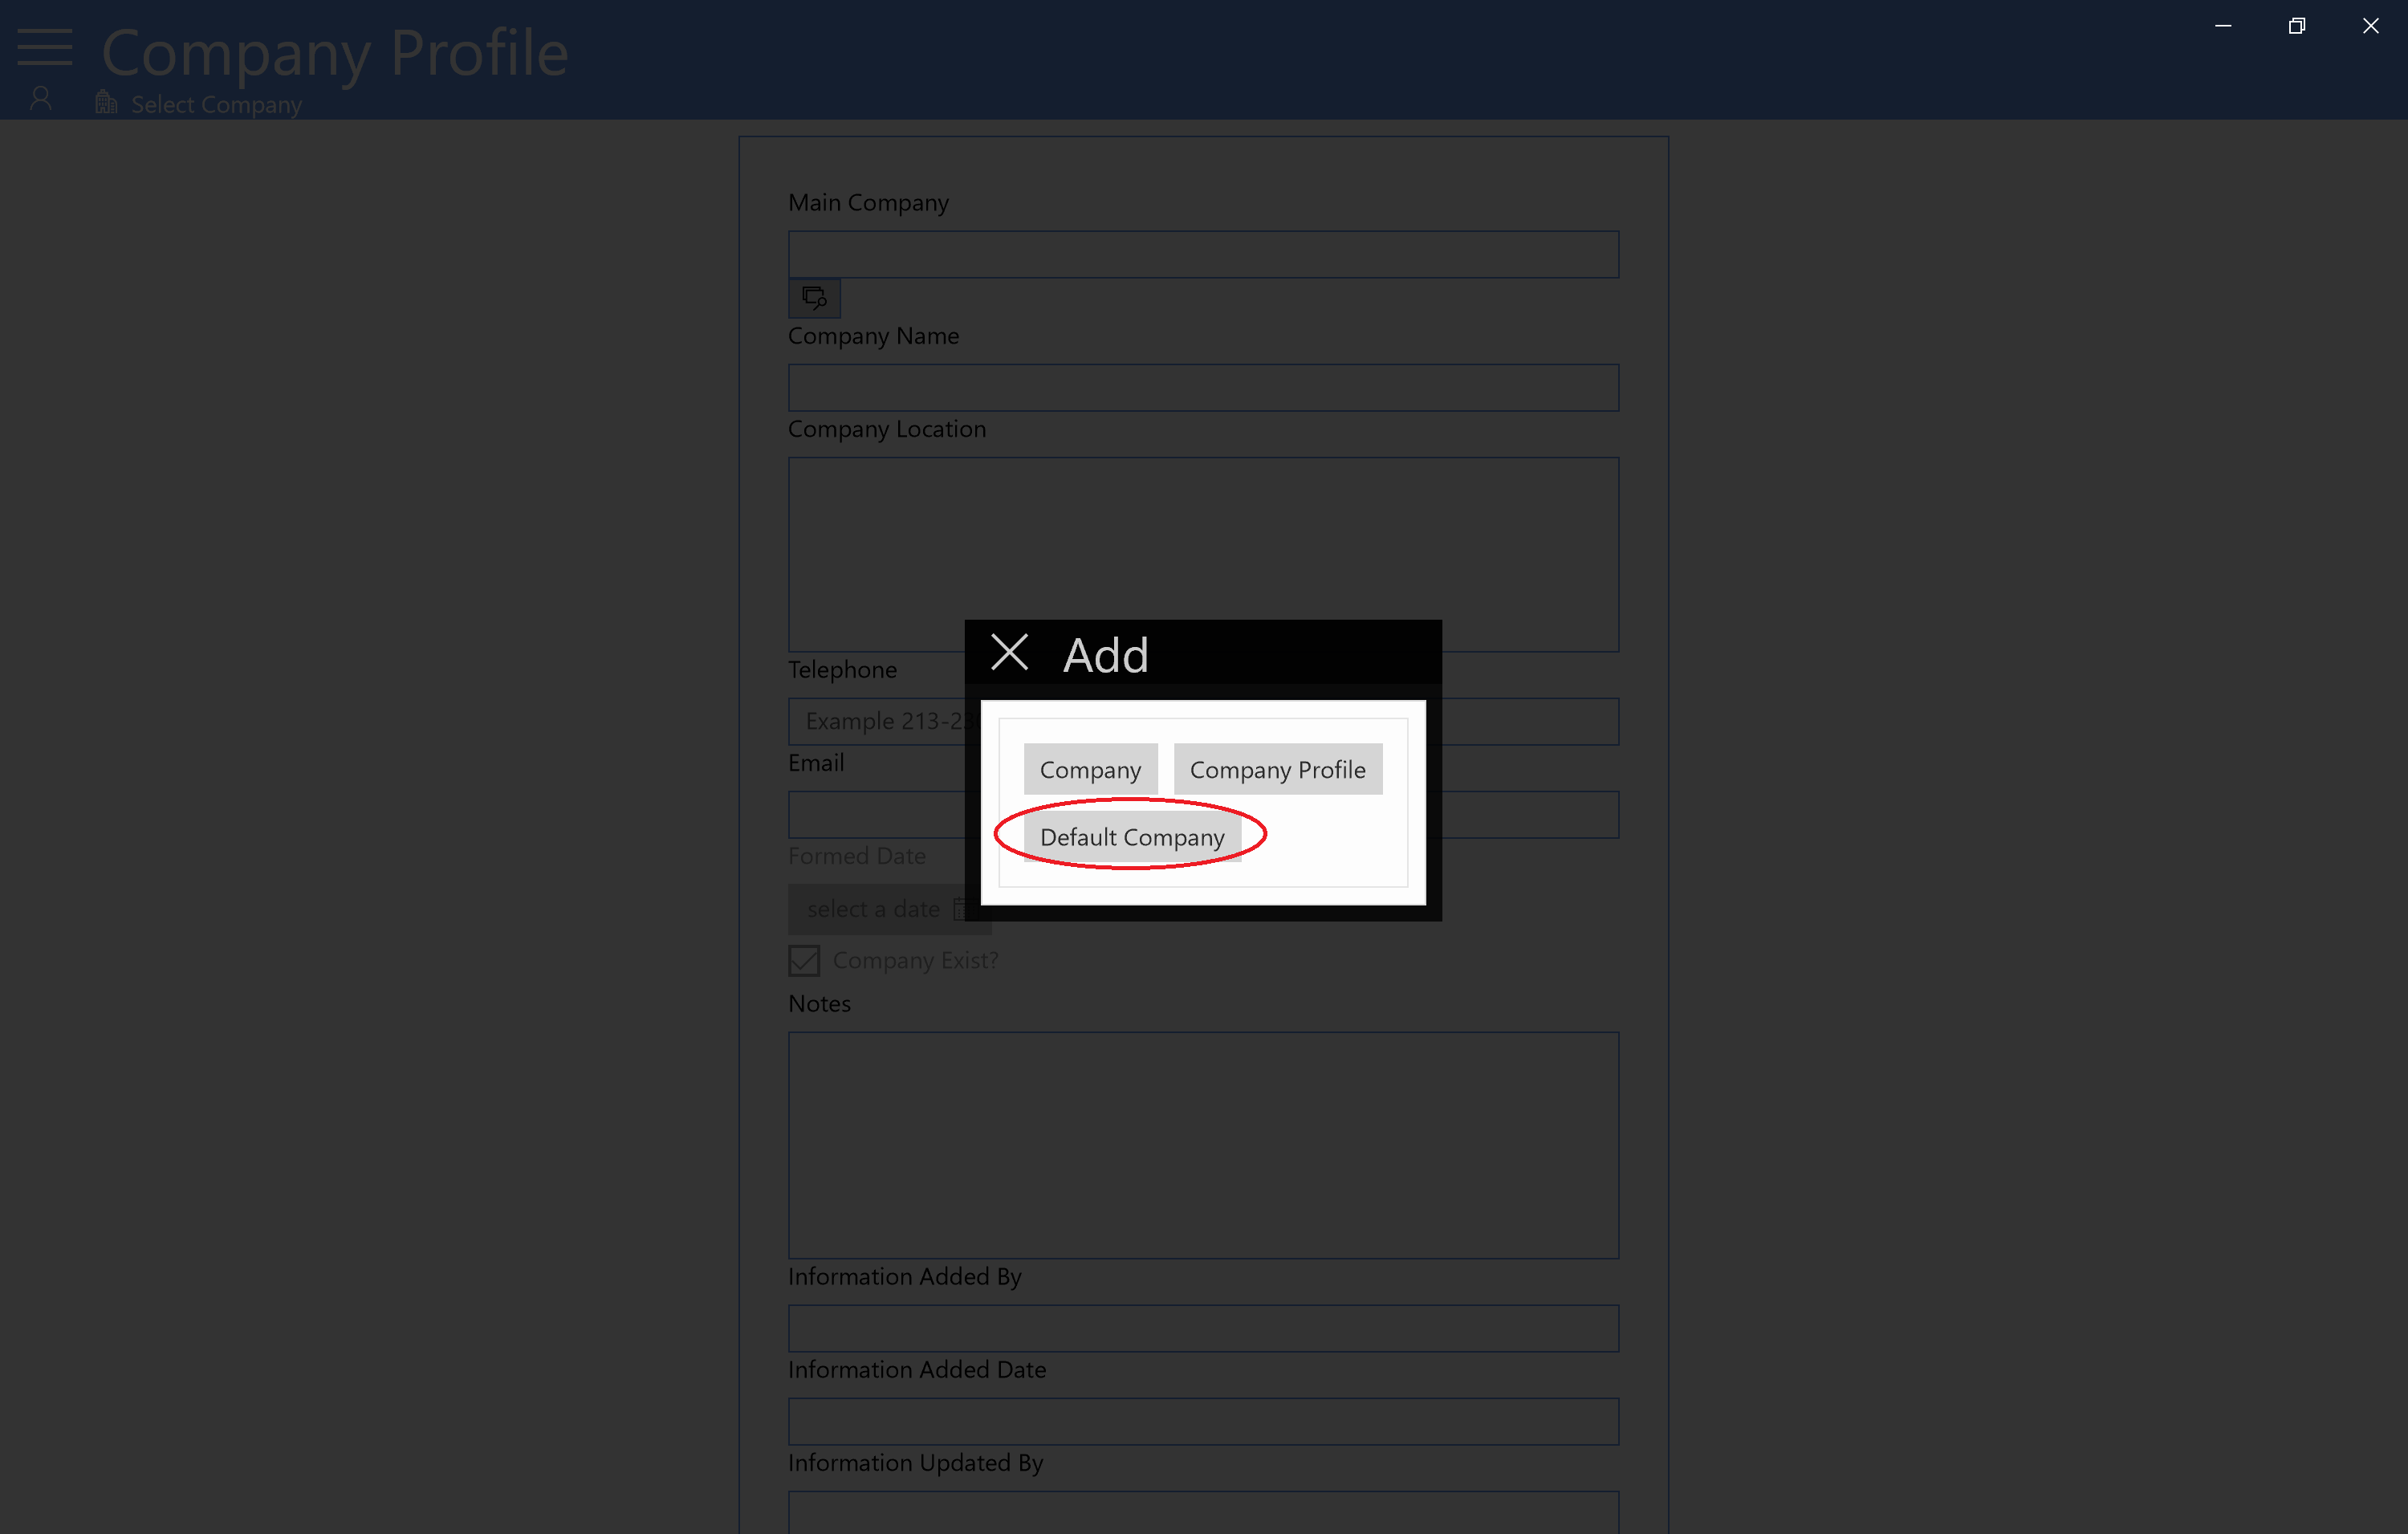
From the interactive Dialog that appear tap Company
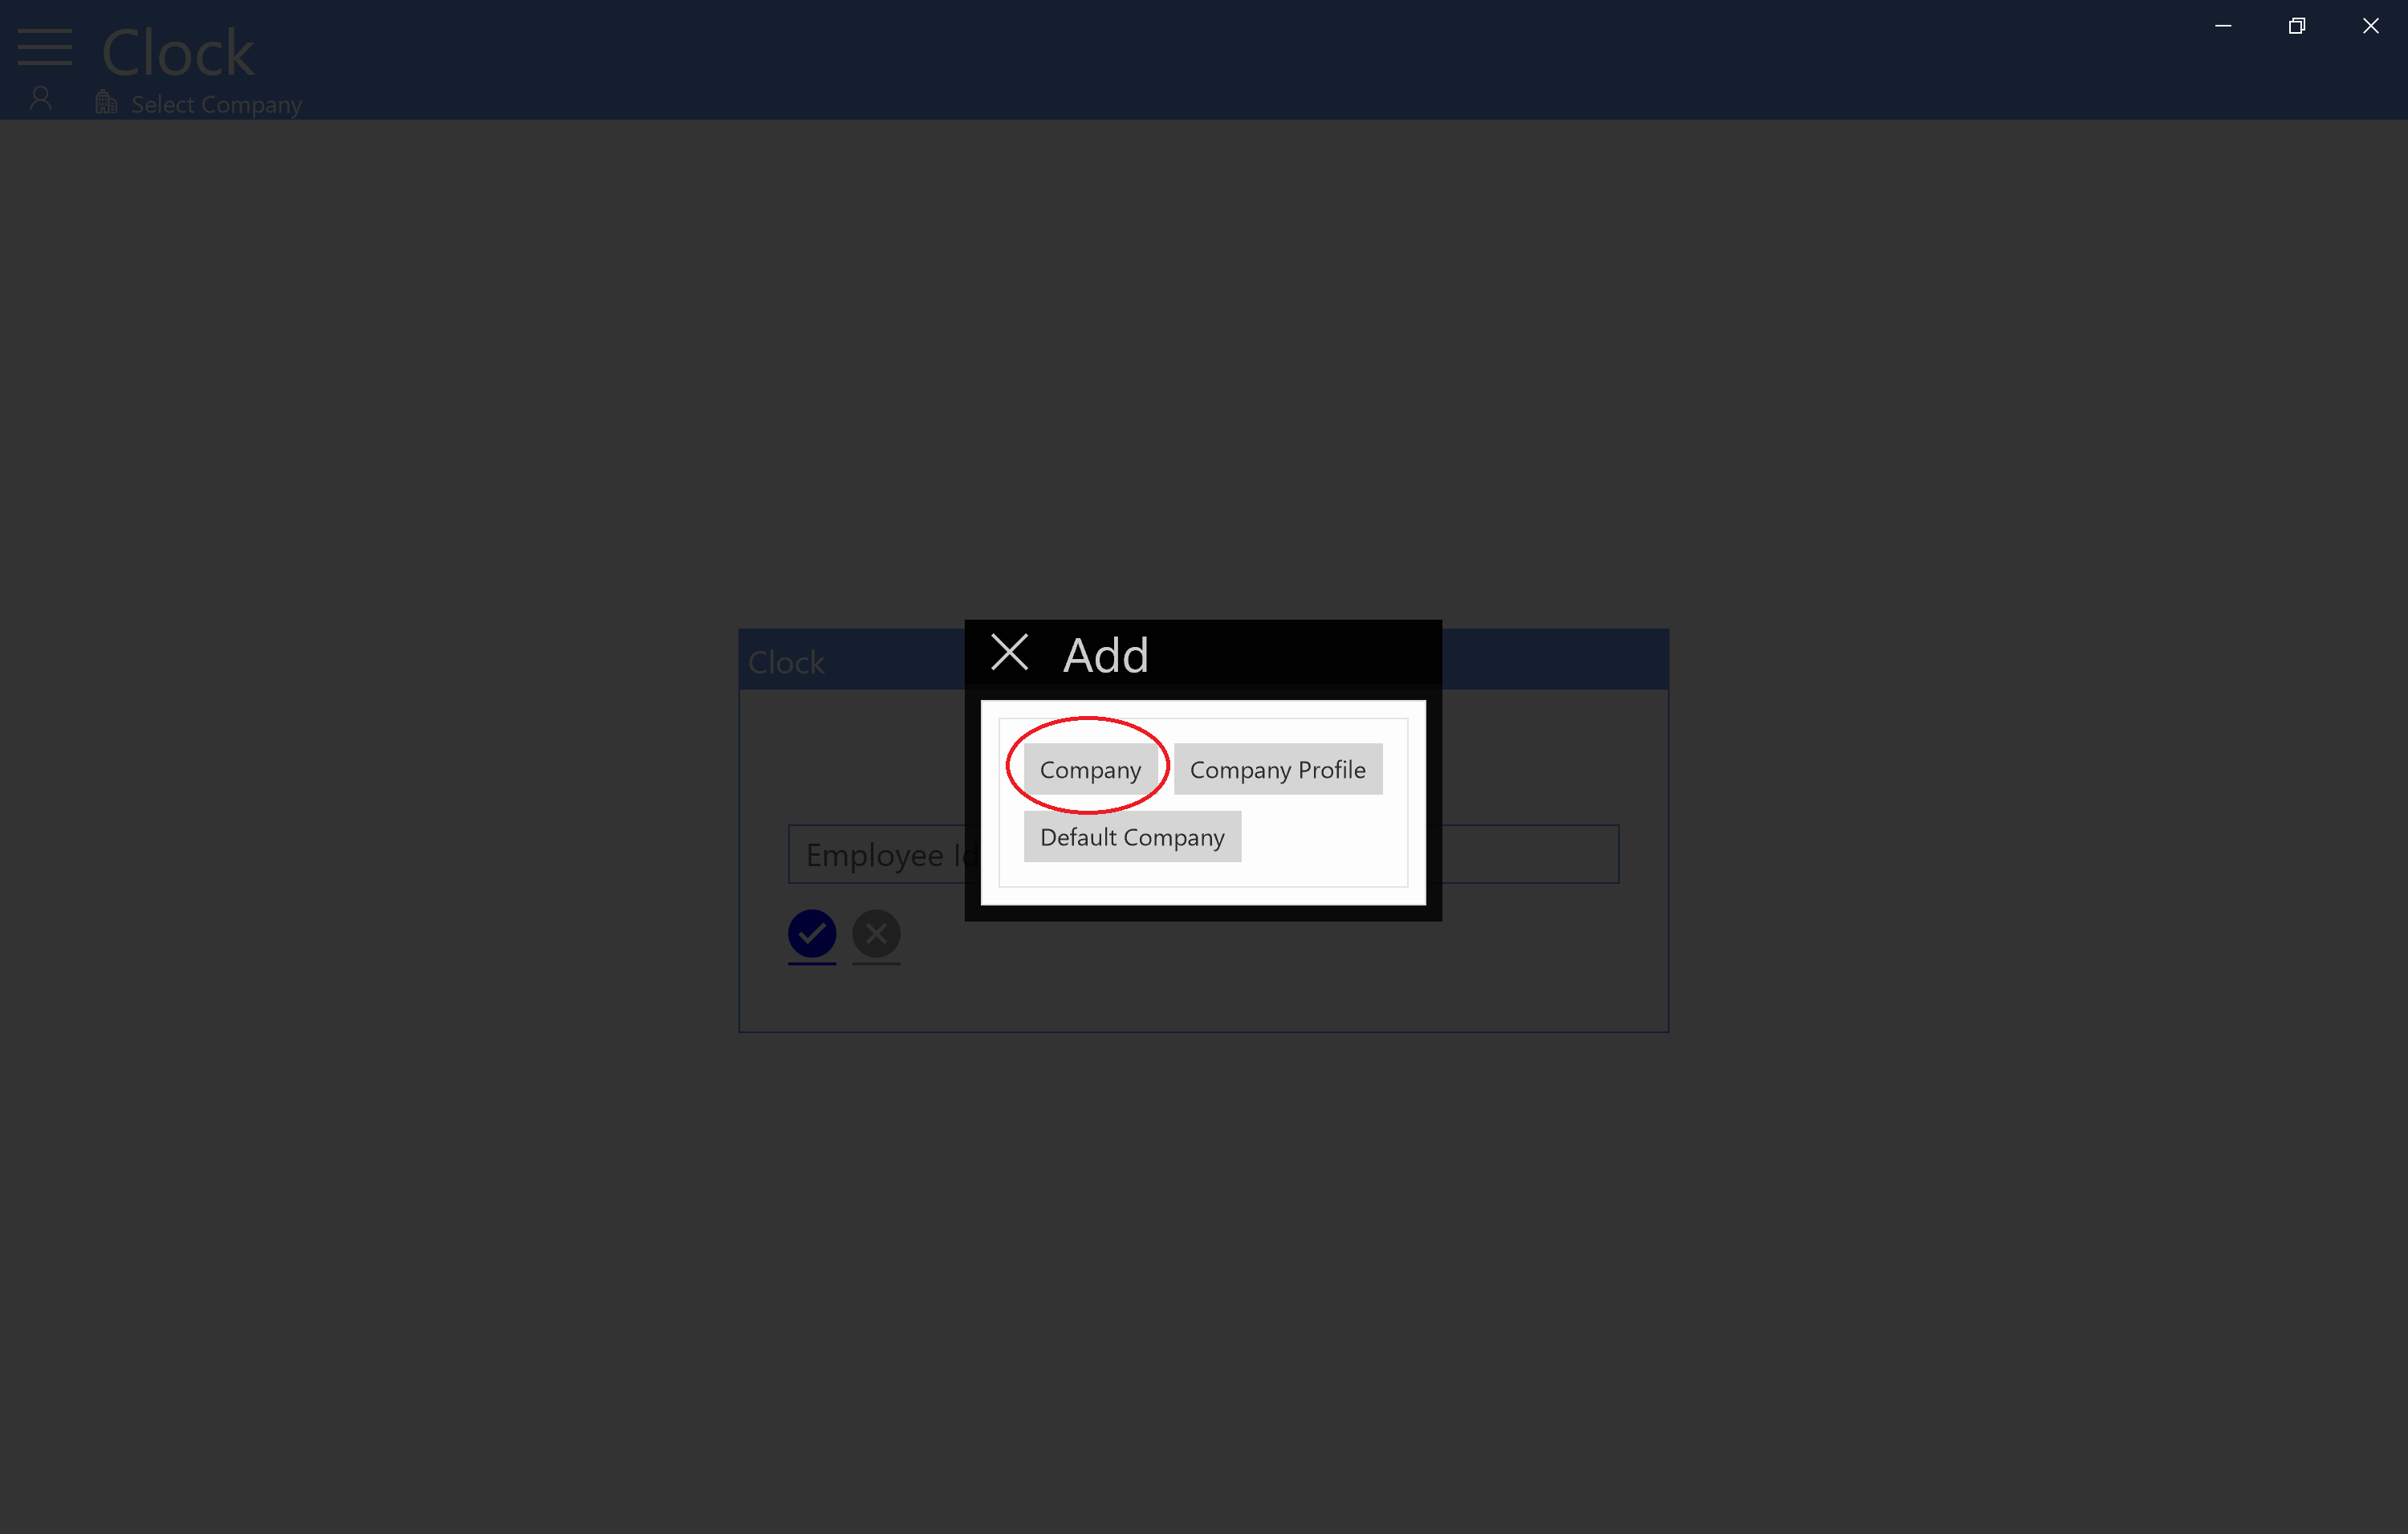
-
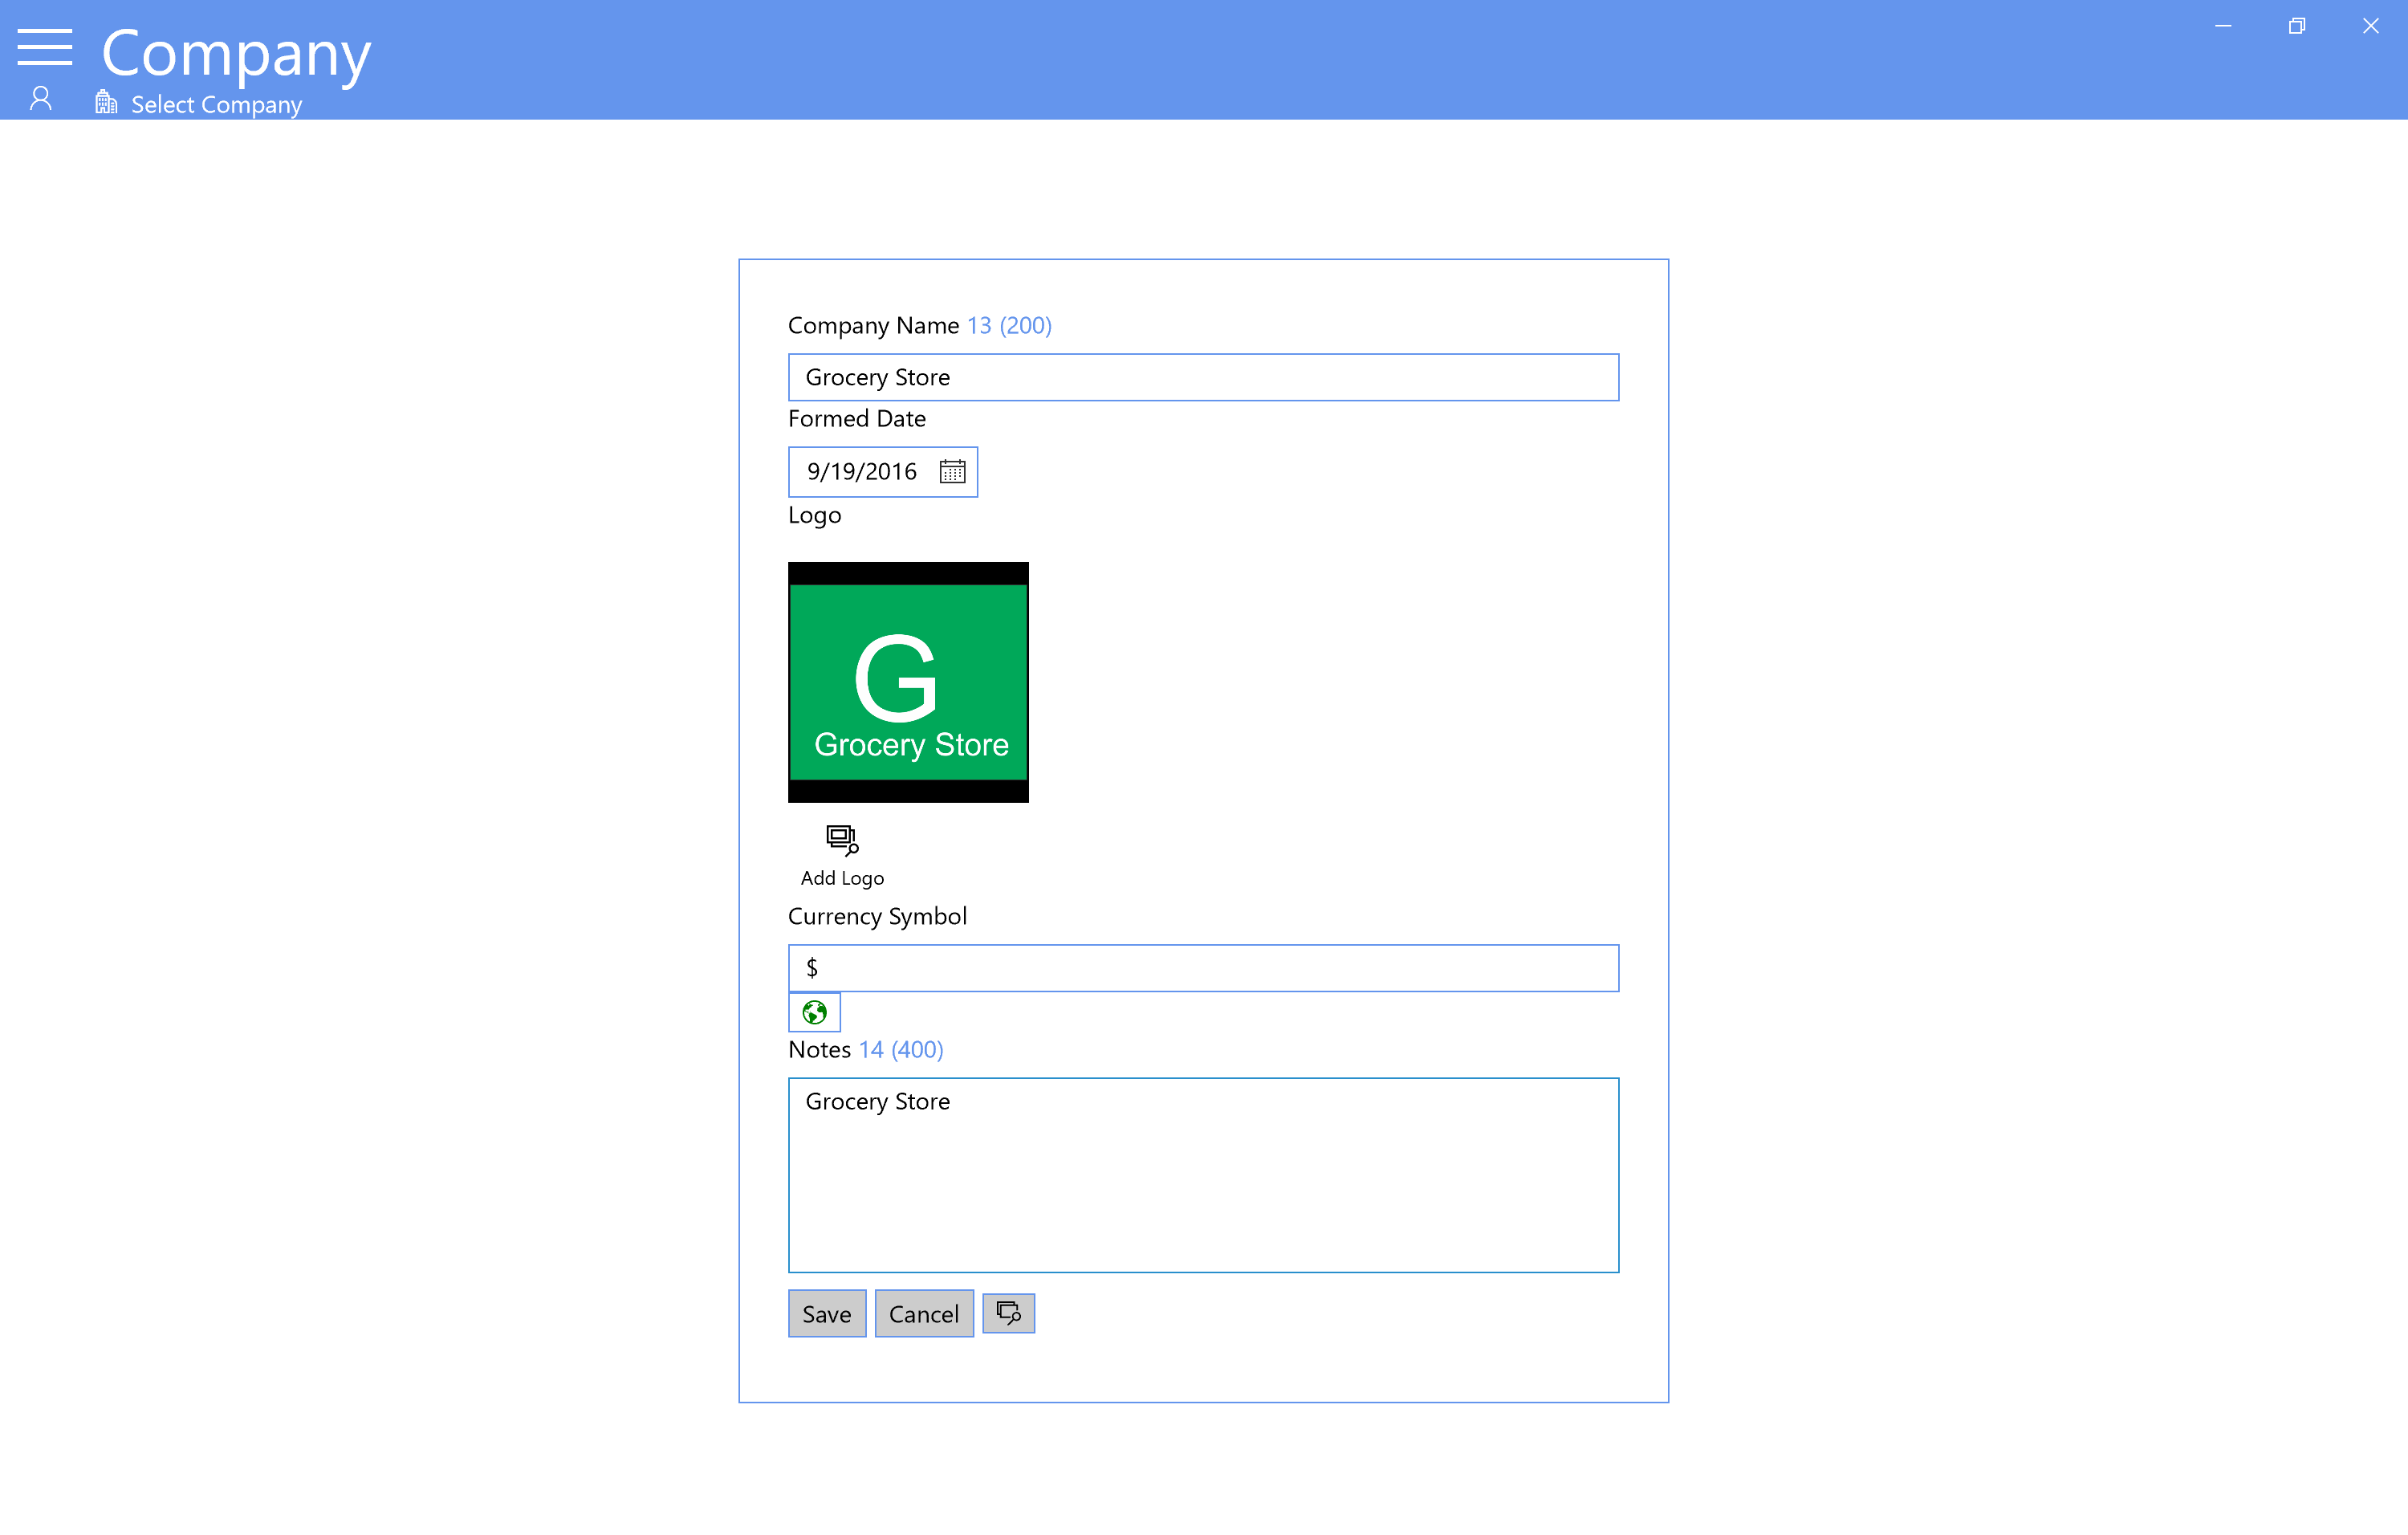
Company: It is refered as main company.
-
Company Name
Add Company Name
-
Formed Date
Formed date is when the company was created
-
Logo
Add The company logo
-
Currency Symbol
This symbol is the money symbol and it will be show wherever the app shows money (reports,Payment report,schedule), For example when you generate a report from the reports page this report shows the total hours and the money that the employee has earned. You can select one of all currency symbol by tapping the world button, select one according to your country Currency.
-
Notes
You can write a note if you want. but it's not required
-
- Again From the menu Select Company
-
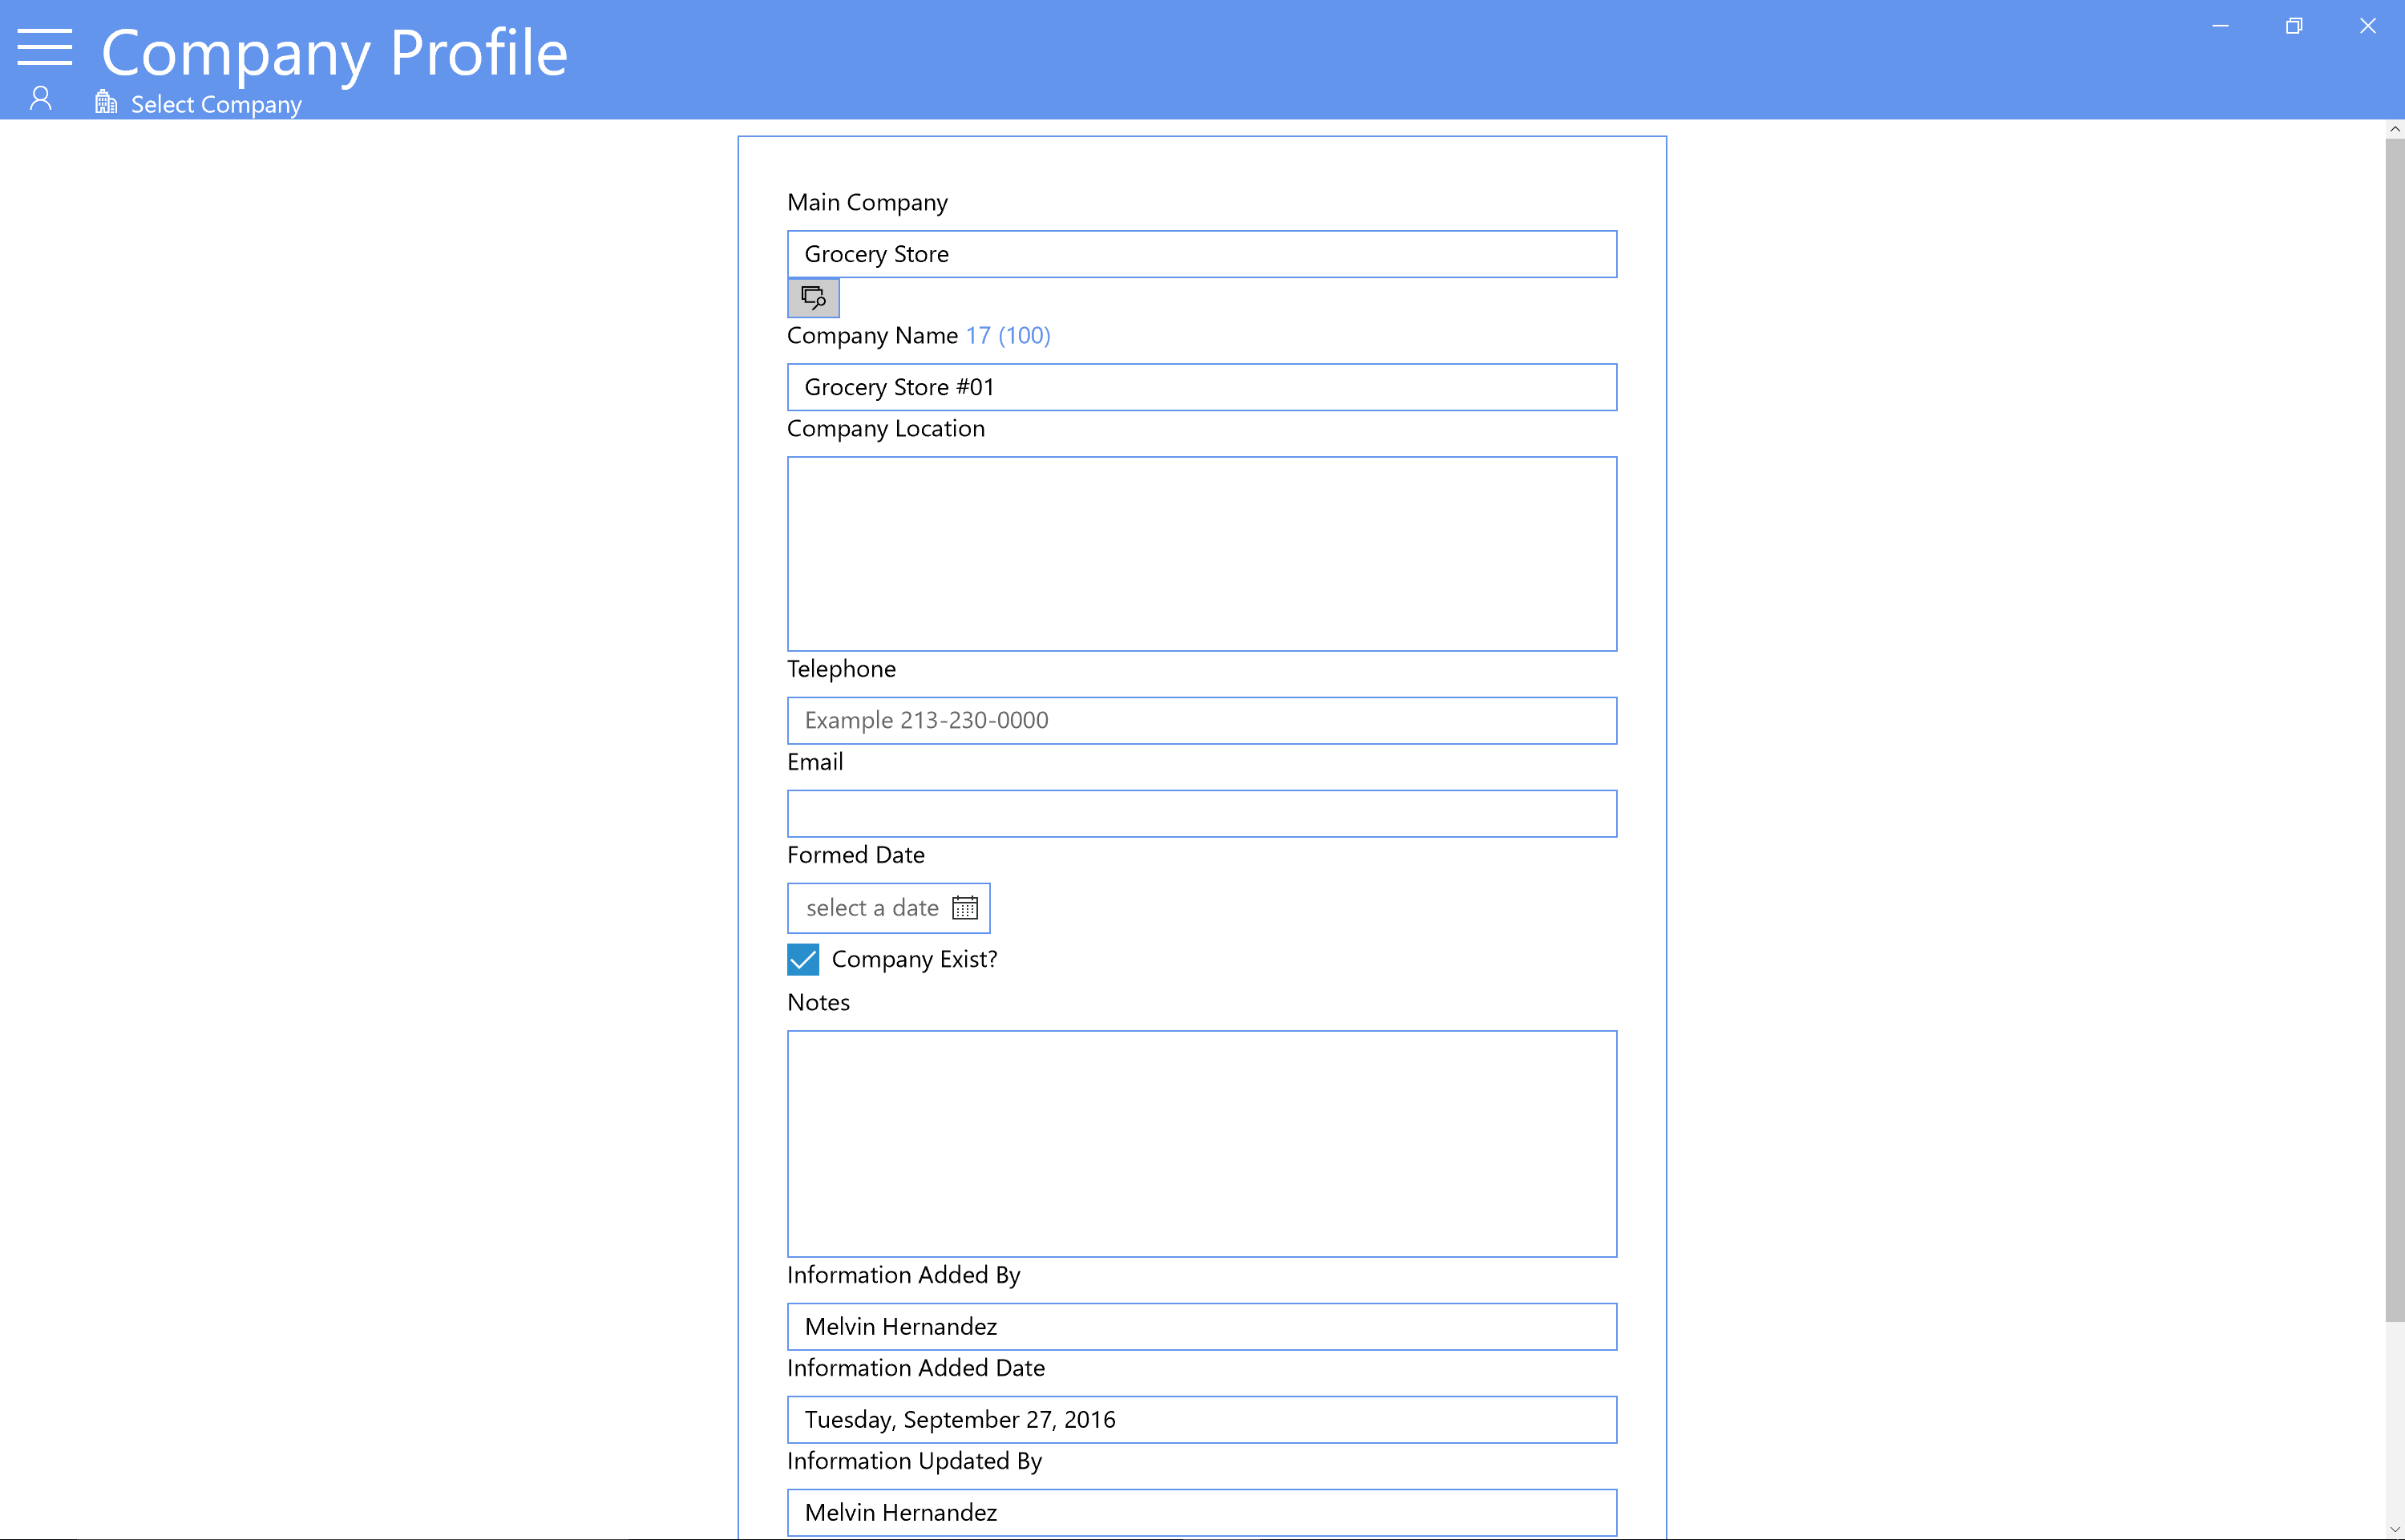
From the interactive Dialog that appear tap Company Profile
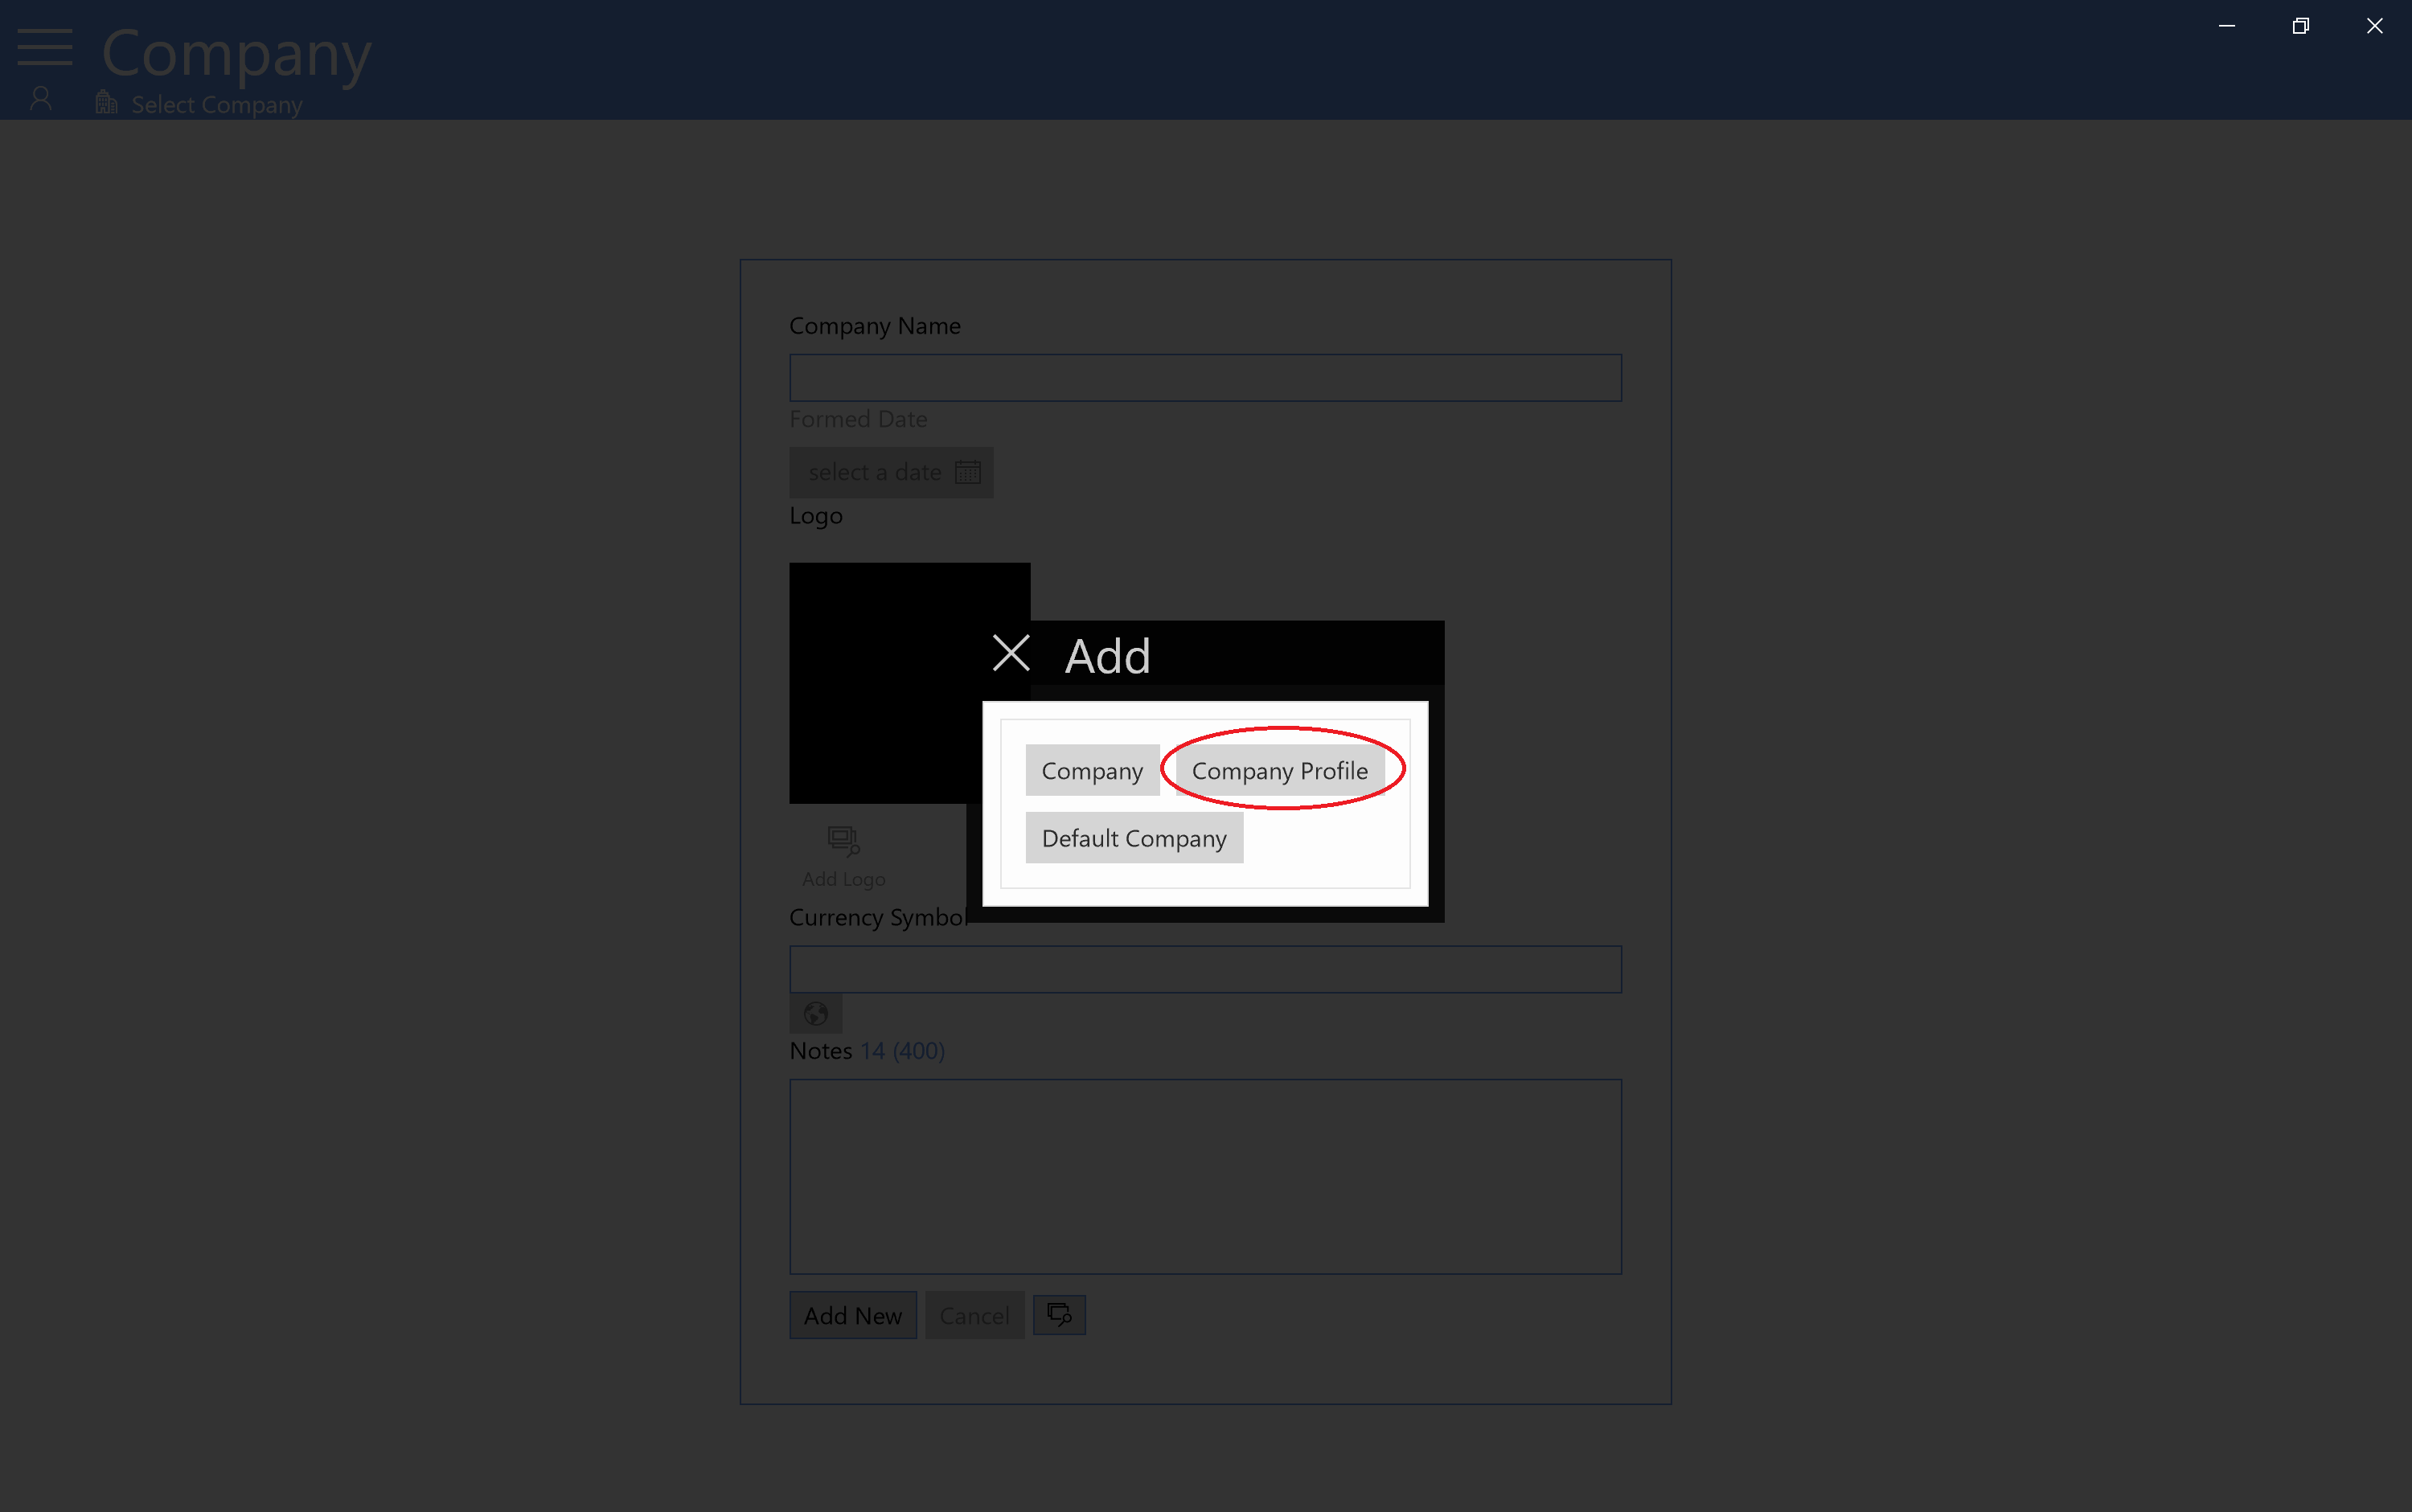
-
Tap add New Button and Add all Required information then save it
-
Main Company
Select a main company from the menu. Tap the search button, Select a main company then tap ok.
This main company is the company we added in the Step 7
You can add many Main companies as you want because Arrowat Workforce works in all purpose time, and of course one example on having more than one main company is that suppose you work for 2 companies and you want to control the hours you work and money you earn yourself you can add all of those main company and their respective Company pofile that you are adding here. Note: each company profile will be saved to the main company you selected on the this field. Once you have selected a main company and you save the data, you won't be able to change it for the current company profile you are adding. -
Company Name
Add a company name, you can add company name as the main company is named, name of your company or name of the company you are working.
-
Company Location
Add Company Location, this can be the addres of the company.
-
Telephone
Add company telephone number, if the company does not have telelphone number, you can write a cero "0" number
-
Email
Add company email, if the company does not have email, you can write "noemail"
-
Formed Date
Formed Date is when the company was created or started. you can add any date you want selecting from the calendar.
-
Company Exist?
Check this box if the company exist, it means if the company is not colosed. if you uncheck this box you will see a red message "Closed" when you search company, and will be disbled from other locations where company profile requires to use.
-
Notes
You can write a note you want or leave it empty.
-
Information Added By
This field is automatically added, it gets the user name from the user account who is logged in. you won't be able to edit or update it.
-
Information Added Date
This field is automatically added, It gets the current date from the system. you won't be able to edit or update it.
-
Information Updated By
This field is automatically added, it gets the user name from the user account who is logged in. Each time any admininstrator update the information of the company profile the user name will be saved.
-
Last Updated Date
This field is automatically added, It gets the current date from the system. Each time any admininstrator update the information of the company profile the date will be updated.
-
- Again From the Action Center Select Company
-
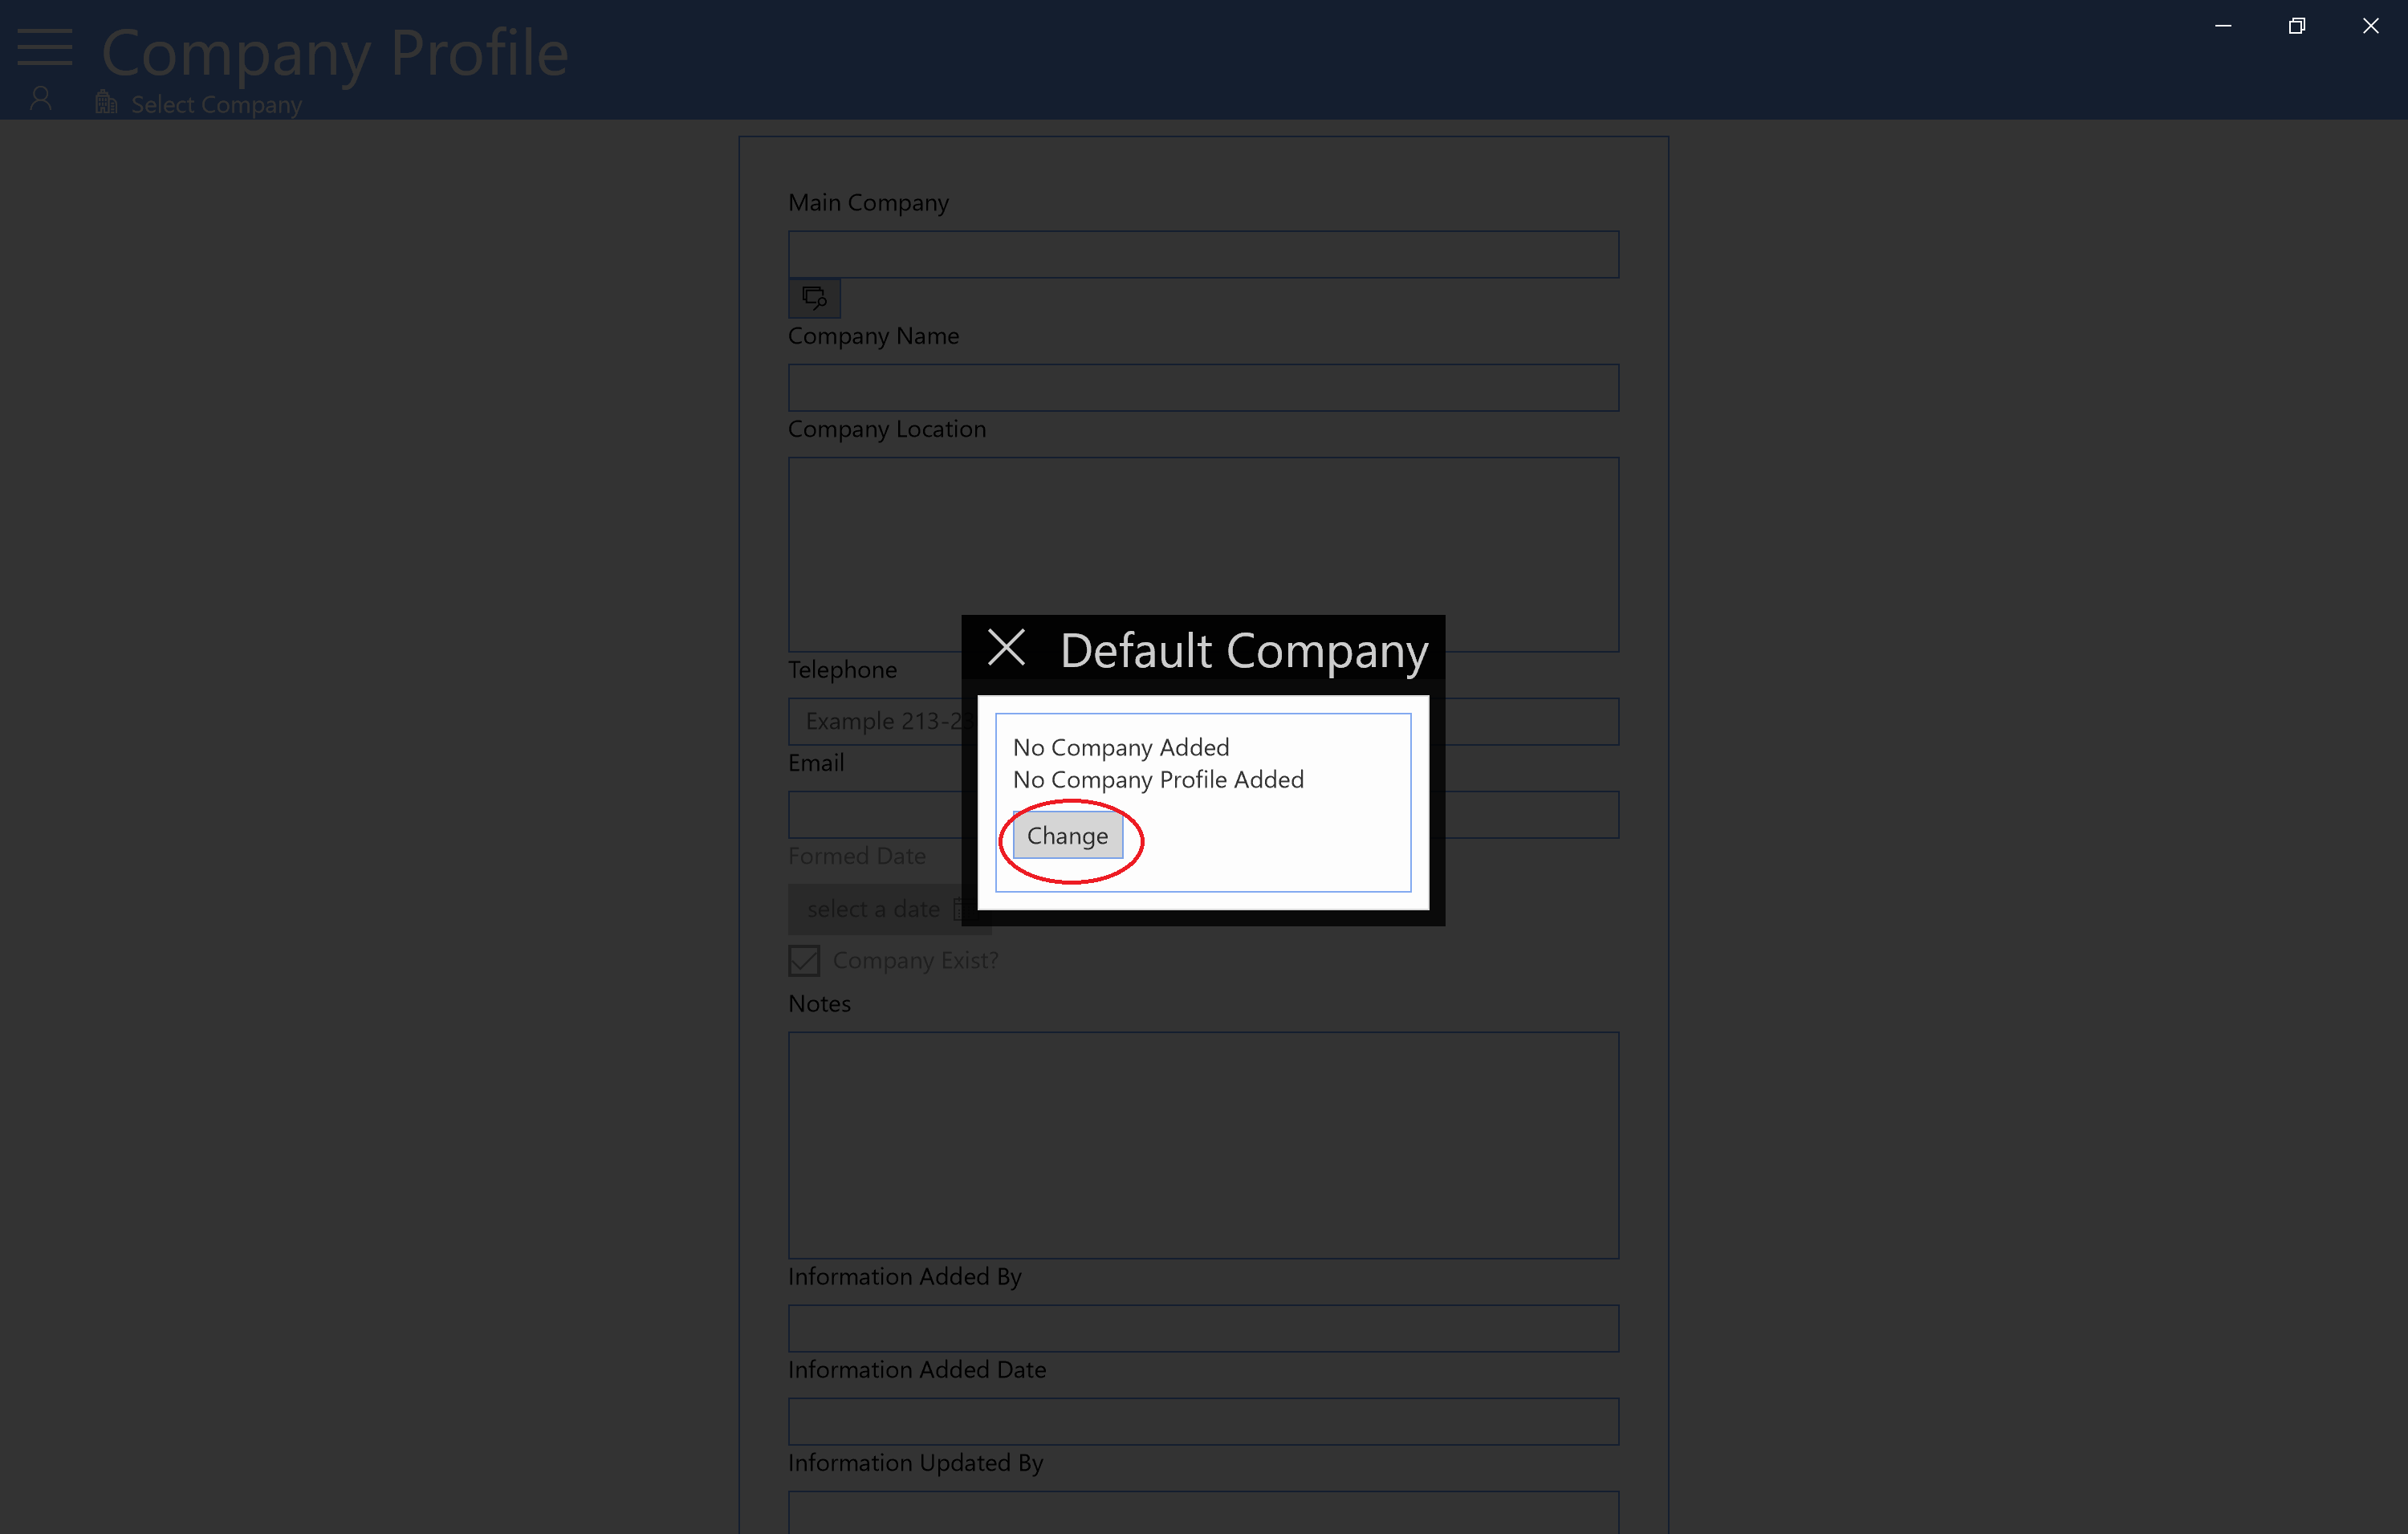
From the interactive Dialog that appear tap Default Company
-
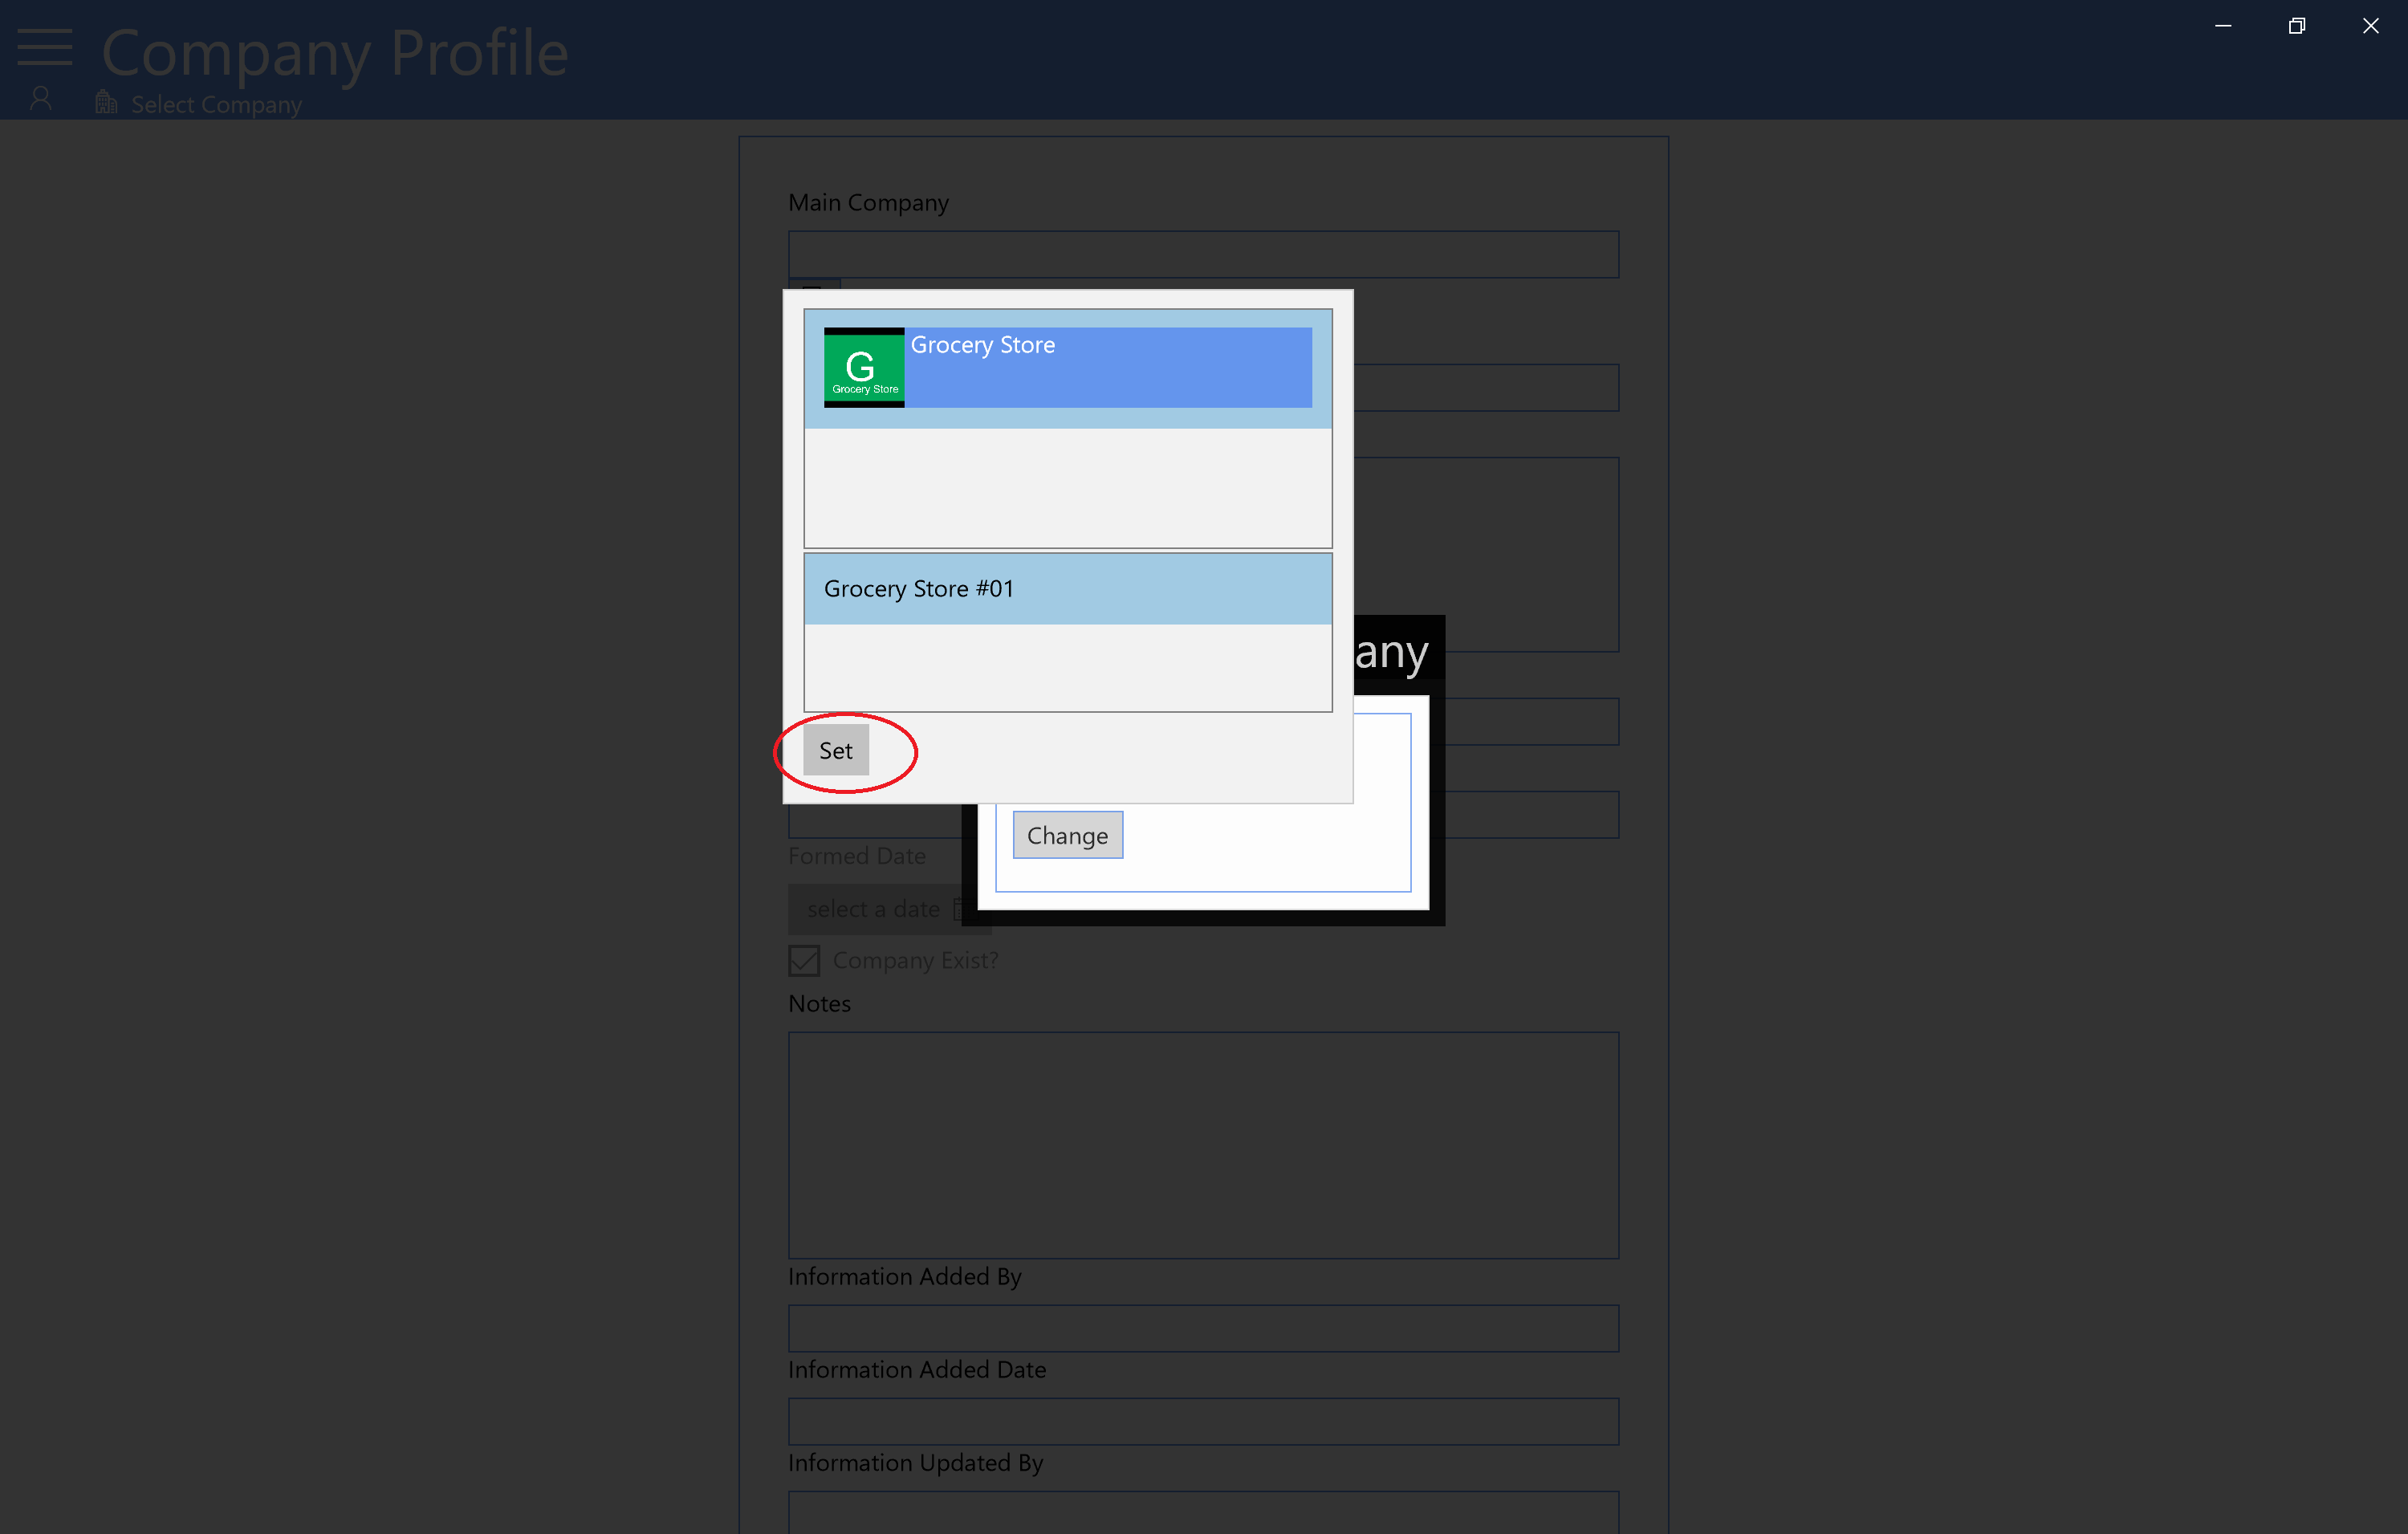
Tap Change button and Sselect Company and then company pofile and tap Set button
-
From the menu Select Positions

-
Add Position Name and the rate you pay for the employee that works in that position and save it
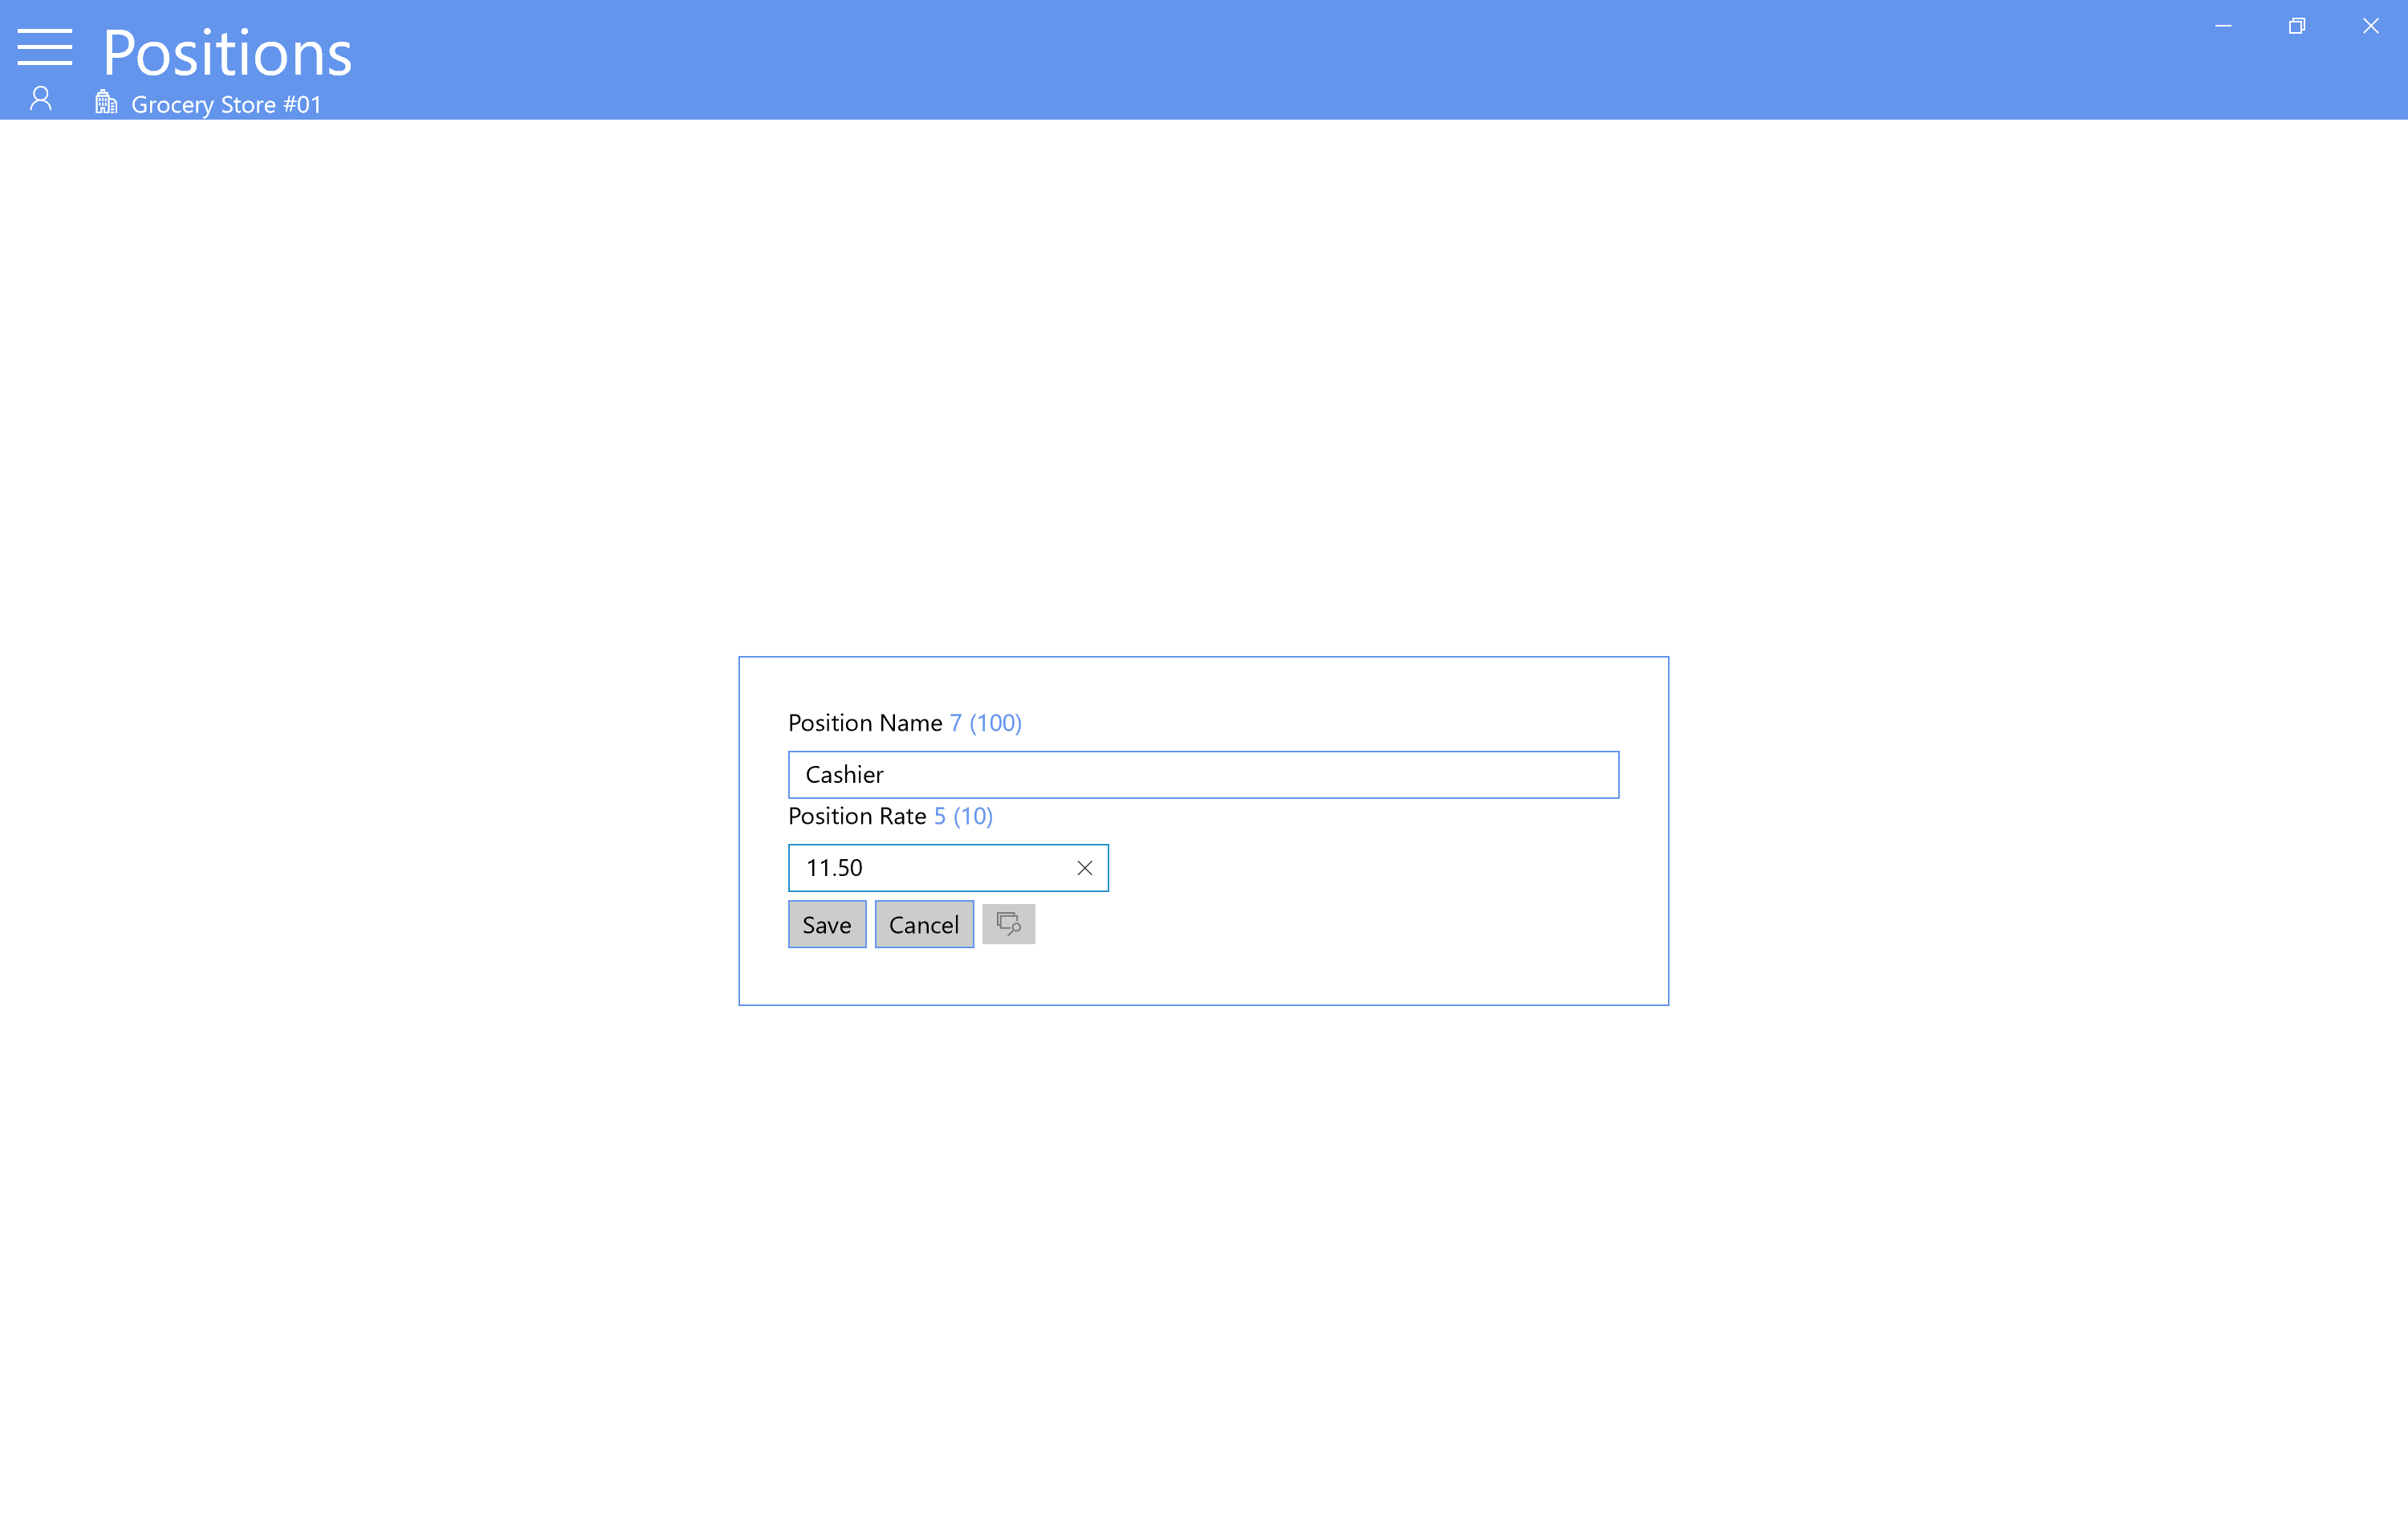
-
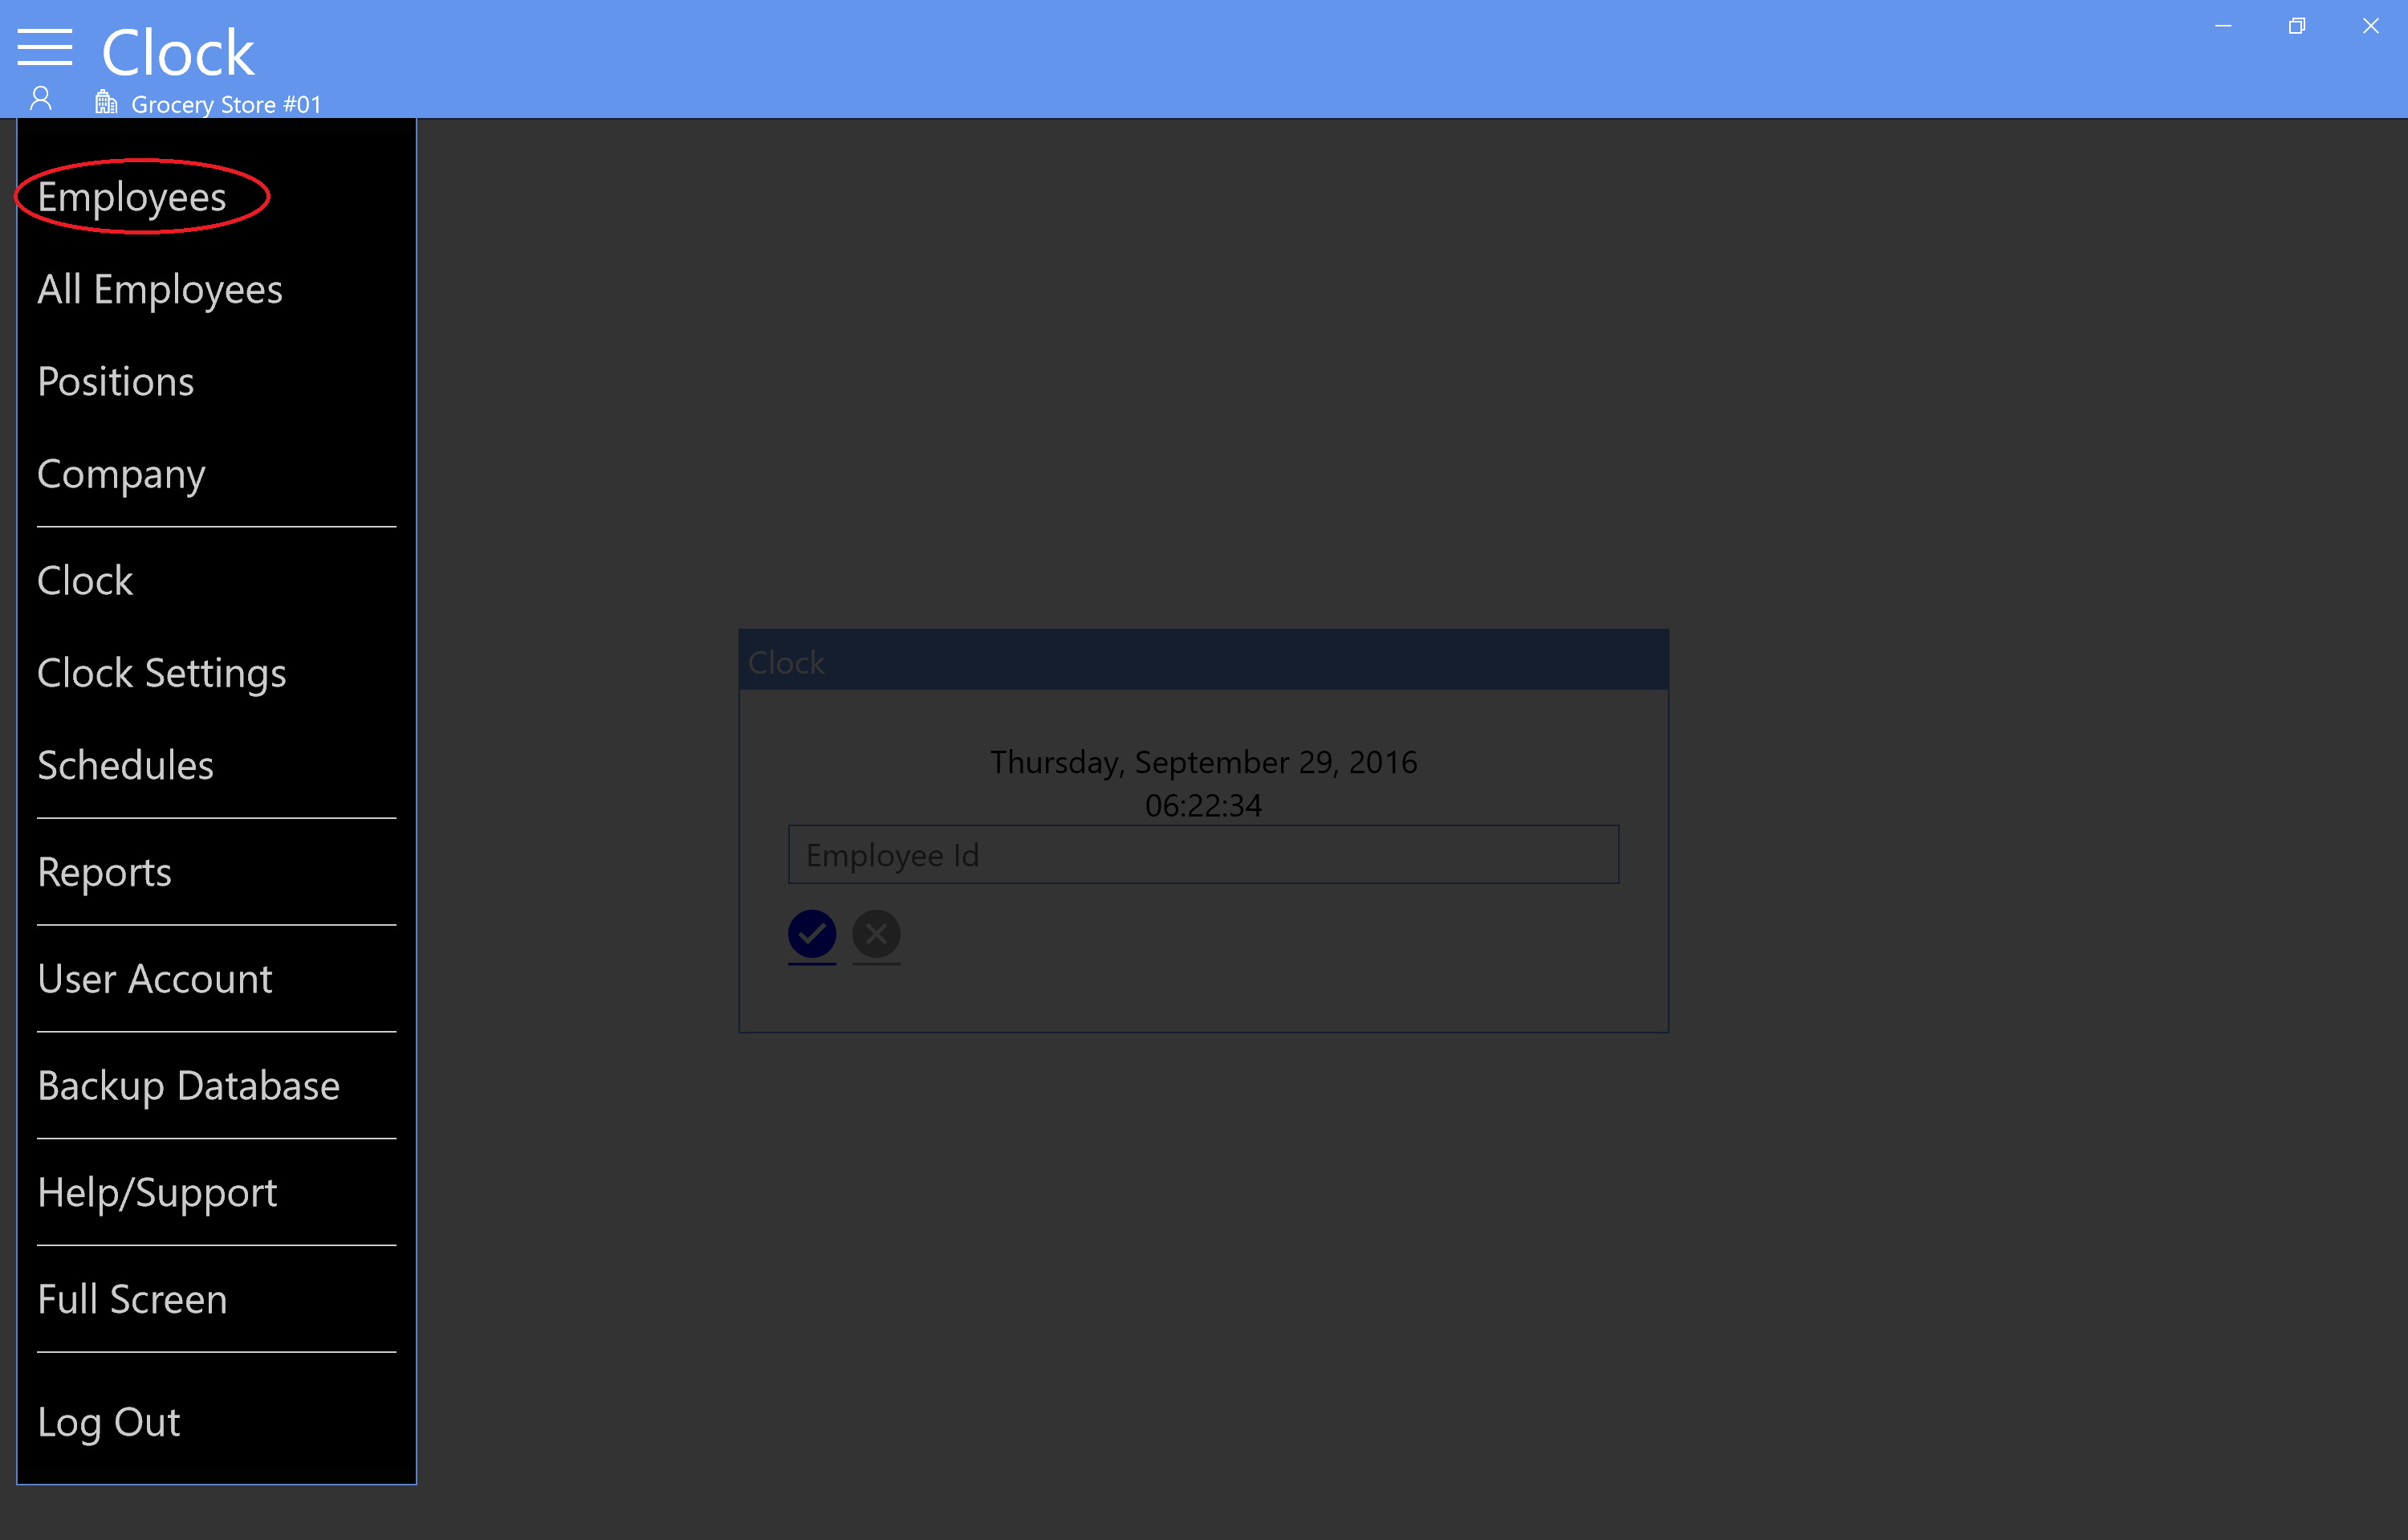
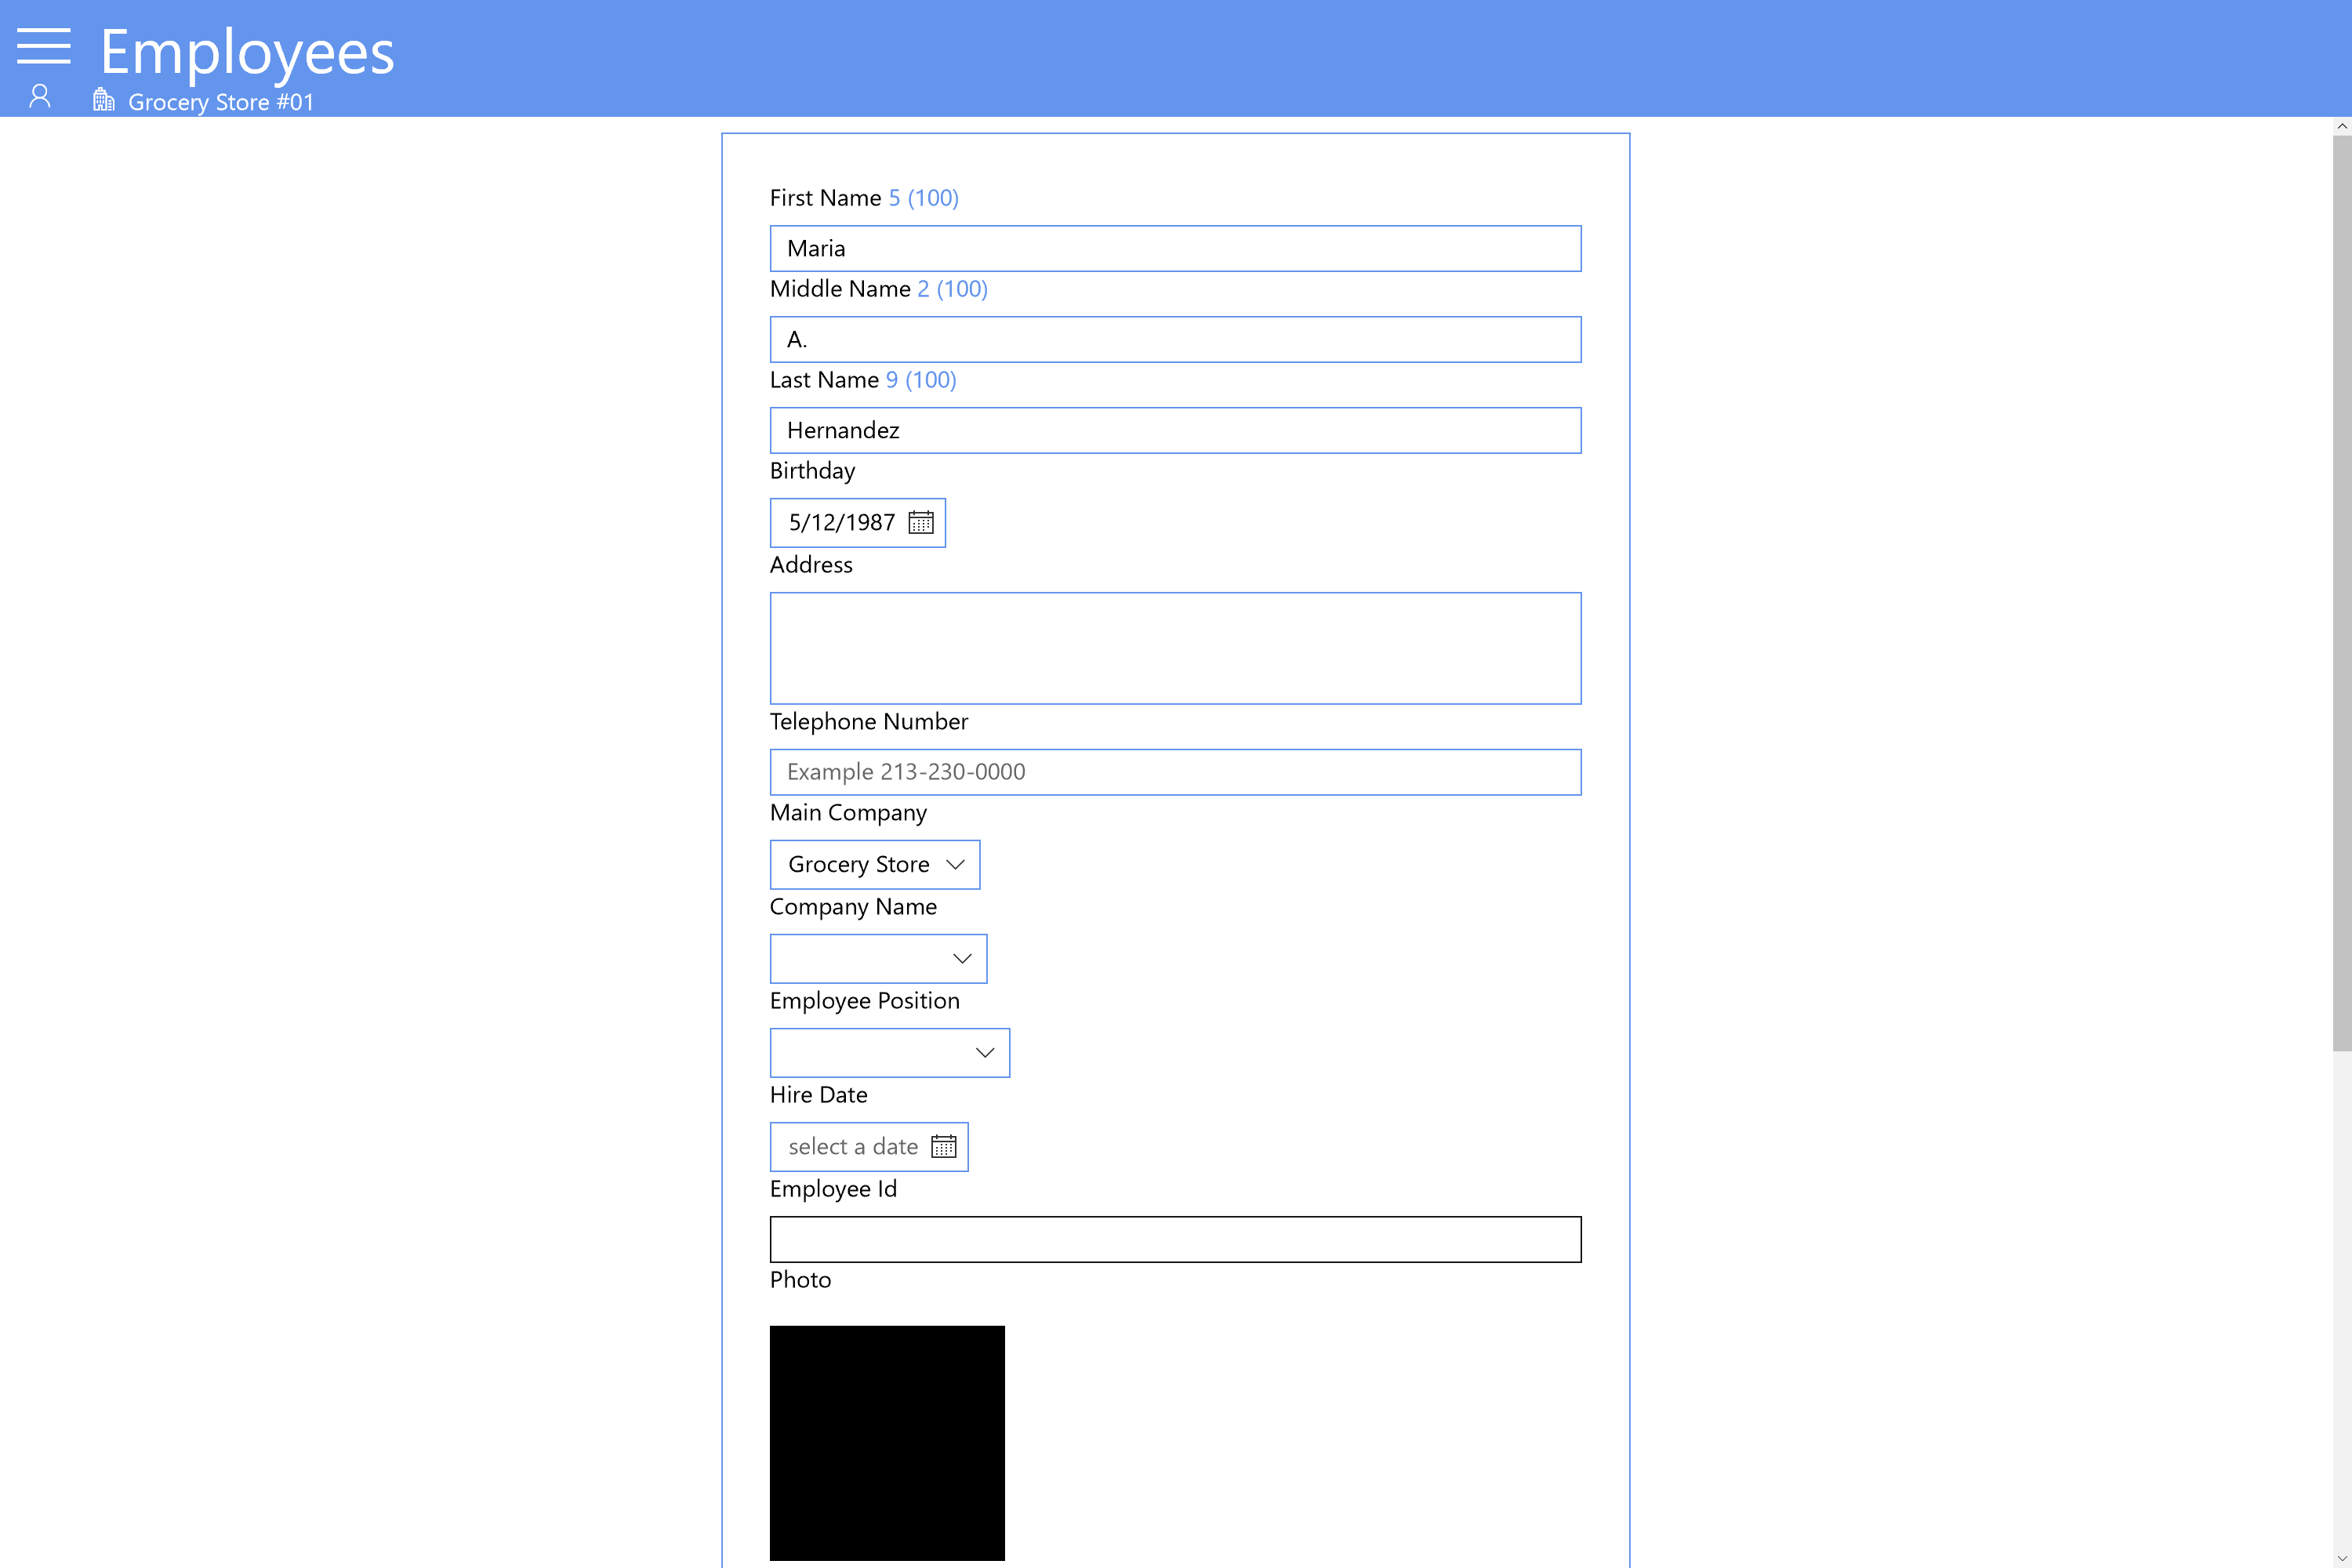
From the menu Select Employees
-
Add all required information and save it
-
First Name
Add first employee name.
-
Middle Name
Add employee middle name.
-
Last Name
Add employee last name.
-
Birth Date
Add employee birth date.
-
Address
Add employee address.
-
Telephone
Add employee telephone, if the employee does not have telephone number you can write cero "0".
-
Main Company
Select a Main Company from the DropDown box to load all company profiles you are created. Note that if you have more than one main company all of them will be shown here.
-
Company Name
Here are all company profiles you have created and where loaded to this dropdown box when you selected a main company in the previous sub step 17-7. Select one company profile.
Tip: if you select a different main company their company profile will be loaded. Make sure you are adding the employee to the right main company and company profile because when you update the information you won't be able to change the main company but you will be able to change Company Name (company Profile) -
Employee Position
Here are all Position you have created on the step 15. the position where the employee will be work.
-
Hire Date
Select a date when the employee start working.
-
Employee Id
Add Employee id, this Id can be anything letters or numbers but unique in each company profile, I decided to leave it filled by the user who will manage the app because some compnies an even small business are already using time paper card and others using Microsoft Exel to calculate their Time and expenses for their employee and each employee have their employee id aready. that's why i did not allow to use auto-increment in number or alphanumeric id, however you can use any id but it must be unique in each company profile the employee is going to be registered.
-
Photo
Add employee Picture: you can add picture from your computer file or you can take a picture using camera, select one option from the Add Photo button.
-
Still Working?
Check this box if the employee still working on your company or business, Uncheck it if the employee does not work in the company anymore.
Note: if this box is unchecked A red message will be shown when you search employee. this employee won't appear when you create a Schedule for your company, and is rectricted to Use the clock (puncher)
-
-
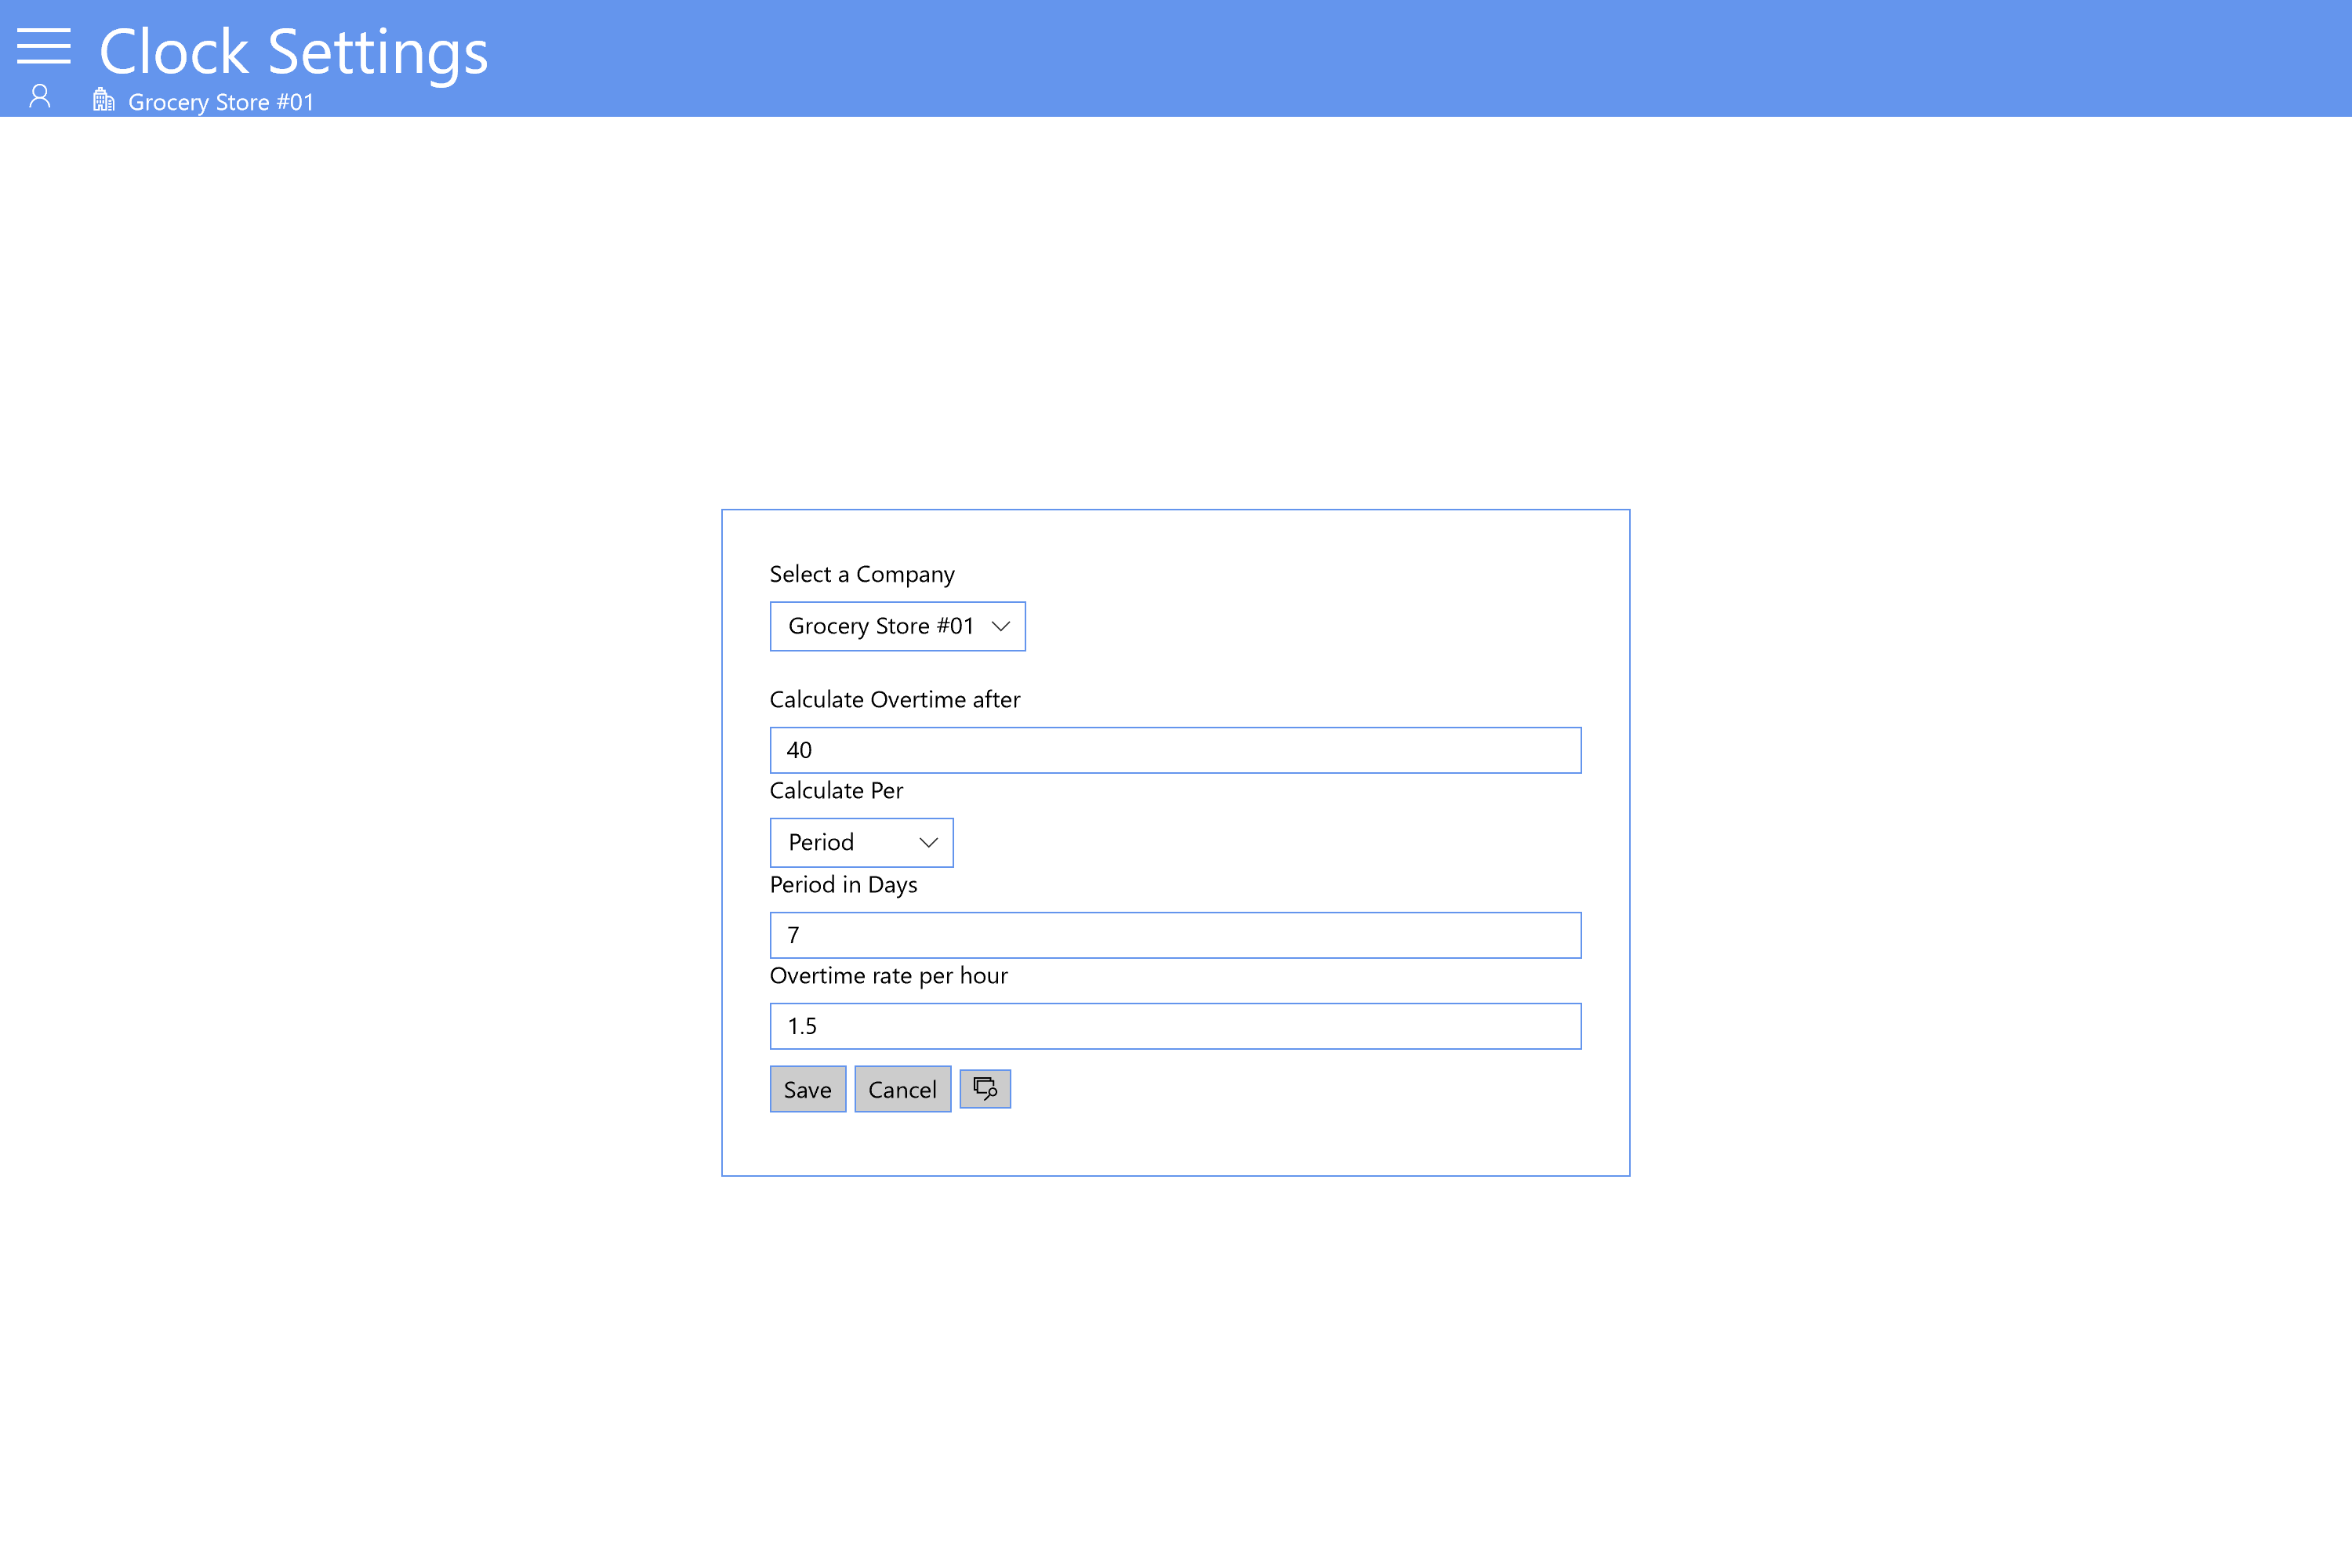
From the menu Select Clock Settings
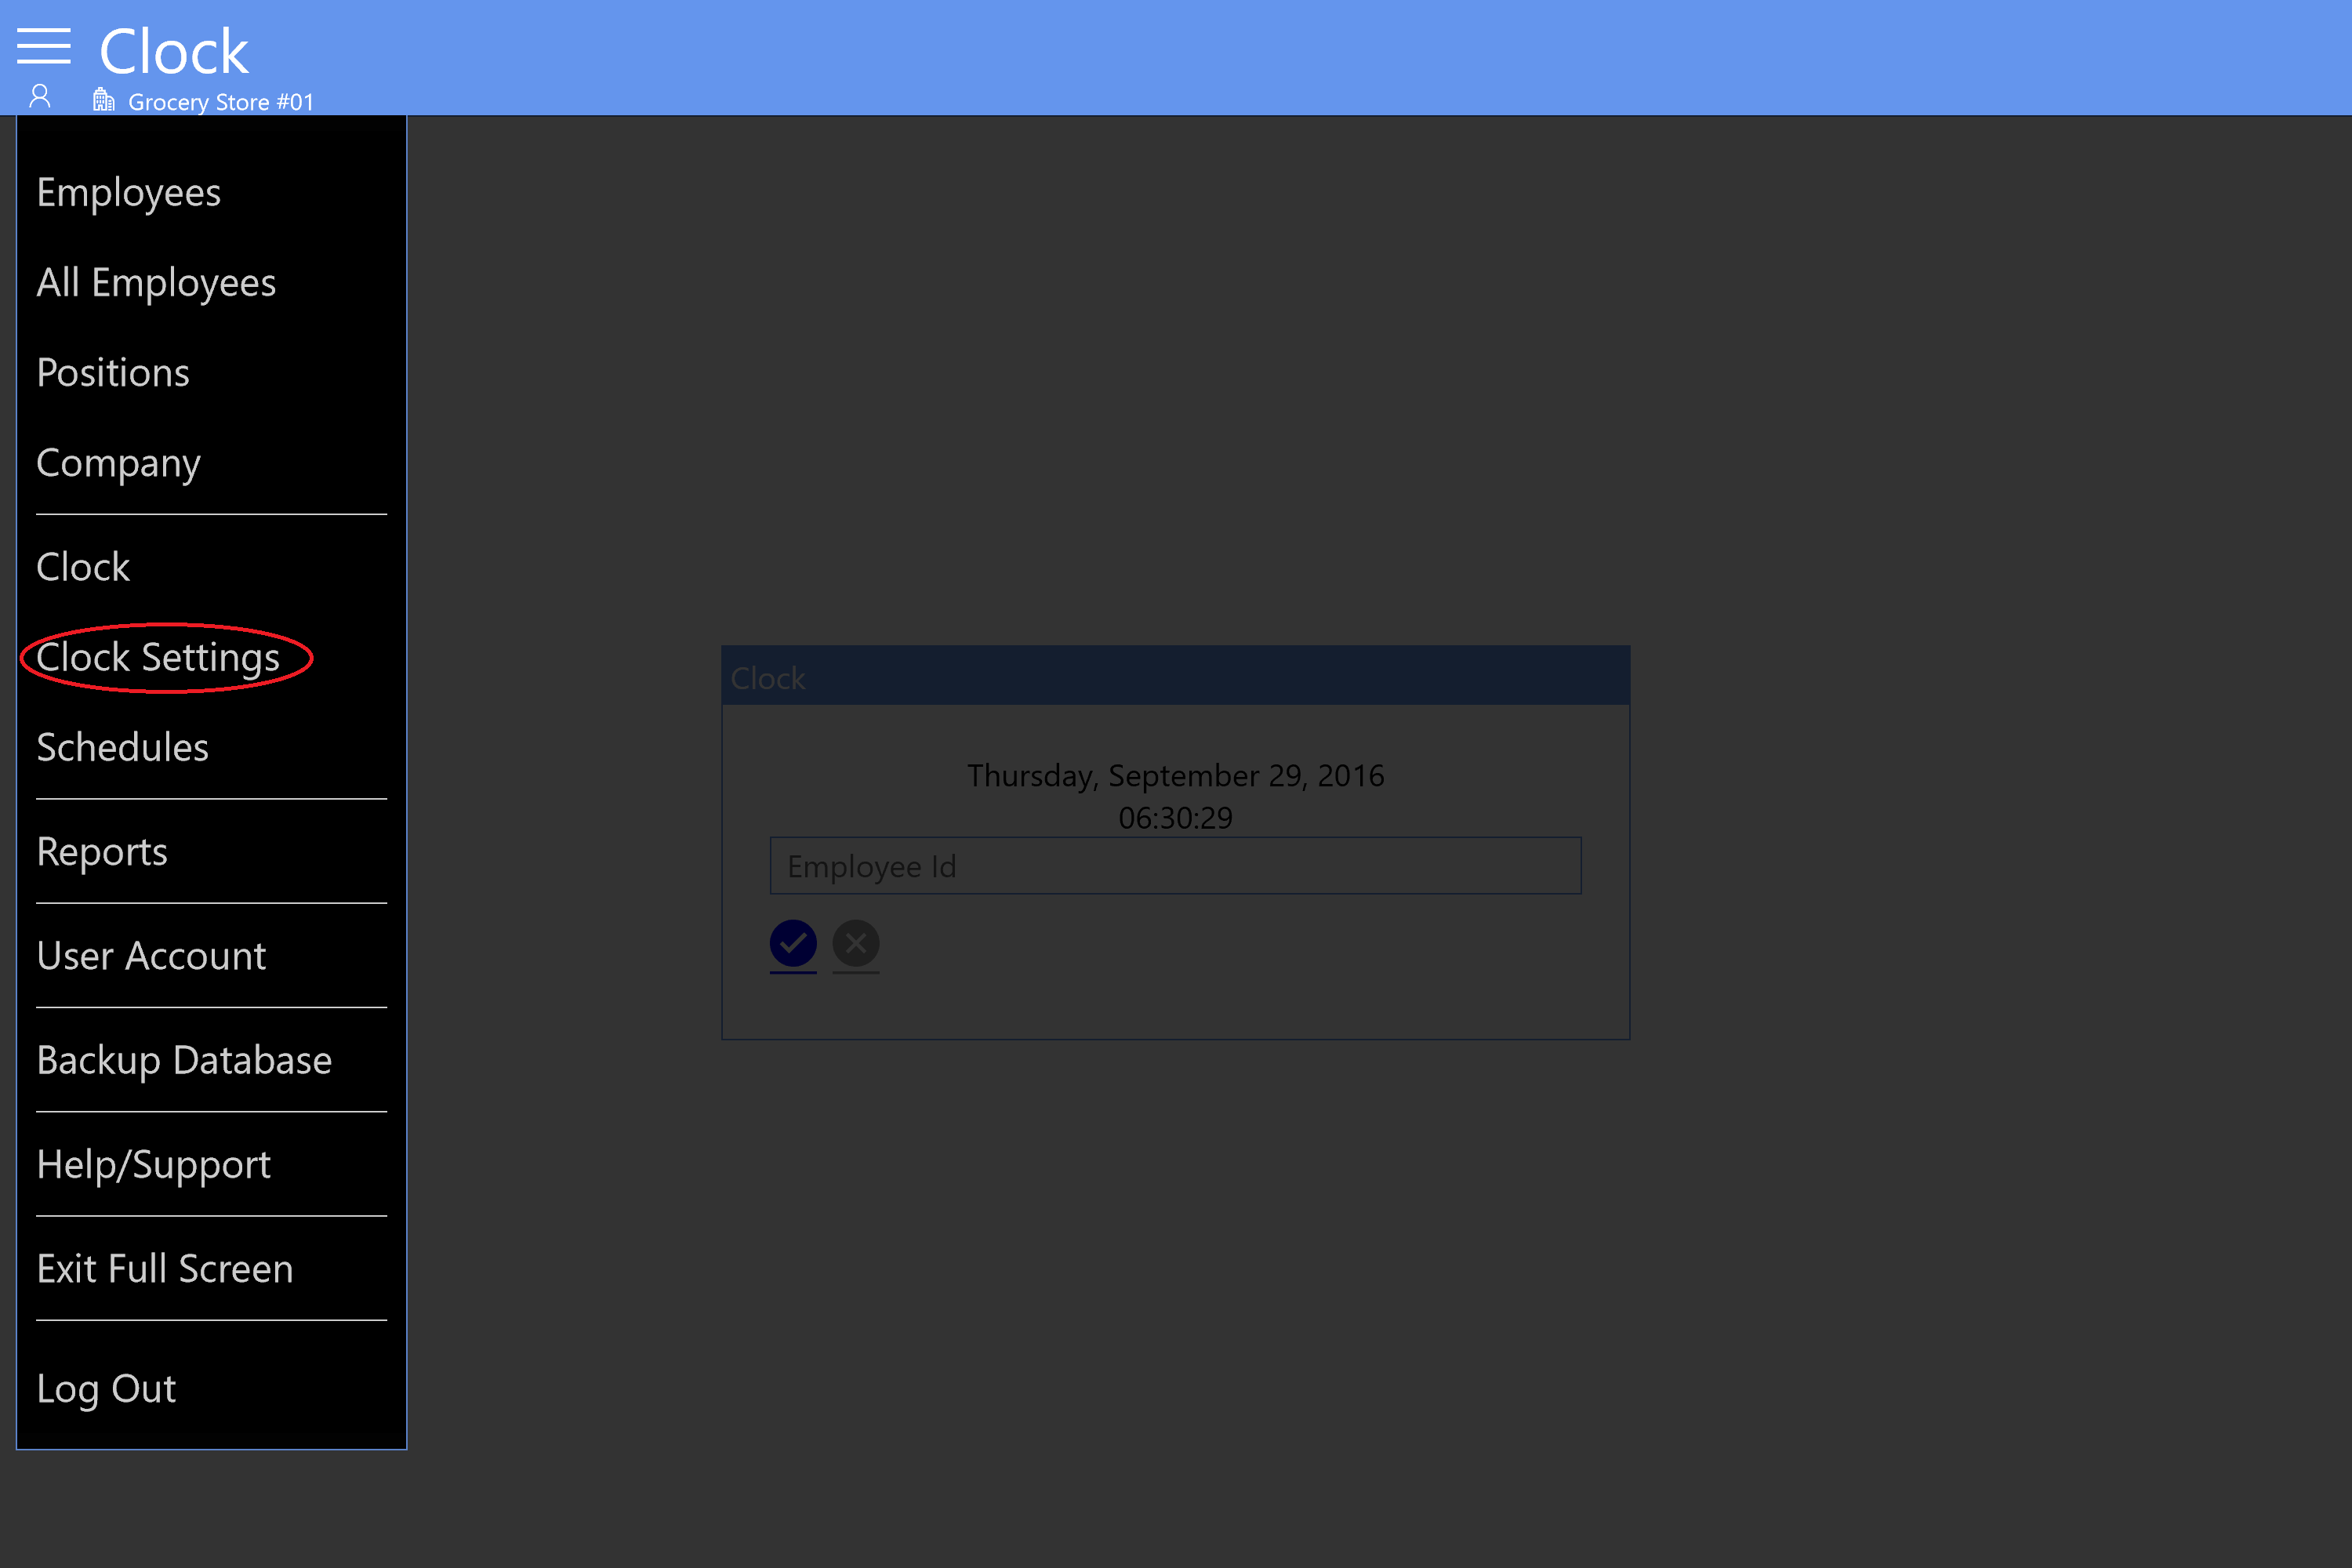
-
Tap Add New then Add all required information and save it
-
Select a Company
Select one of the company profile you have added
-
Calculate Overtime after
Write the regular hours the company allows to work, regular hours are calculated by the position rate where the employee is working (Regular hours * position rate) example (40 * 11.50 = 460.00), If the employee works more than the hours specified here all will be count as overtime.
-
Calculate Per
Select Period if the company pays in a week, 15 days, 6 monts or salary, Note that if the company pays weekly, salary or more than one day you need to specify the period in days example 7 days, if the company pays daily select Day.
-
Period in Days
If you selected in the previous step Period you can specify here in how many days the employee pays, if you selected Day this field cannot be edited because Day is for daily calculation.
-
Overtime rate per hours
Speficy the rate you pay as overtime if the employee works more than regular hours you allow to work in your company , example 1.5 that is Hour and half, this calculation is as (Overtime hours * Position rate * 1.5) Example (2 * 11.50 * 1.5 = 34.5)
Example
You pay 40 hours as regular rate (position rate) and the rest as ovetime weekly and you have an employee who worked 45 hours last week, the position where the employee is woking is paid at $11.50 per hour. the employee has worked 40 regular hours and 5 overtime hours. Calculation is as follow.
Regular
40 (regular hours) * $11.50 (Position rate) = $460.00
Overtime
5 (overtime hours) * 11.50 (Position rate) * 1.50 = $86.25
Total
40 (regular) + 5 (overtime) = 45 hours
$460.00 (regular) + $86.25 (overtime) = $546.25 -
After you have finished you can start using it. If you want to add other company,company profile, position and other employee you need to repeat all you do in this getting started guide.
About the author
Melvin Dev
This documentation has been written by Melvin Dev, Melvin Dev is a founder and developer of Arrowat LLC.