Search POS Devices
Installing POS Printer
In this guide we will show you how to install a POS Printer on your computer, we will configure the POS Printer properties and we will configure
the receipt template on Arrowat POS System. There are a lot POS Printer you can use to print receipt as long as the POS Printer works on Windows 10 and Windows 11.
You can use any POS Printer from any brand that is available on your country or region as long as it works on Windows 11 and Windows 10. The configuration
depends on what printer properties provides, While Arrowat POS System Provides the receipt template, aditional configurations are required on the POS Printer
you are installing if they are available, some properties are:
- Paper Roll Size
- Paper Cutter
- Open Cash Drawer
In this guide we will install a MUNBYN POS Printer, while the configuration and installation drivers interface depends on the printer you choose, the printer settings provides the properties we want to use with Arrowat POS System.
The first step is to connect your printer to your computer and install the POS Printer drivers, you need to follow the instruction from the POS Printer installation guide.
- Connect the POS Printer.
- Install The POS Printer drivers by following the setup instructions.
Once you have installed your POS Printer, is time to configure the poperties we need to use with Arrowat POS System.
Configuring POS Printer Properties
Many POS Printers provides the options to Paper Cut, Open Cash Drawer when the receipt printed is completed. this properties options
can be found on the Printer Properties on the Operating System. We are installing the printer on Windows 11, the following steps show how
to configure the POS Printer properties.
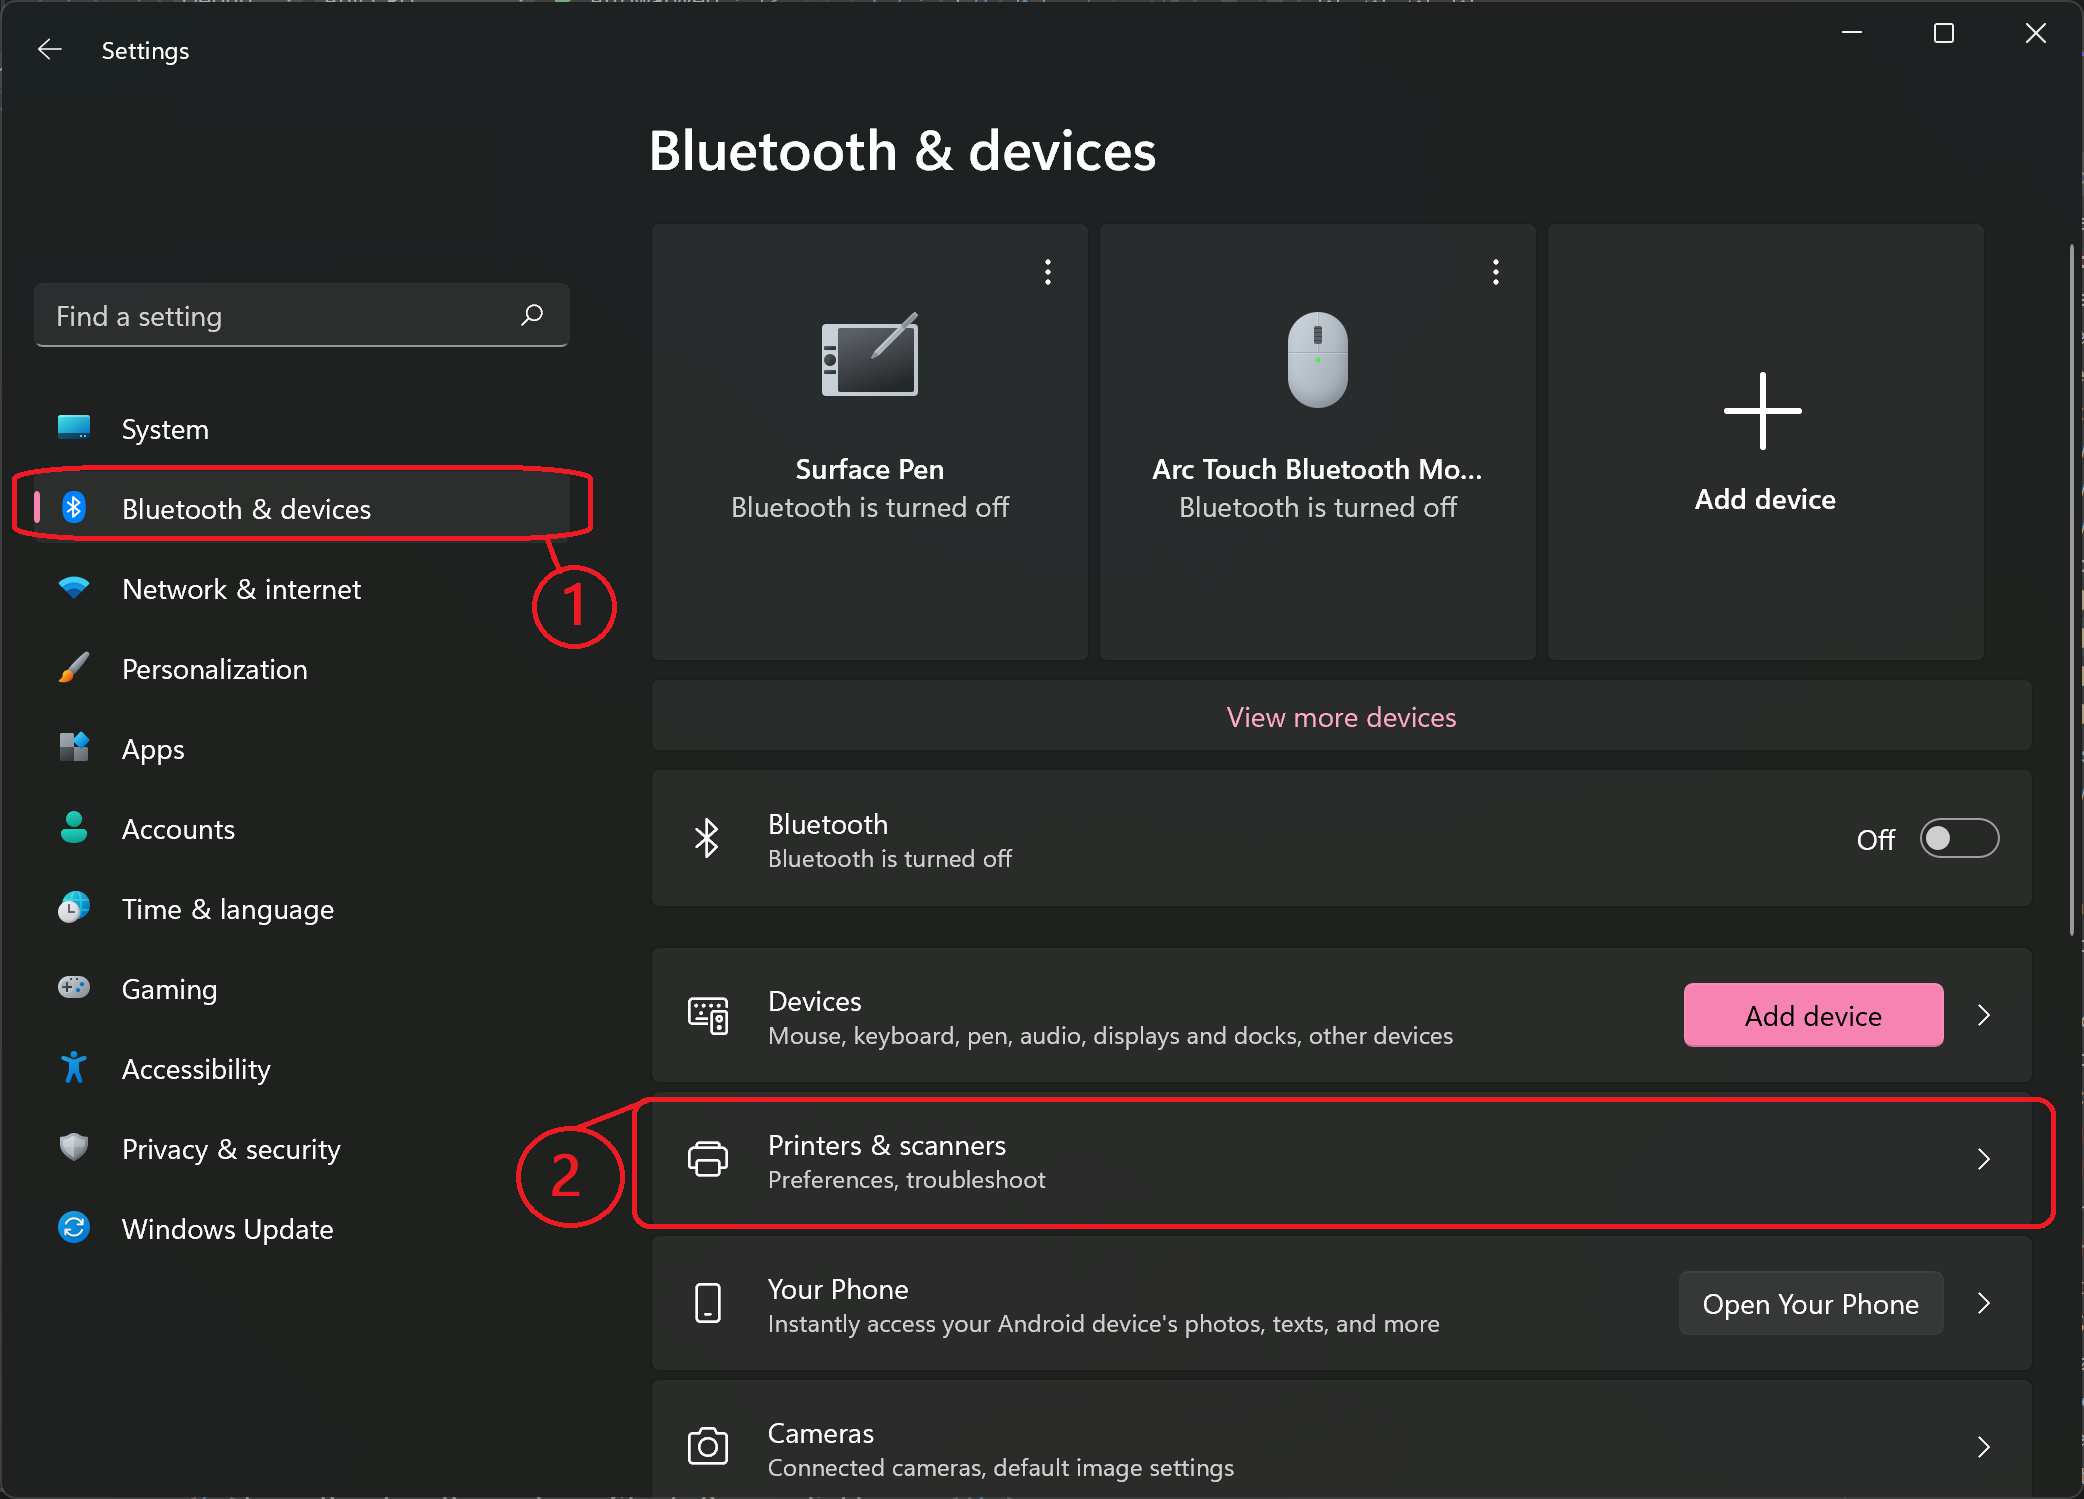
- On Your Windows 11 PC Go to Start
- Click Setting
- Click Bluetooht & Devices
-
Click Printers & Scanners
-
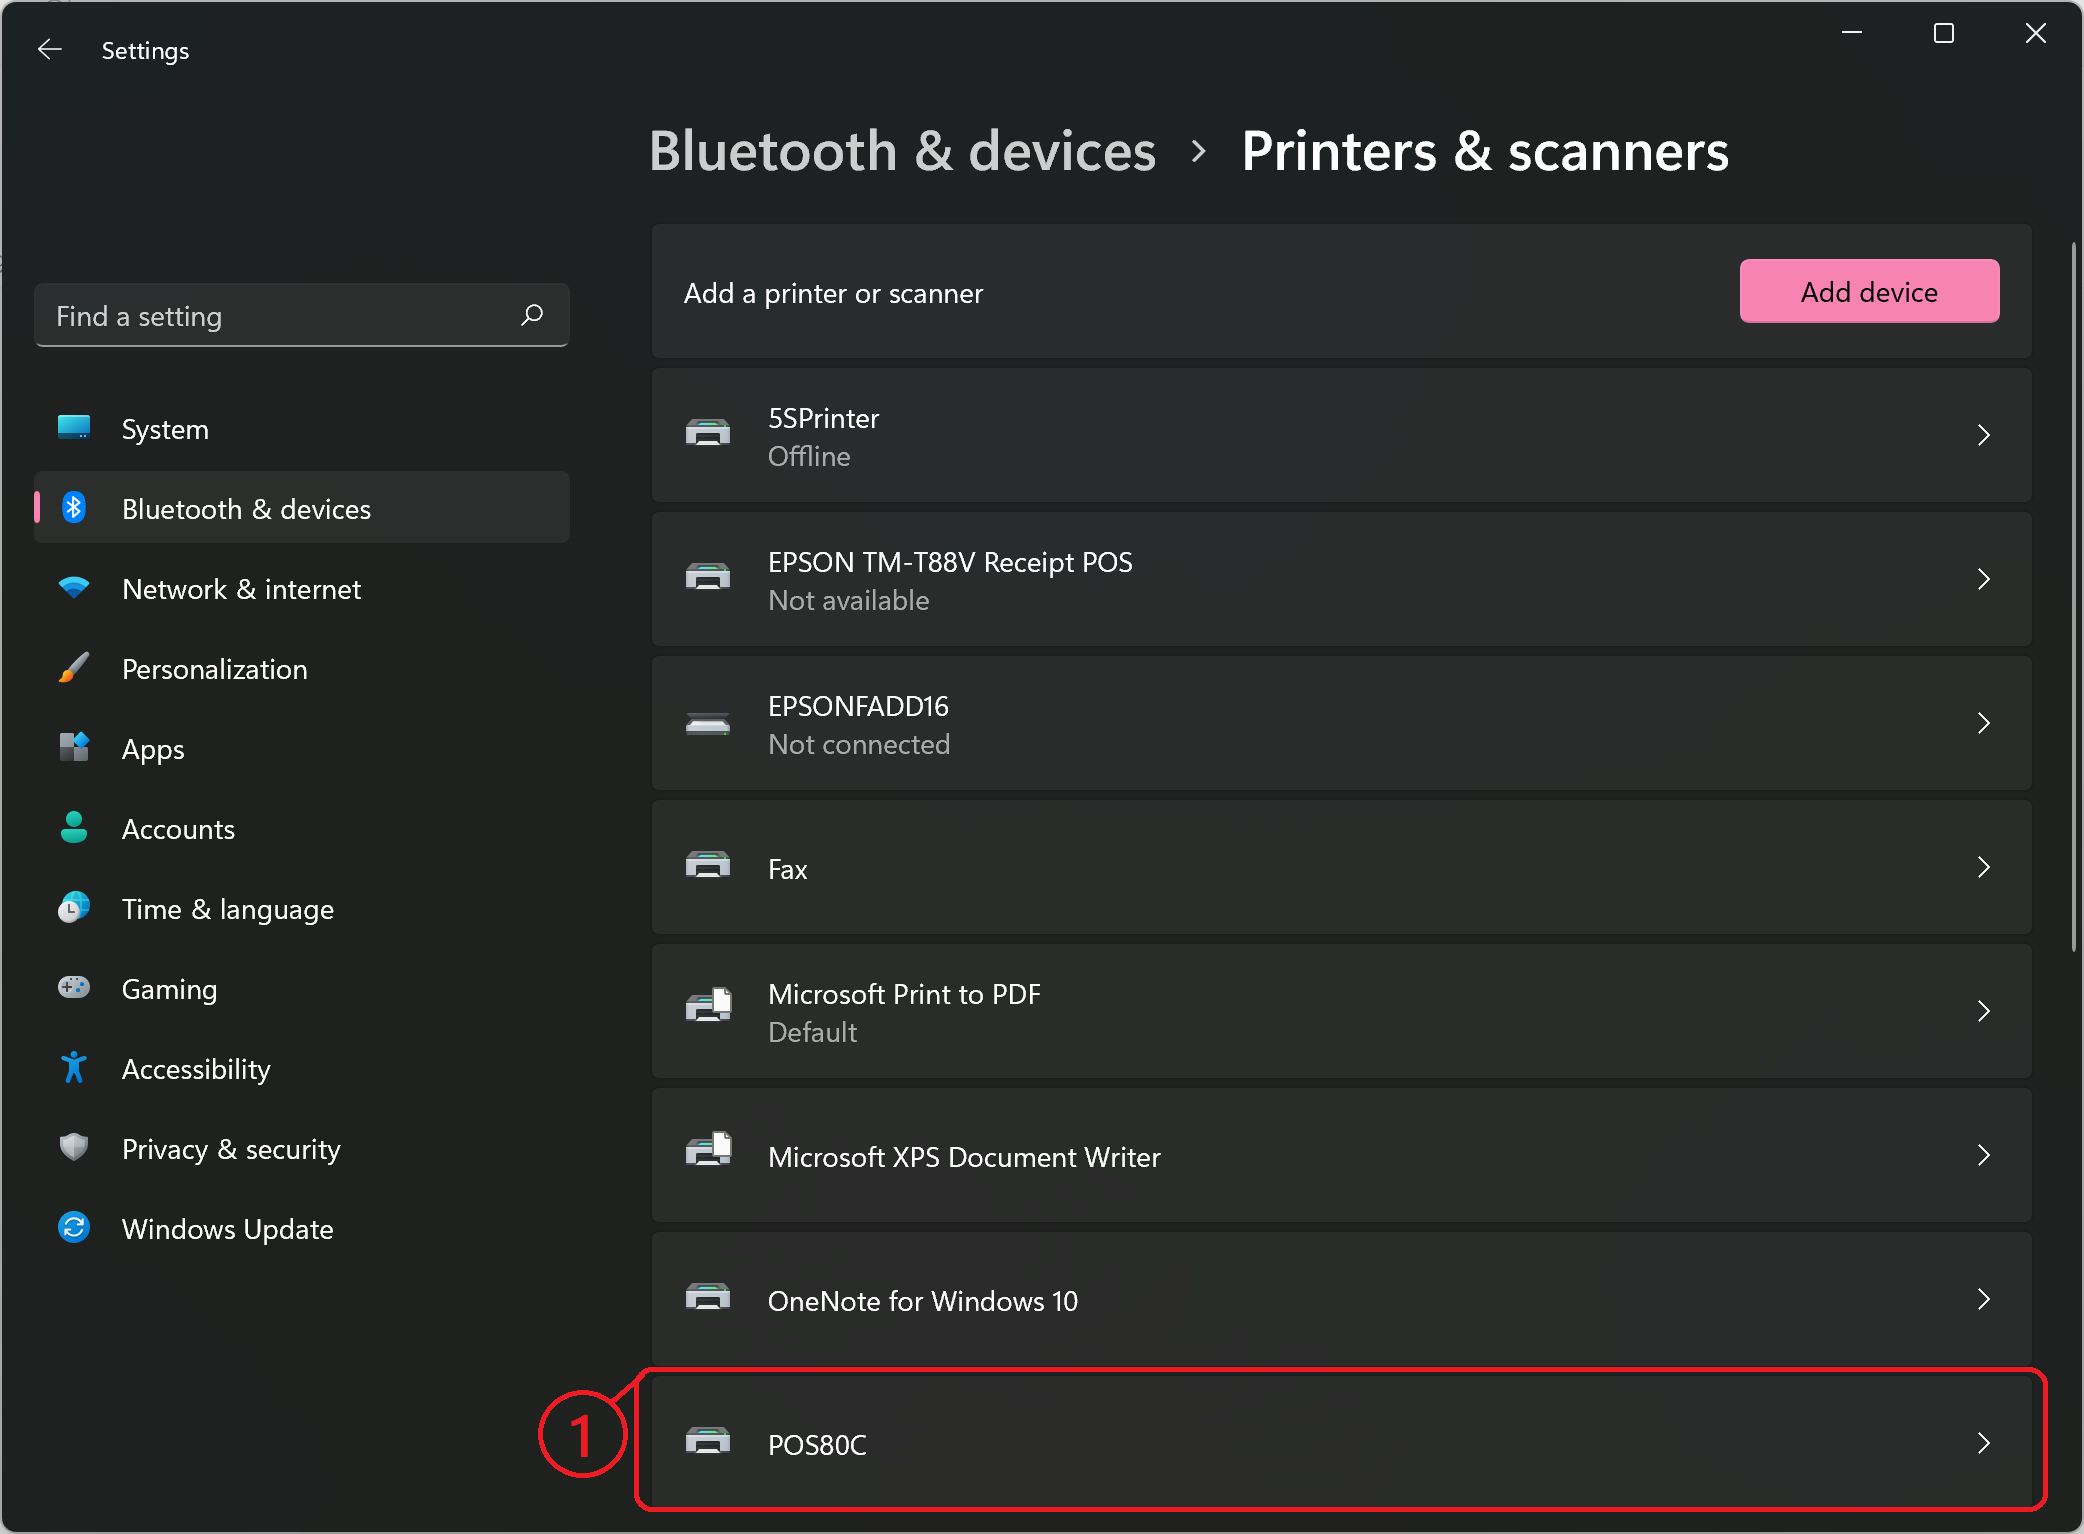
Click the POS Printer you have installed
-
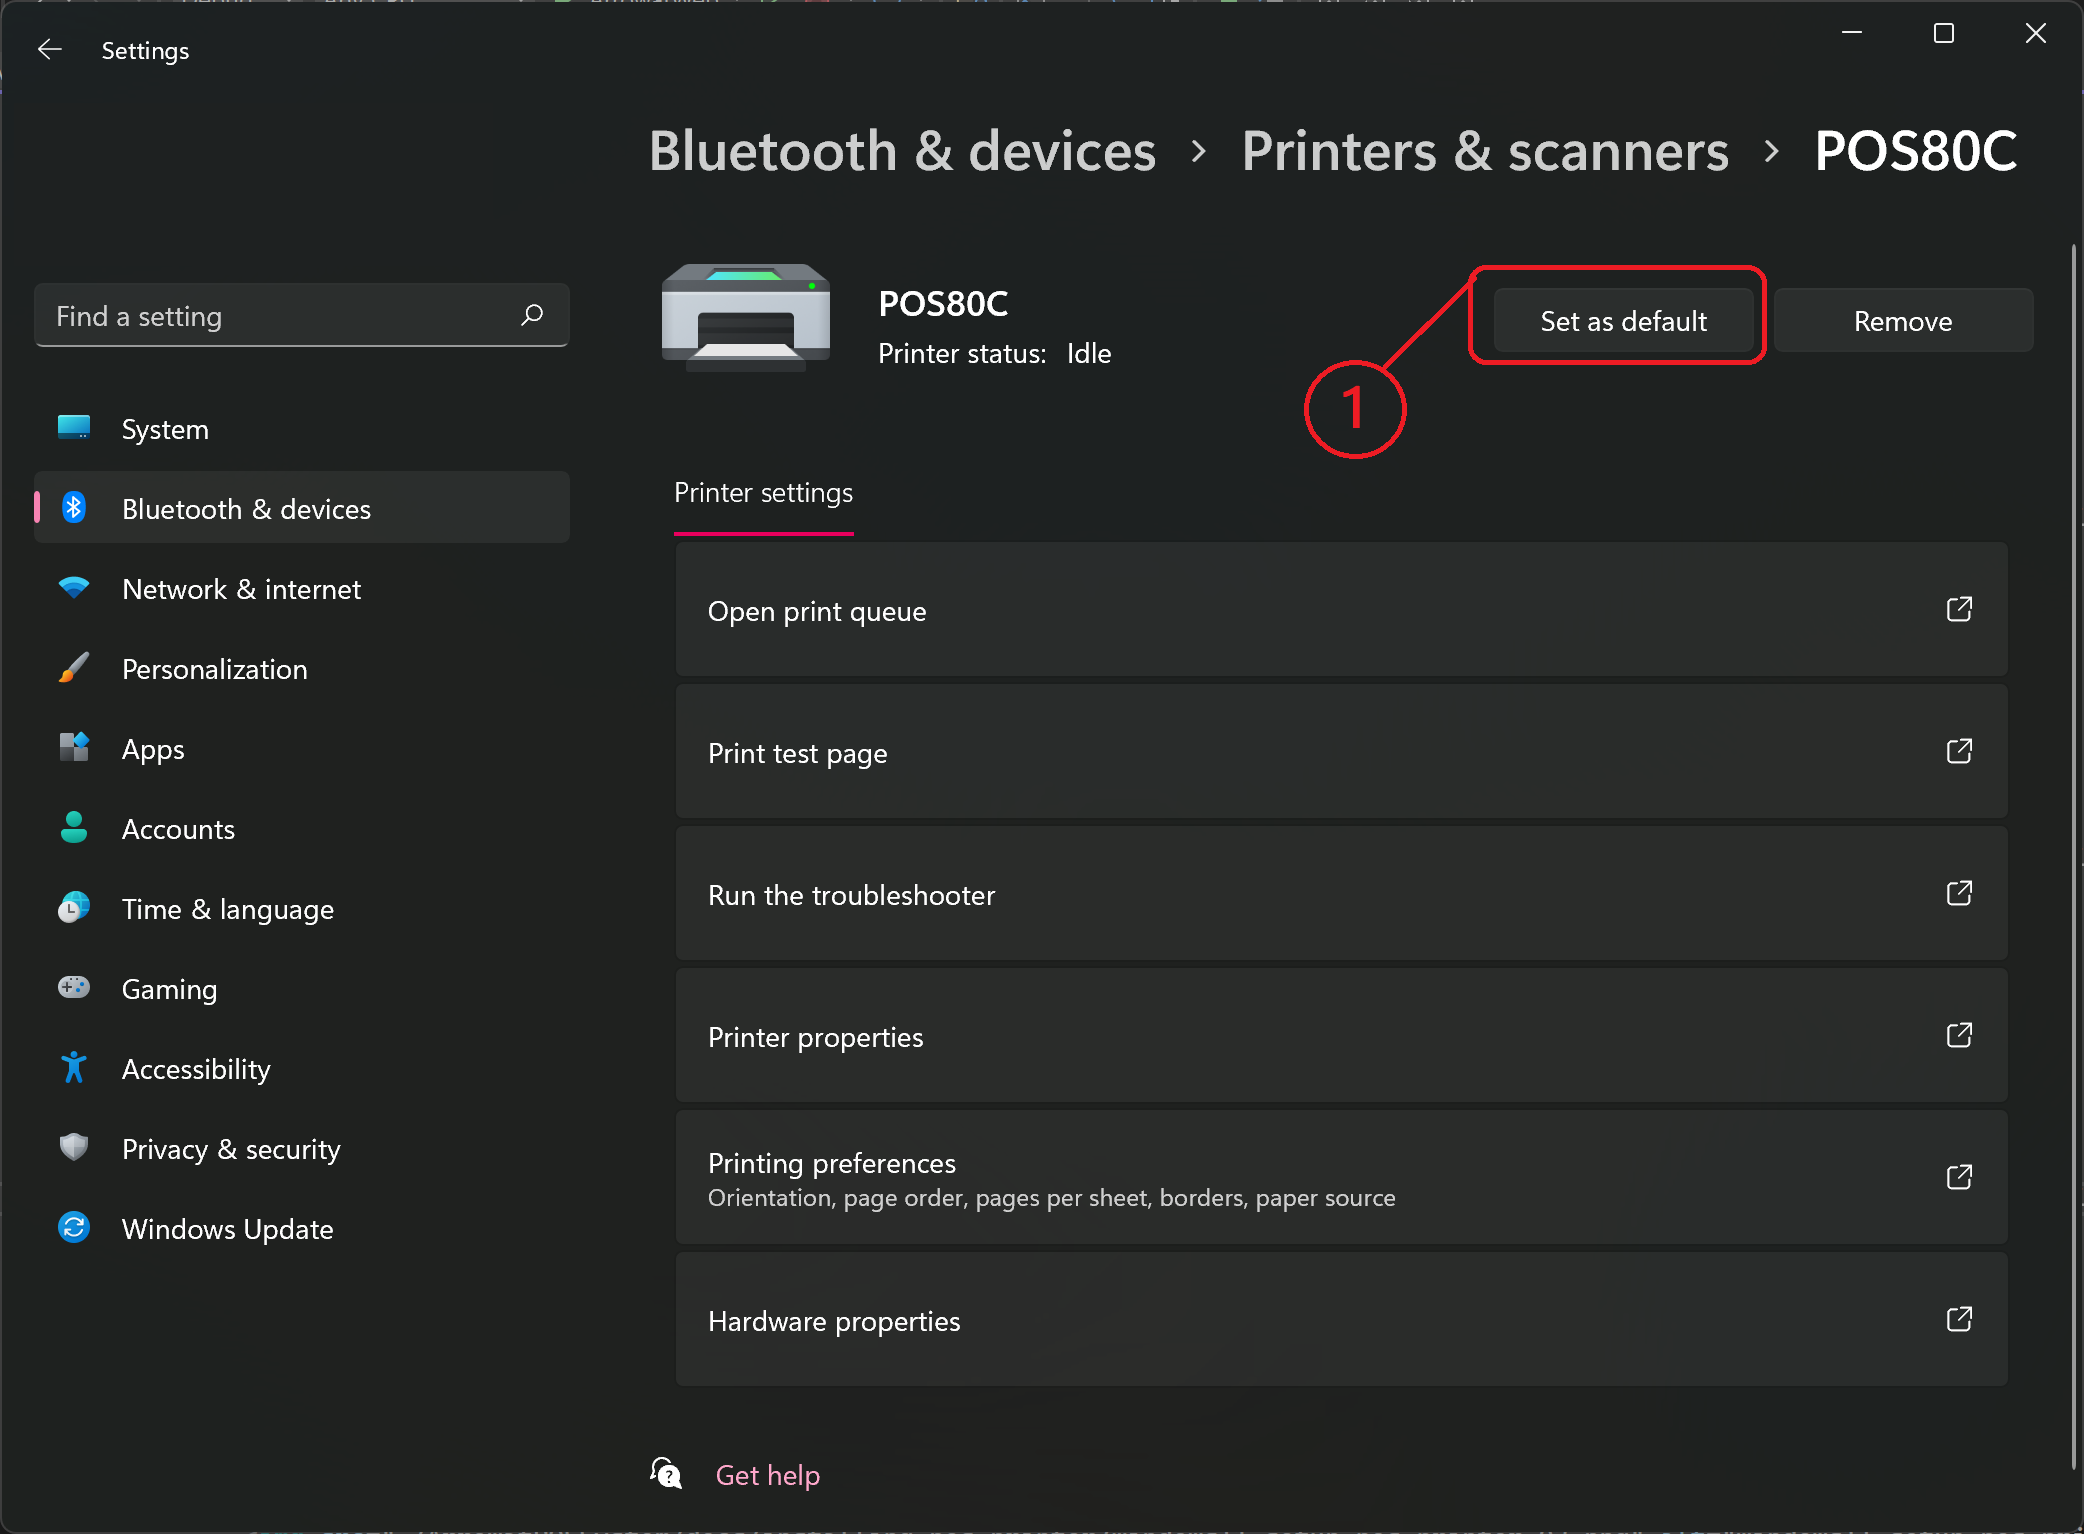
Click Set As Default Printer
-
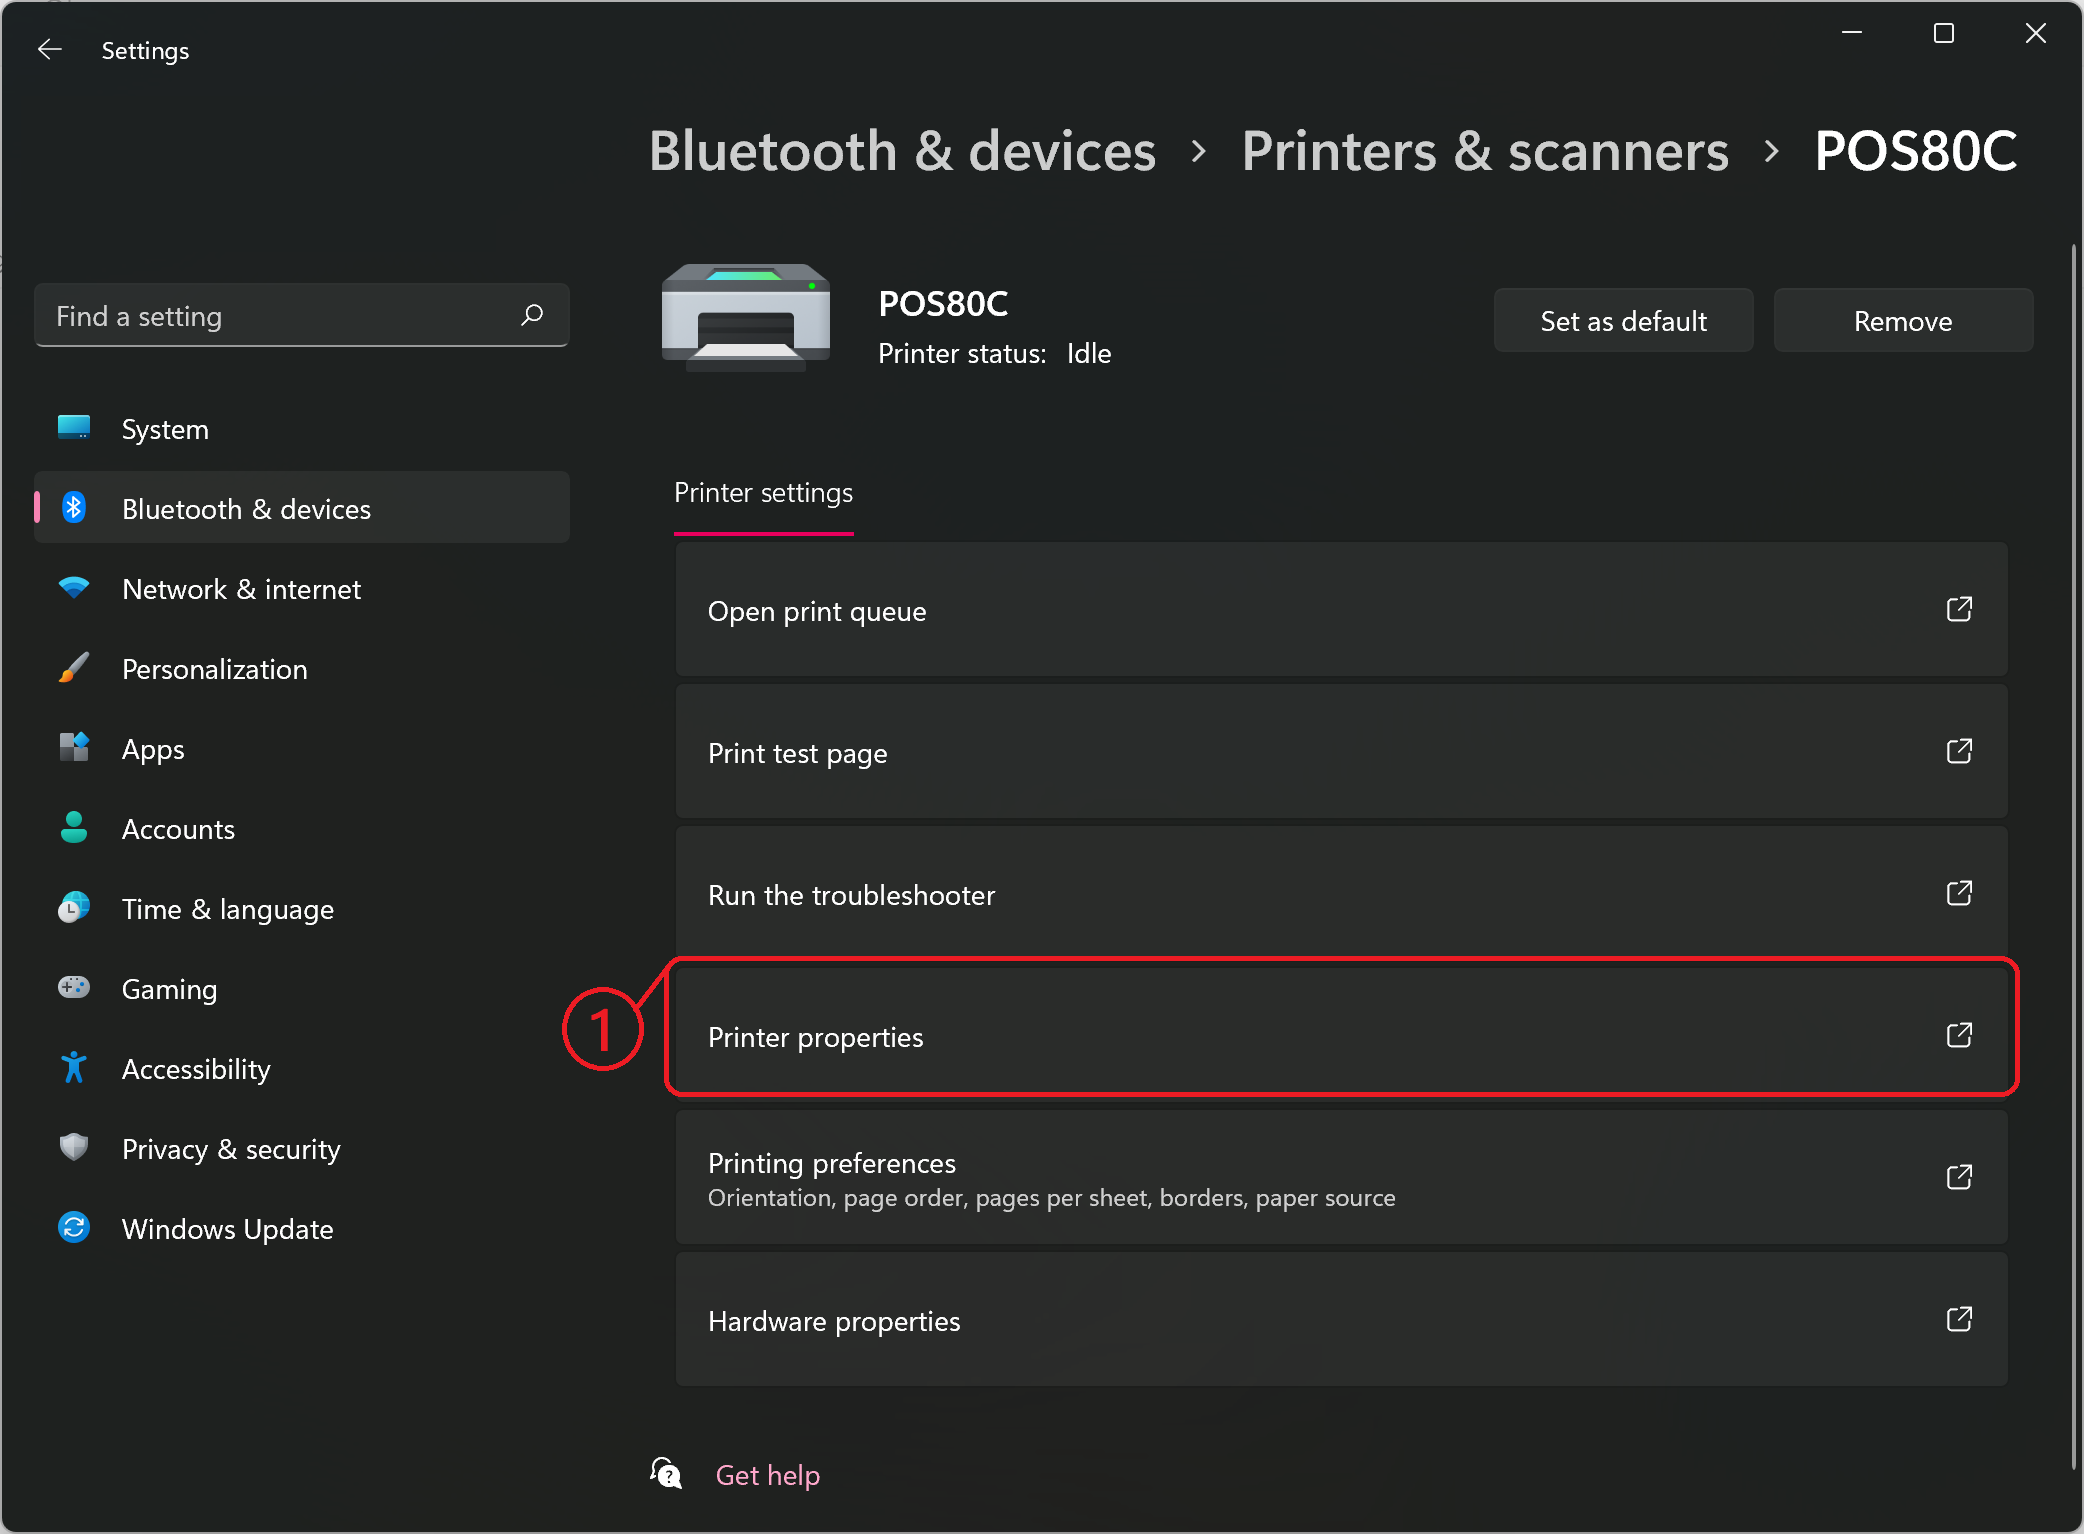
Click Printer Properties
-
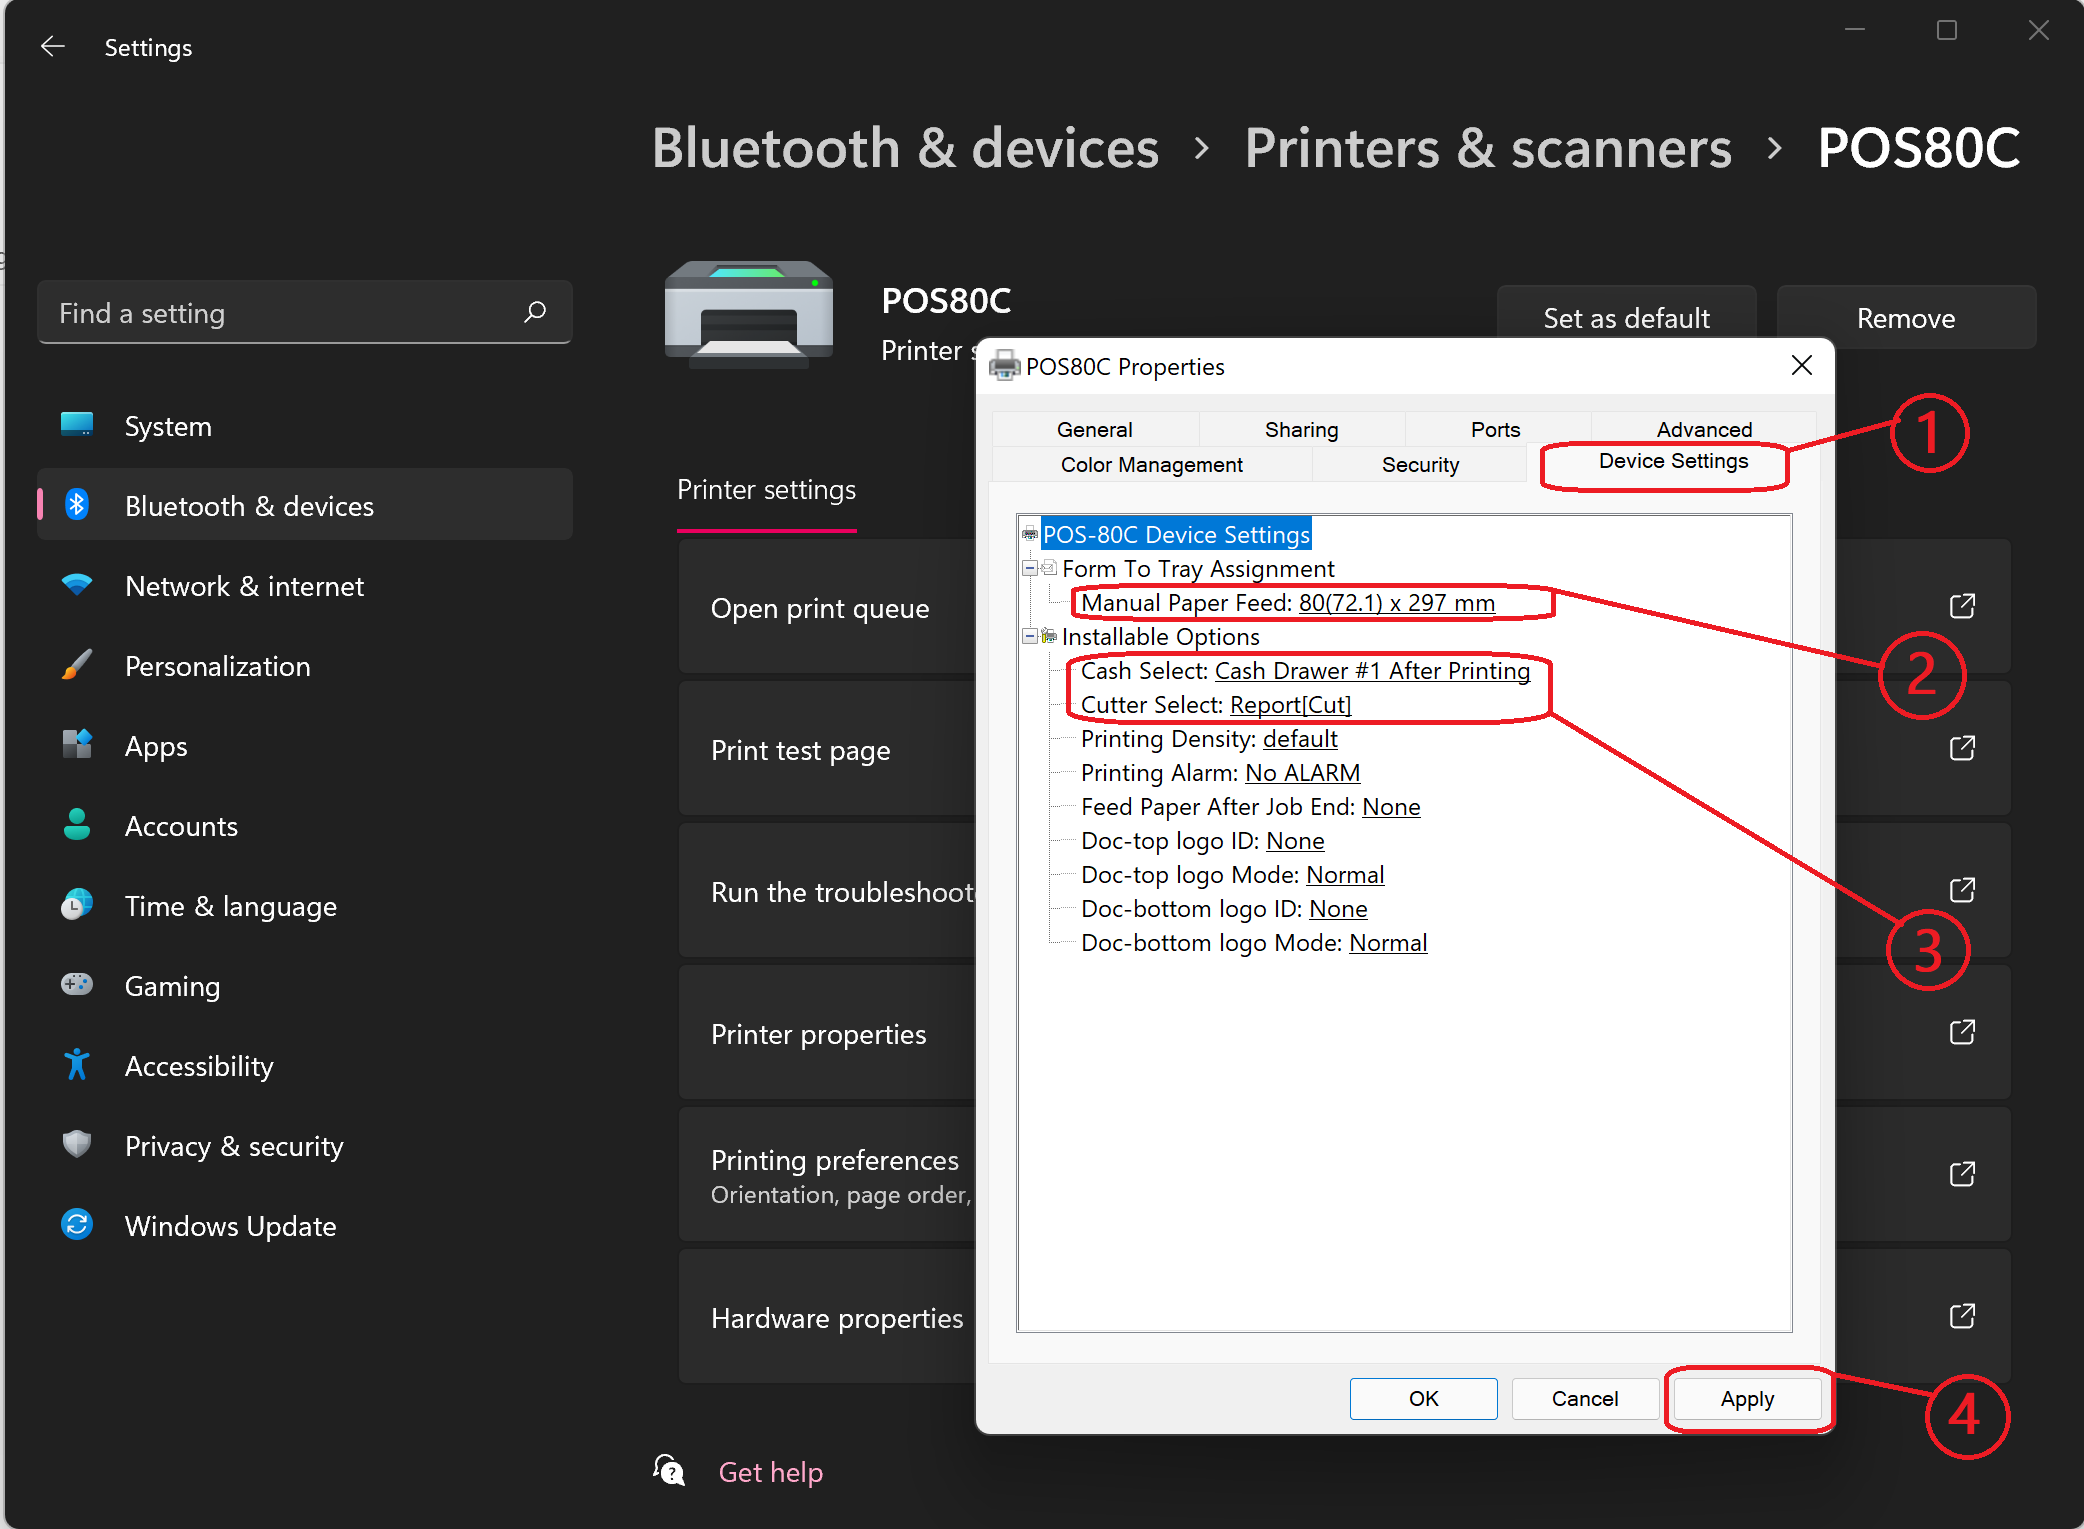
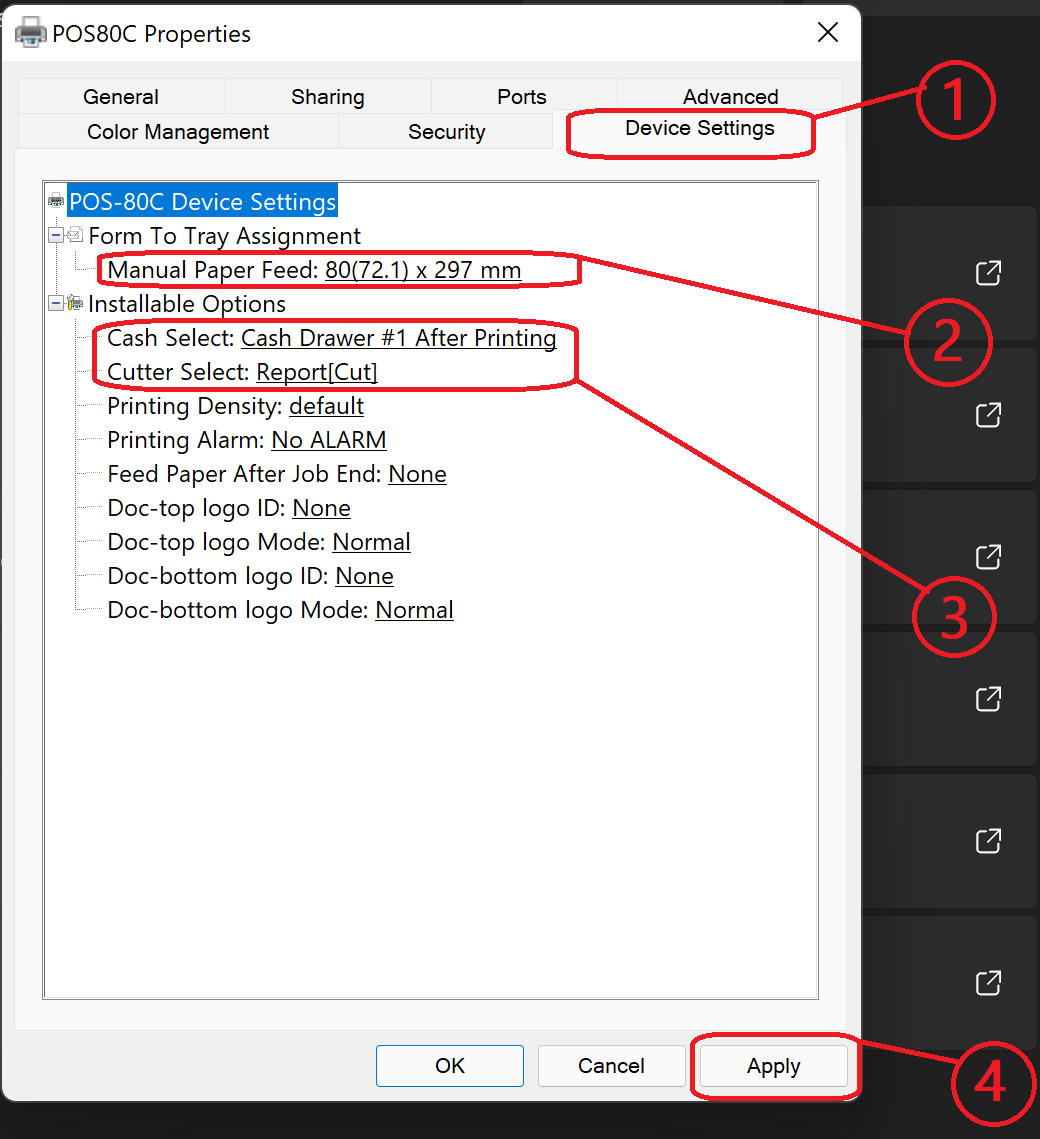
From Printer Properties Click Device Settings
Configure the following properties. The paper size depends of the printer paper size roll like 80mm, 58mm, etc. The printer we are installing in this guide uses 80mm paper size. Click Apply to apply changes.
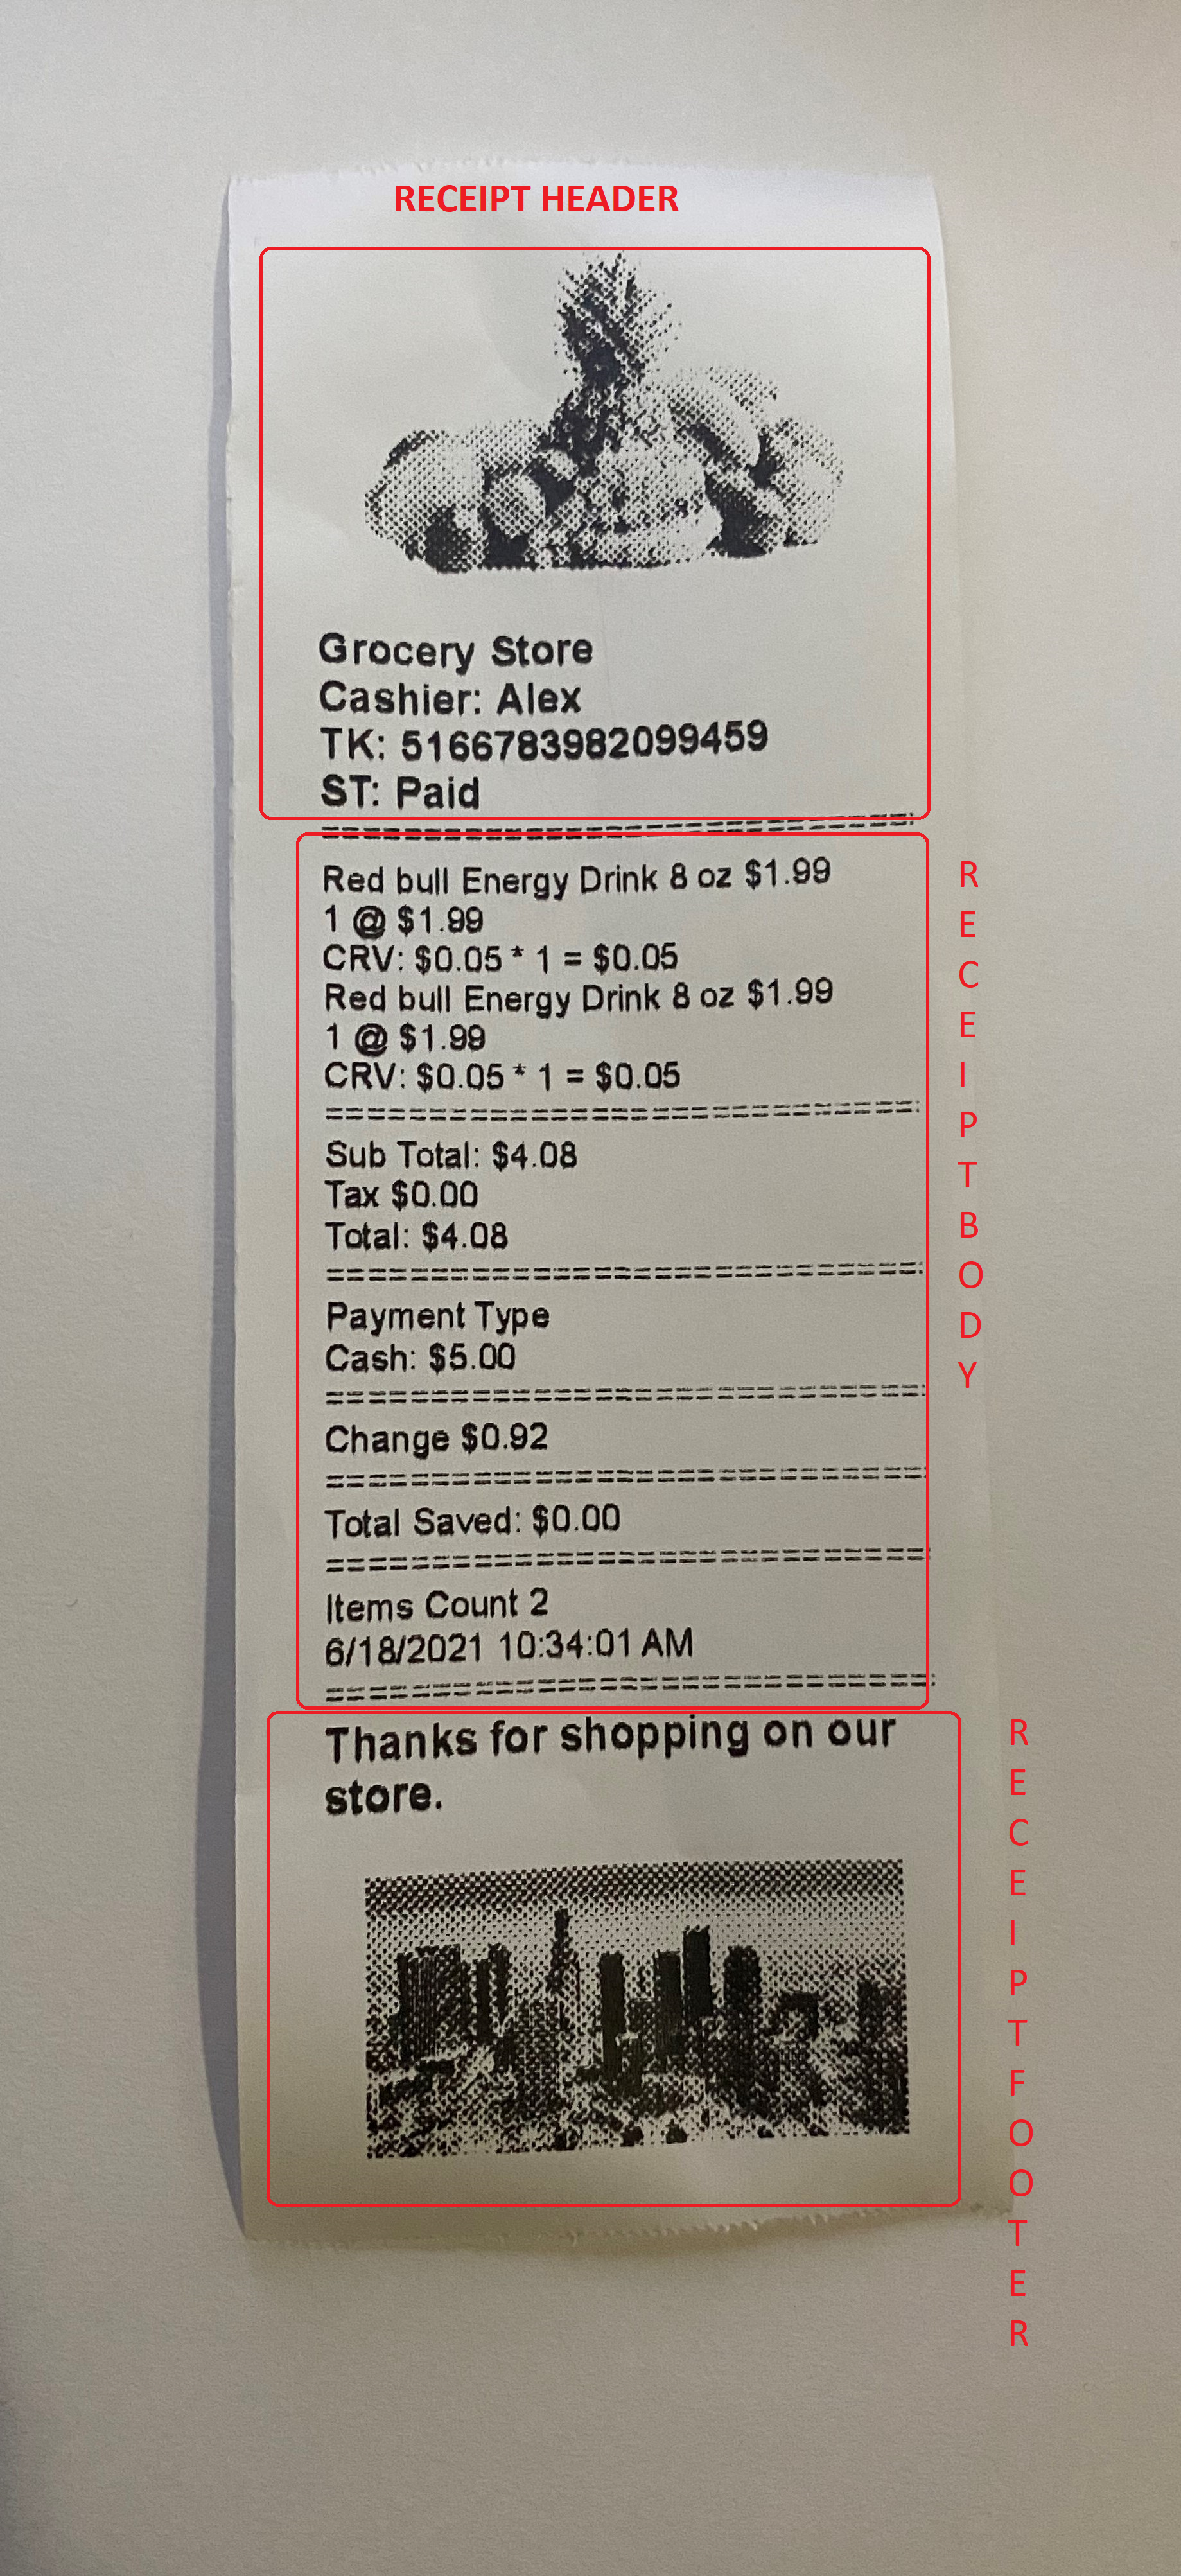
Creating POS Receipt
Arrowat POS System lets you crate a POS receipt, using font size, Font family this help you to adapt the receipt to any POS Printer paper size like 58mm, 80mm, 90mm
- Open Arrowat POS System
-
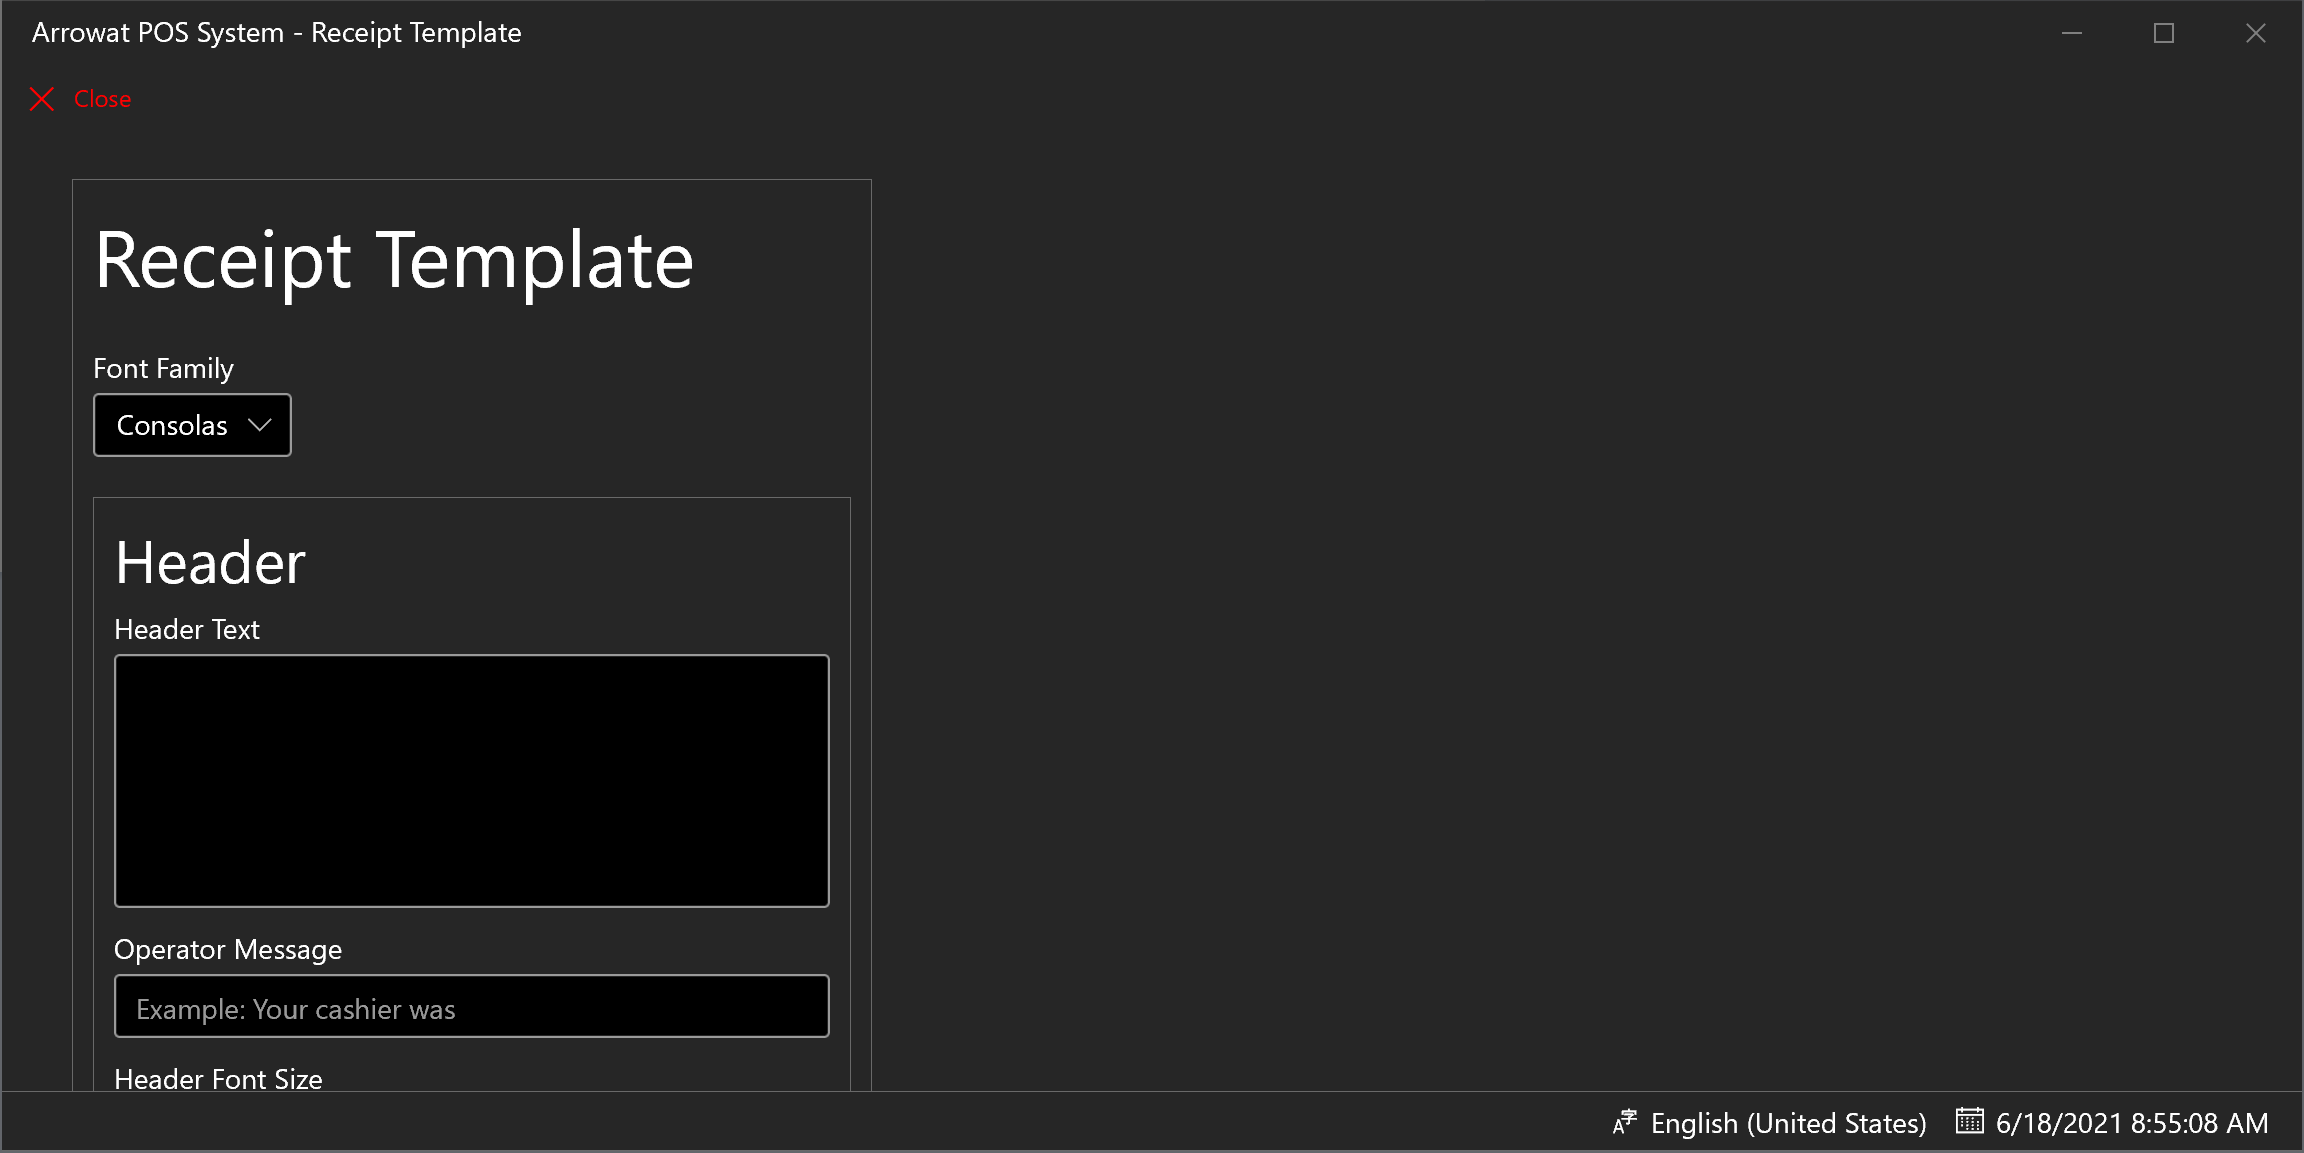
Click Templates > Receipt Template
You will navigate to Store/Machine page

-
On The Receipt Template Configure as following
- Font Family: Select a Font Family You would like to use on the printed receiptl
- Header Text: Write a text that you would like to show to customer on the header receipt at the top.
- Operator Message: In this field you can write a message on any language Like: Le Atendio Con Mucho Gusto:, Your Cashier Was:, etc.
- Header Font Size: The font size. use it as the size you would like to show the header.
- Header Font Weight: Select the font style.
- Header Logo: Select an image from your computer you would like to show at the top of the receipt by clicking the browse button.
- Header Logo Width: The width of the logo.
- Body Font Weight: This are the body font Weight of the receipt, this is the information of the items you sold.
- Body Font Size: This are the body font size of the receipt, this is the information of the items you sold.
- Footer Font Size: The font size. use it as the size you would like to show the Footer.
- Footer Font Weight: Select the font style.
- Footer Logo: Select an image from your computer you would like to show at the bottom of the receipt by clicking the browse button.
- Footer Logo Width: The width of the logo.
- Sub Total Display: This is an option for you how to display Sub Total itsel for example istead of Show Sub Total : $2.99, you can show Total Neto: $2.99.
- Total Display: This is an option for you how to display Total itsel for example istead of Show Total : $2.99, you can show Total Completo: $2.99.
- Total Saved Display: Example: Total Descuento.
- Change Display: Example: Cambio.
- Balance Display: Example: Usted Debe.
- Payment Type Display: Example: Tipo de Pago.
- Items Count Display: Example: cantidad de Productos comprados.
It's upto you how to show the receipt style and information.
Click Save button to save the Receipt Template data.
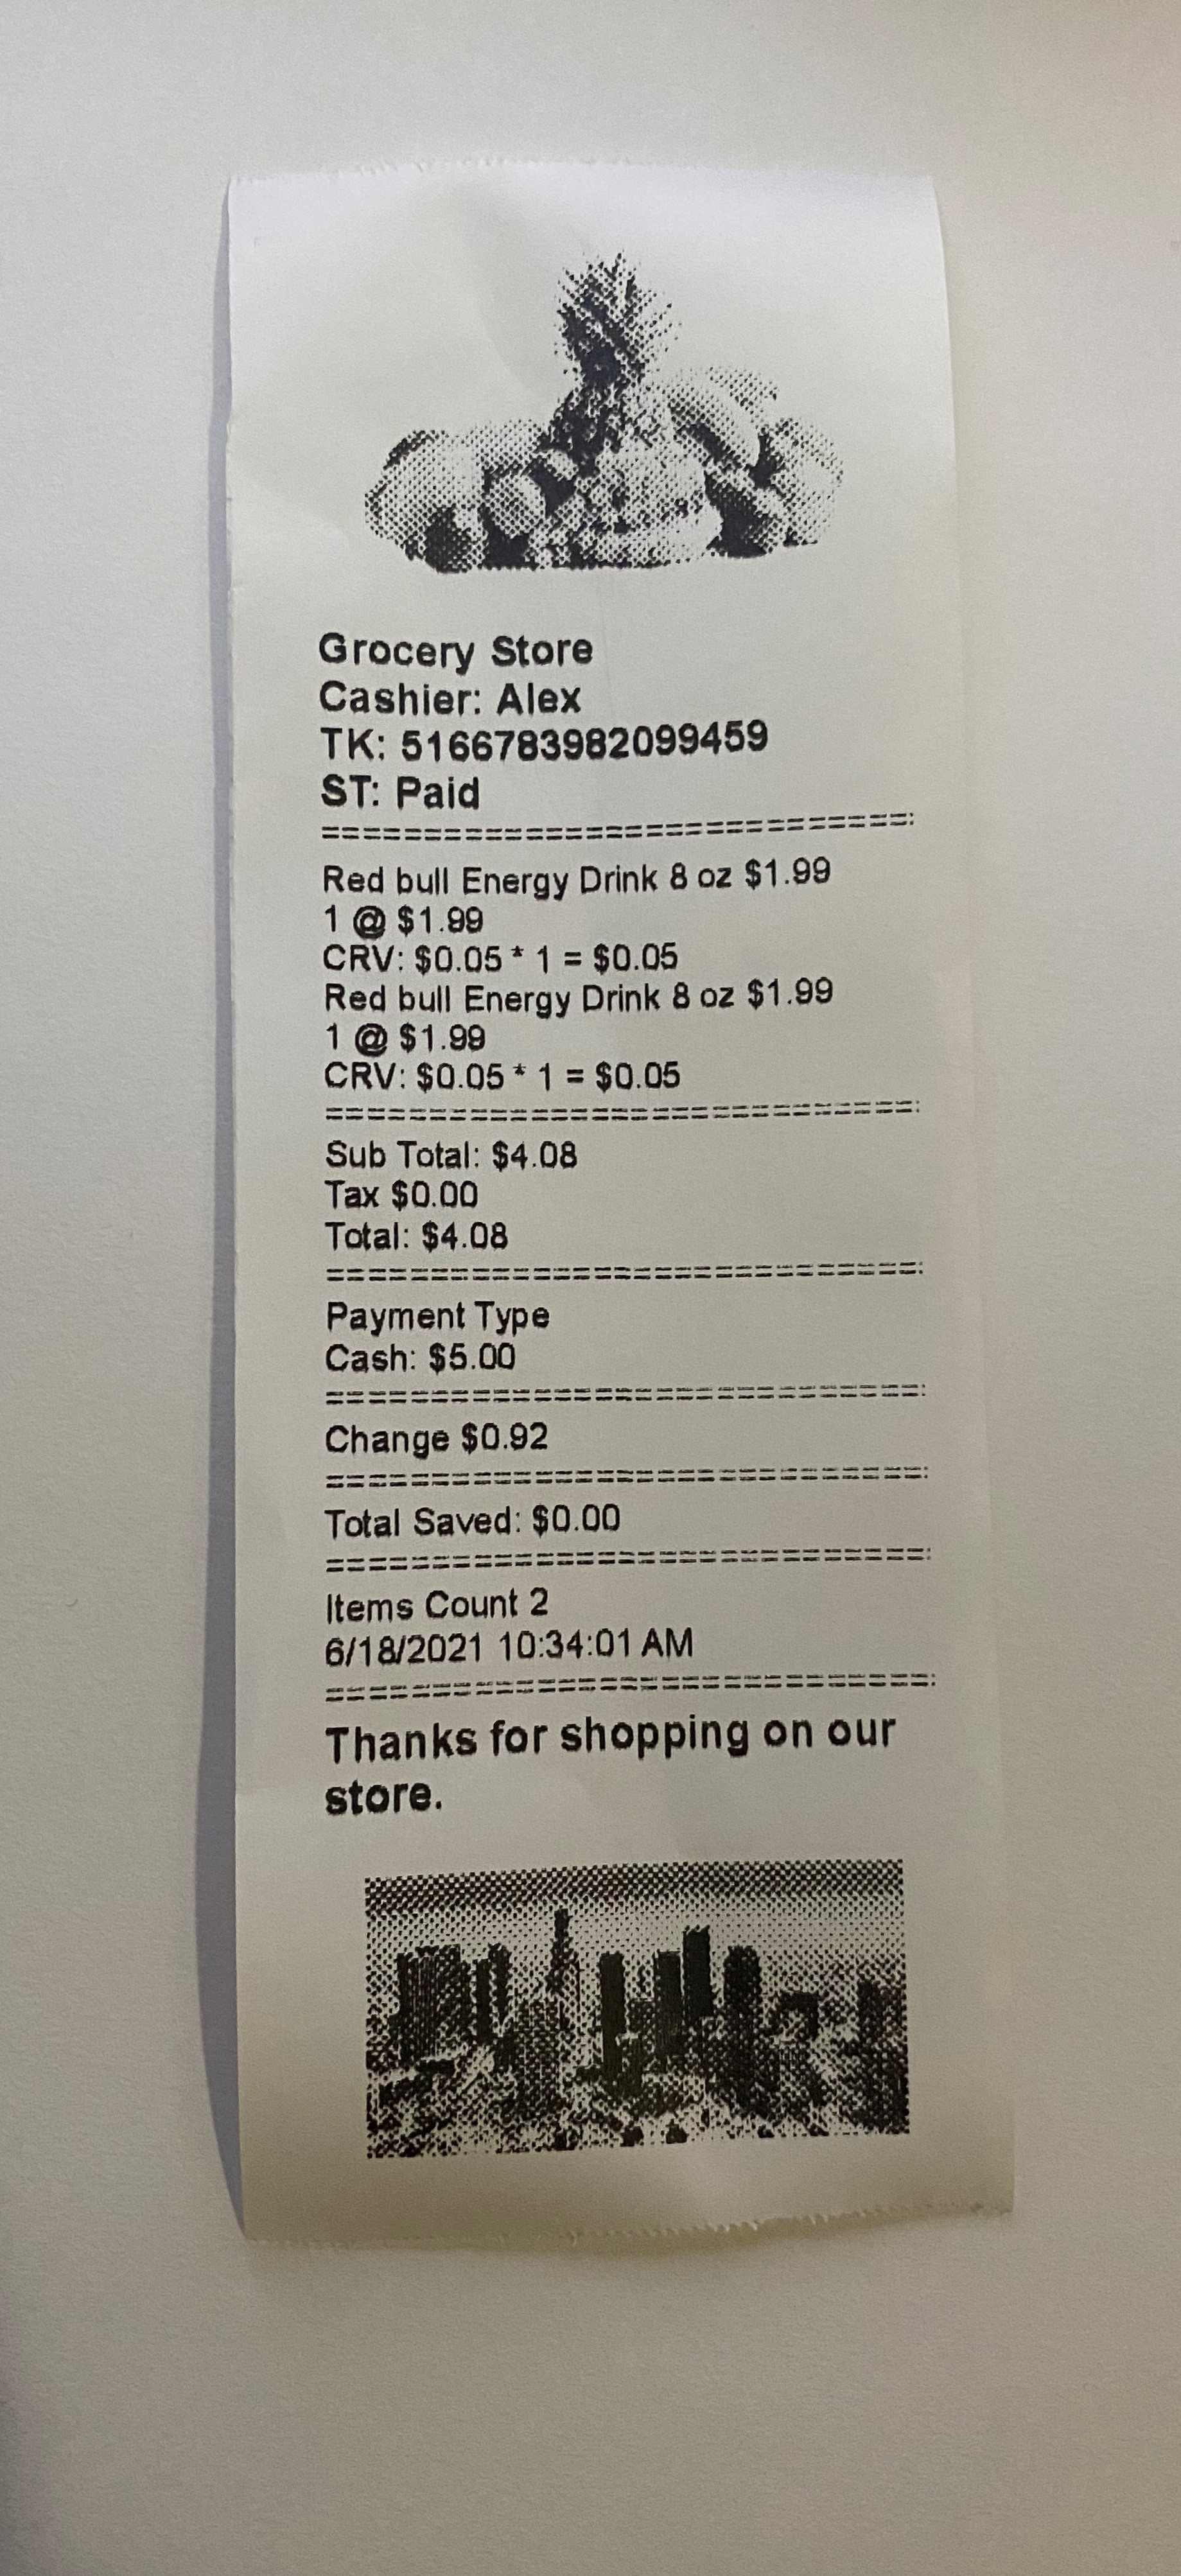
The Following is a receipt example printed from Arrowat POS System. We used a POS Printer paper roll size 80mm.
We hope this guide helps you to configure your POS Printer, please read the Quick Guide to learn how to install and work with Arrowat POS System App.
If you have any question you can Contact us any time.
About the author
Melvin Dev
This documentation has been written by Melvin Dev, Melvin Dev is a founder and developer of Arrowat LLC.